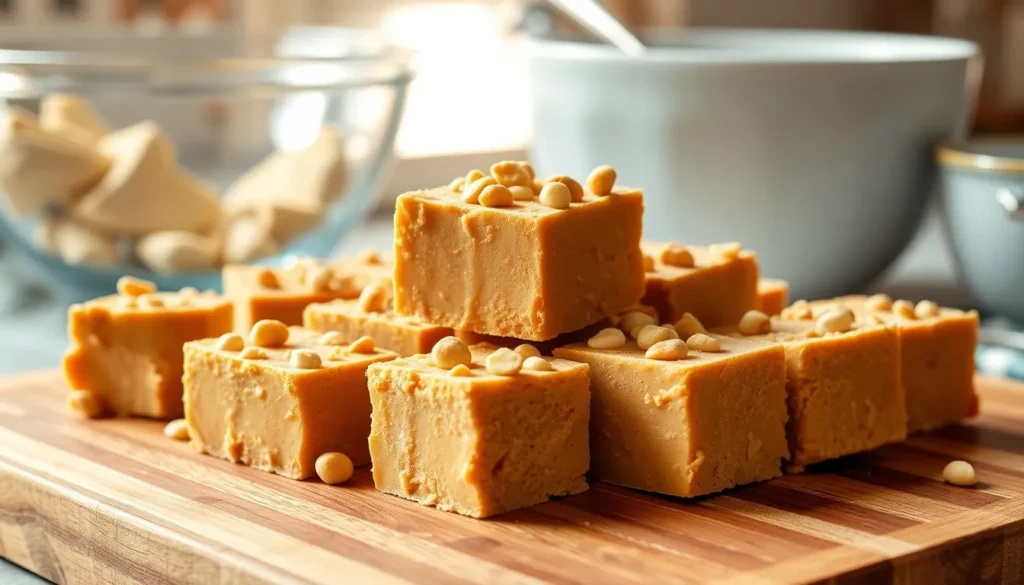
We’ve discovered the ultimate lazy baker’s dream – a 2-ingredient peanut butter fudge that’ll blow your mind with its simplicity and incredible taste. This isn’t some complicated confection that requires a candy thermometer or years of pastry school training. It’s pure magic made with just peanut butter and sweetened condensed milk.
What makes this recipe absolutely brilliant is how it transforms two pantry staples into rich, creamy fudge that rivals any fancy candy shop creation. We’re talking about silky smooth texture and that perfect balance of sweet and nutty flavors that’ll have everyone asking for your secret.
The best part? You can whip this up in under 10 minutes of active prep time. Whether you’re facing a last-minute dessert emergency or simply craving something indulgent without the fuss, this foolproof fudge delivers every single time. Trust us – once you try this method, you’ll never go back to complicated fudge recipes again.
Ingredients
We need only two simple ingredients to create this incredibly rich and satisfying peanut butter fudge that rivals any complex confection.
For the 2-Ingredient Peanut Butter Fudge:
- 1 cup creamy peanut butter (natural or traditional varieties work equally well)
- 1 can (14 ounces) sweetened condensed milk
The beauty of this recipe lies in its simplicity. We recommend using room temperature peanut butter for easier mixing and smoother incorporation with the sweetened condensed milk. Natural peanut butter creates a slightly more rustic texture while traditional processed peanut butter yields an ultra-smooth finish.
Our sweetened condensed milk should be at room temperature as well to prevent any lumps during the mixing process. Eagle Brand or any similar quality brand works perfectly for achieving that signature creamy consistency that makes this fudge so irresistible.
These two pantry staples transform into something magical when combined properly. The high sugar content in the condensed milk acts as both sweetener and binding agent while the peanut butter provides that rich nutty flavor and helps the mixture set to the perfect fudgy texture.
Equipment Needed
 1")
Creating our delicious 2-ingredient peanut butter fudge requires minimal equipment that most home cooks already have in their kitchens. We keep this recipe simple by using basic tools that make the process effortless and cleanup quick.
Microwave-safe bowl serves as our primary mixing vessel for combining the peanut butter and sweetened condensed milk. Glass or ceramic bowls work best since they heat evenly and won’t absorb flavors from previous uses.
Spatula or mixing spoon helps us blend the ingredients smoothly during the heating process. A silicone spatula works particularly well because it scrapes the bowl clean and withstands the heat from our microwave intervals.
8×8-inch baking dish or pan provides the perfect size for our fudge to set properly. This dimensions create squares that are neither too thick nor too thin, giving us the ideal fudgy texture we want.
Parchment paper or non-stick spray makes removal effortless once our fudge sets. Parchment paper creates clean edges and prevents sticking, while non-stick spray offers a quick alternative when we don’t have parchment on hand.
Each piece of equipment plays a crucial role in achieving the smooth, creamy texture that makes this fudge so irresistible. We recommend gathering all equipment before starting to ensure our process flows seamlessly from mixing to setting.
Instructions
 2")
Creating this delicious 2-ingredient peanut butter fudge takes just minutes of active preparation time. We’ll walk you through each simple step to achieve perfectly smooth and creamy results every time.
Prep the Pan
We start by lining our 8×8-inch baking dish with parchment paper for effortless removal once the fudge sets. The parchment should hang slightly over the edges to create easy-lift tabs. Alternatively we can spray the pan with non-stick cooking spray if parchment paper isn’t available. This crucial first step prevents sticking and ensures clean cuts when we slice our finished fudge.
Melt the Chocolate
This step is completely optional since our base recipe requires only peanut butter and sweetened condensed milk. But if we want to add a chocolate drizzle for extra indulgence we can melt chocolate chips in 20-second intervals in the microwave. We stir between each interval until the chocolate becomes smooth and glossy. This decorative touch adds visual appeal and complementary flavor to our finished fudge.
Mix in Peanut Butter
We combine our room temperature peanut butter and sweetened condensed milk in a microwave-safe bowl. The mixture goes into the microwave for 20-30 second intervals typically requiring two rounds of heating. After each interval we stir thoroughly until the ingredients blend into a completely smooth mixture. The consistency should be uniform with no streaks of peanut butter or condensed milk visible.
Pour and Spread
We transfer our smooth mixture into the prepared pan and spread it evenly using a spatula. The surface should be level for consistent thickness throughout. Now we can add optional toppings like crushed peanuts or chopped peanut butter cups if desired. Our fudge needs to refrigerate for 1-2 hours until it becomes firm enough to cut into squares. The setting time ensures perfect texture and easy slicing.
Cooling and Setting
 3")
Once we’ve poured our peanut butter fudge mixture into the prepared pan, the cooling process becomes absolutely critical for achieving that perfect sliceable texture we’re after. We need to transfer the pan directly to the refrigerator where the fats and sugars will solidify properly.
The refrigeration time requires patience but delivers exceptional results. Most recipes specify at least 1 hour of cooling time, though we recommend allowing 2 hours or longer for optimal firmness. This extended cooling period ensures our fudge reaches the ideal consistency for clean cuts and beautiful presentation.
During this cooling phase, the mixture transforms from a smooth liquid into a firm, sliceable dessert. The cold temperature facilitates the solidification process, binding all ingredients together into that coveted fudgy texture we love.
| Cooling Time | Result |
|---|---|
| 1 hour | Minimum setting time |
| 2+ hours | Optimal firmness |
| 4+ hours | Best slicing results |
We can easily remove the set fudge from our pan using the parchment paper lining we prepared earlier. This method prevents sticking and allows for effortless transfer to our cutting surface.
After removal, we cut the fudge into uniform squares using a sharp knife. Clean cuts between each square ensure professional looking portions that hold their shape beautifully.
Proper storage maintains our fudge’s quality and extends its shelf life significantly. We store the cut squares in an airtight container in the refrigerator where they remain fresh for up to one week. Some sources indicate storage can extend up to 4 weeks depending on moisture levels and handling practices.
For longer term storage, we can freeze our peanut butter fudge for up to 6 months. This option works perfectly for batch preparation or saving portions for future occasions.
The entire cooling and setting process requires no special equipment beyond refrigerator space. This simplicity makes our recipe accessible to any home cook while delivering professional quality results every time.
Cutting and Serving
 4")
Once our peanut butter fudge has set for at least 1 to 2 hours in the refrigerator, we can begin the cutting process. The parchment paper lining makes removal effortless as we simply lift the entire block of fudge from the pan using the paper edges. This technique prevents any damage to our perfectly set dessert and ensures clean edges.
Sharp kitchen knives work best for cutting through the firm texture without creating jagged edges. We recommend wiping the blade clean between cuts to maintain neat lines and professional presentation. Starting with a single cut down the center, we can then divide each half into equal portions for uniform squares.
Cutting temperature matters significantly for achieving clean slices. Room temperature fudge cuts more easily than cold fudge straight from the refrigerator. Allowing our fudge to sit at room temperature for 5 to 10 minutes before cutting creates the ideal consistency for slicing.
Standard serving sizes typically measure 1 to 1.5 inches square, though we can adjust based on personal preference. An 8×8-inch pan yields approximately 16 to 25 pieces depending on our chosen portion size. Smaller cuts work well for parties or gift giving, while larger squares satisfy those seeking a more indulgent treat.
| Pan Size | Approximate Yield | Recommended Cut Size |
|---|---|---|
| 8×8 inch | 16-25 pieces | 1-1.5 inch squares |
Fresh fudge pieces should be stored in an airtight container in the refrigerator for up to one week. We can also freeze individual pieces for up to six months by wrapping them in parchment paper before placing in freezer bags. Serving directly from refrigerator temperature provides the best texture, though allowing pieces to come to room temperature for a few minutes creates a softer bite.
Storage Tips
 5")
Proper storage ensures our 2-ingredient peanut butter fudge maintains its perfect texture and rich flavor for extended periods. We recommend several storage methods depending on how long you plan to keep your homemade treat.
For immediate consumption within the next week, we can store the fudge at room temperature in an airtight container. This method works particularly well in cooler climates where temperatures remain stable. The fudge will maintain its firm yet creamy consistency when kept away from direct sunlight and heat sources.
Refrigeration offers our preferred storage method for maintaining optimal freshness and texture. We place cut fudge pieces in an airtight container and store them in the refrigerator for 2-4 weeks. The cool temperature prevents the peanut butter oils from separating while preserving the fudge’s structural integrity. Cold storage also enhances the dense, satisfying bite that makes this treat so irresistible.
For longer storage periods, we turn to freezing as our most effective preservation method. We can freeze our peanut butter fudge for up to 6 months without compromising quality or taste. To prevent pieces from sticking together, we place parchment paper between layers before sealing them in an airtight container. This technique ensures individual pieces separate easily when we’re ready to enjoy them.
| Storage Method | Duration | Container Requirements |
|---|---|---|
| Room Temperature | Up to 1 week | Airtight container |
| Refrigeration | 2-4 weeks | Airtight container |
| Freezing | Up to 6 months | Airtight container with parchment paper layers |
When using natural peanut butter in our recipe, we find the fudge tends to remain softer than versions made with traditional peanut butter. Extended refrigeration time helps achieve the desired firmness, and we sometimes add extra vanilla frosting to reach the perfect consistency. Natural peanut butter creates a more rustic texture that some prefer, but it requires adjusted storage expectations.
We always allow frozen fudge to thaw at room temperature for 10-15 minutes before serving. This brief thawing period restores the ideal texture without making the fudge too soft. Room temperature fudge cuts more cleanly and delivers the full spectrum of peanut butter flavors that make this simple recipe so satisfying.
Recipe Variations
 6")
Transform our basic 2-ingredient peanut butter fudge into exciting new flavors with these simple modifications. Each variation maintains the simplicity of the original recipe while adding unique textures and tastes.
Crunchy Peanut Butter Version
We can easily create a textured version by substituting our creamy peanut butter with crunchy peanut butter. This simple swap introduces delightful peanut pieces throughout the fudge without requiring additional ingredients.
For those who prefer to control the texture level, we recommend using creamy peanut butter and mixing in chopped peanuts before pouring the mixture into the pan. This method allows us to adjust the crunchiness to our preference while maintaining the smooth base consistency.
Another approach involves using cream cheese frosting instead of vanilla frosting to create a tangier flavor profile that complements the nutty crunch perfectly. The cream cheese adds a subtle tartness that balances the sweetness while maintaining the fudge’s creamy foundation.
Add-In Options
We can elevate our fudge with various toppings applied before the chilling process begins. Sprinkle chopped peanuts, diced peanut butter cups, or drizzle melted chocolate on top for visual appeal and enhanced flavor complexity.
Salt enhances the peanut butter flavor dramatically, so we suggest adding a pinch of salt to the mixture or sprinkling flaky sea salt on top. This creates a sophisticated sweet and salty combination that intensifies the overall taste experience.
For additional texture variety, we can fold mini chocolate chips, butterscotch chips, or crushed pretzels into the mixture before setting. These mix-ins distribute evenly throughout the fudge and provide delightful surprises in every bite.
| Mix-In Type | Suggested Amount | When to Add |
|---|---|---|
| Chopped peanuts | 1/2 cup | Before pouring into pan |
| Mini chocolate chips | 1/3 cup | Fold into mixture |
| Crushed pretzels | 1/2 cup | Fold into mixture |
| Flaky sea salt | 1/4 teaspoon | Sprinkle on top |
Troubleshooting Tips
 7")
Creating perfect 2-ingredient peanut butter fudge should be straightforward, but we understand that sometimes things don’t go as planned. Our troubleshooting guide addresses the most common issues you might encounter.
Fudge Won’t Set Properly
When your fudge remains too soft after the recommended refrigeration time, we can fix this issue easily. Heat the mixture over low heat for 2-4 minutes until it thins out and then begins to thicken slightly. This additional cooking time helps achieve the proper consistency that transforms into firm fudge once cooled.
Natural peanut butter often creates a softer final product due to its oil content. We recommend switching to traditional peanut butter for firmer results, or extend the refrigeration time to 3-4 hours instead of the standard 2 hours.
Overheating Problems
Microwave timing requires careful attention to prevent overheating. We suggest using 50% power for the initial 2 minutes, followed by high power for just 1 minute. Overheating causes the mixture to become grainy or seize up completely, ruining the smooth texture we want.
Stovetop preparation demands constant stirring over medium-low heat. Never rush this process with high temperatures, as the condensed milk can scorch quickly and create an unpleasant bitter taste.
Texture Issues
Lumpy fudge typically results from cold ingredients that don’t blend smoothly. We always ensure both peanut butter and sweetened condensed milk reach room temperature before mixing. This simple step prevents clumping and creates the silky texture that makes our fudge irresistible.
Grainy texture often indicates overheating or insufficient mixing. We recommend stirring thoroughly between each heating interval to maintain smoothness throughout the cooking process.
Oil Separation
Oil separation occurs when natural peanut butter hasn’t been properly stirred before use. We thoroughly mix the peanut butter jar contents before measuring to distribute the natural oils evenly. This prevents the oils from separating during the heating process and maintains consistent texture throughout the fudge.
Make-Ahead Instructions
 8")
We recommend preparing this 2-ingredient peanut butter fudge up to several days before your event or gathering. The beauty of this recipe lies in its ability to maintain perfect texture and flavor when made ahead of time.
Timing Your Preparation
Planning ahead allows us to create stress-free entertaining experiences. You can make this fudge up to 4 days in advance when stored properly in the refrigerator. For special occasions or holiday preparations, we suggest making the fudge 2-3 days early to ensure optimal freshness while giving yourself flexibility in your schedule.
Advance Preparation Steps
Follow our standard recipe instructions completely before storing. Once you’ve poured the mixture into your prepared 8×8-inch pan, allow it to set in the refrigerator for the full 2 hours. After the initial setting period, we recommend covering the pan tightly with plastic wrap or transferring cut pieces to an airtight container.
Extended Storage for Batch Preparation
Freezing offers the ultimate make-ahead solution for this peanut butter fudge. We can store properly wrapped fudge in the freezer for up to 6 months without compromising quality. Layer individual pieces between parchment paper sheets before placing them in freezer-safe containers to prevent sticking.
| Storage Method | Duration | Temperature |
|---|---|---|
| Room Temperature | 1 week | 68-72°F |
| Refrigerated | 2-4 weeks | 35-40°F |
| Frozen | 6 months | 0°F or below |
Serving Preparation
When ready to serve your make-ahead fudge, remove it from refrigeration 10-15 minutes before cutting. This brief warming period ensures clean cuts and prevents cracking. Frozen fudge requires 15-20 minutes at room temperature to reach optimal serving texture.
Conclusion
We’ve shown you how incredibly simple it can be to create restaurant-quality fudge at home with just two pantry staples. This foolproof recipe eliminates the guesswork and complexity that often intimidates home bakers when it comes to candy making.
The beauty of this peanut butter fudge lies in its versatility and reliability. Whether you’re planning ahead for a special occasion or need a last-minute dessert solution you can count on consistent results every time.
With proper storage techniques and endless customization possibilities you’ll find yourself returning to this recipe again and again. We’re confident that once you experience how effortless and delicious homemade fudge can be you’ll wonder why you ever bought store-bought versions.
Start gathering your ingredients today and discover just how satisfying it is to create something this decadent with so little effort.
Frequently Asked Questions
What are the only two ingredients needed for this peanut butter fudge?
You only need 1 cup of creamy peanut butter and 1 can (14 ounces) of sweetened condensed milk. Both ingredients should be at room temperature for smooth mixing and to prevent lumps from forming in your fudge.
How long does it take to make this 2-ingredient peanut butter fudge?
The active preparation time is less than 10 minutes. However, you’ll need to refrigerate the fudge for 1-2 hours until it’s firm enough to cut into squares for serving.
Can I use natural peanut butter instead of regular peanut butter?
Yes, you can use natural peanut butter, but it will create a softer fudge with a more rustic texture. Make sure to stir the natural peanut butter well before using to prevent oil separation.
What size pan should I use for this fudge recipe?
An 8×8-inch baking dish is recommended for the perfect thickness. Line it with parchment paper or use non-stick spray for easy removal once the fudge has set.
How should I store the peanut butter fudge?
Store in an airtight container in the refrigerator for up to one week for optimal freshness. For longer storage, freeze for up to 6 months, layering pieces between parchment paper to prevent sticking.
Can I add other ingredients to customize the fudge?
Absolutely! You can add chopped peanuts, mini chocolate chips, crushed pretzels, or a sprinkle of flaky sea salt. These additions maintain the recipe’s simplicity while adding unique flavors and textures.
Why won’t my fudge set properly?
If your fudge won’t set, try refrigerating it longer or ensure you heated the mixture sufficiently. Natural peanut butter may require extended refrigeration time due to its softer consistency.
How many pieces does this recipe make?
An 8×8-inch pan yields approximately 16-25 pieces, depending on how large you cut each square. For clean cuts, let the fudge sit at room temperature for 5-10 minutes before slicing.
Can I make this fudge ahead of time?
Yes, this fudge is perfect for make-ahead preparation. It can be made 2-4 days in advance and stays fresh when properly stored in the refrigerator in an airtight container.
Do I need any special equipment to make this fudge?
No special equipment is needed. You’ll only need a microwave-safe bowl, spatula or mixing spoon, and an 8×8-inch baking dish – items most home cooks already have in their kitchen.


