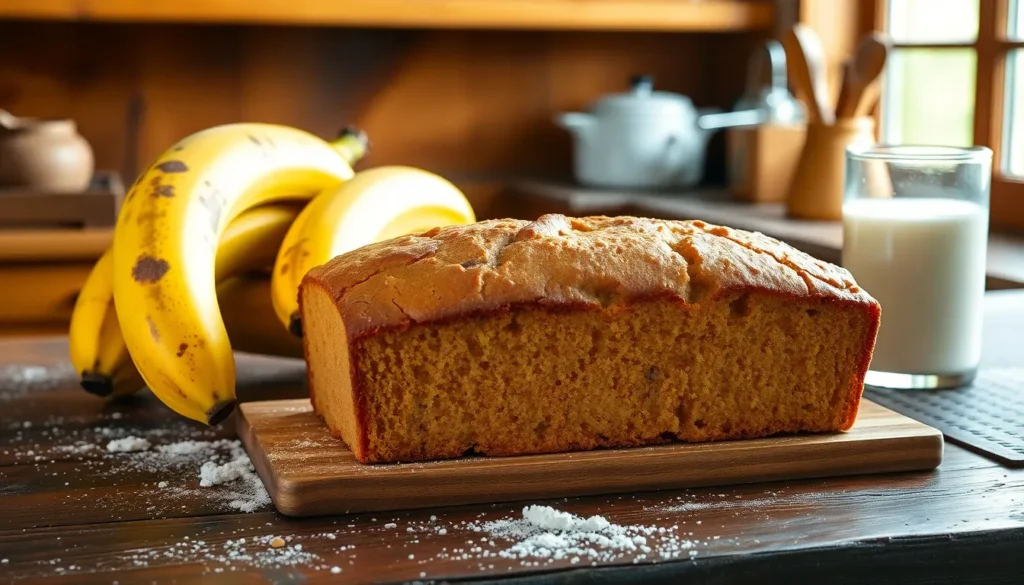
We’ve all been there – overripe bananas sitting on the counter begging to be used before they go bad. That’s where our 4-ingredient banana bread comes to the rescue! This incredibly simple recipe proves you don’t need a pantry full of ingredients to create something absolutely delicious.
What makes this banana bread so special? It’s the perfect solution for busy bakers who want homemade goodness without the fuss. We’re talking about a recipe so straightforward that even kitchen beginners can master it on their first try. The best part? You probably already have everything you need right in your kitchen.
This isn’t just any banana bread – it’s moist, naturally sweet, and delivers all the comfort food vibes we crave. We’ve stripped away the unnecessary ingredients while keeping all the flavor that makes banana bread a beloved classic. Let’s show you how four simple ingredients can transform into your new go-to recipe.
Ingredients
This simple banana bread recipe requires just four basic ingredients that we likely already have in our kitchen. We keep the ingredient list minimal to showcase how amazing results come from quality basics.
Essential Ingredients:
- 3 large overripe bananas (about 1½ cups mashed)
- ⅓ cup melted butter or vegetable oil
- ¾ cup granulated sugar
- 1¾ cups all-purpose flour
We recommend using bananas that are heavily spotted or completely brown for the best flavor and natural sweetness. The riper the bananas the more intense the banana flavor becomes in our finished bread. Room temperature ingredients blend more easily so we suggest taking the butter out about 30 minutes before baking if using butter instead of oil.
Our flour measurement works best when we spoon it into the measuring cup and level it off rather than scooping directly from the bag. This prevents packing too much flour which can make the bread dense. We can substitute up to half the all-purpose flour with whole wheat flour for added nutrition without significantly changing the texture.
The sugar provides structure and moisture beyond just sweetness. We can reduce it slightly if our bananas are extremely ripe but we recommend keeping at least ½ cup for proper texture. Brown sugar works as a direct substitute and adds subtle caramel notes to complement the banana flavor.
Equipment Needed
 2")
Creating this simple 4-ingredient banana bread requires just a few basic kitchen tools that most home bakers already have on hand. We’ll walk you through each essential piece of equipment to ensure your baking process goes smoothly.
Large mixing bowl serves as our primary workspace for combining all ingredients. We recommend using a bowl with at least 3-quart capacity to provide ample room for mixing without spillage.
Fork or potato masher helps us achieve the perfect banana consistency. A standard dinner fork works perfectly for smaller batches, while a potato masher handles larger quantities more efficiently.
Whisk ensures our wet ingredients blend thoroughly before adding the flour. This tool prevents lumps and creates a smooth base for our bread batter.
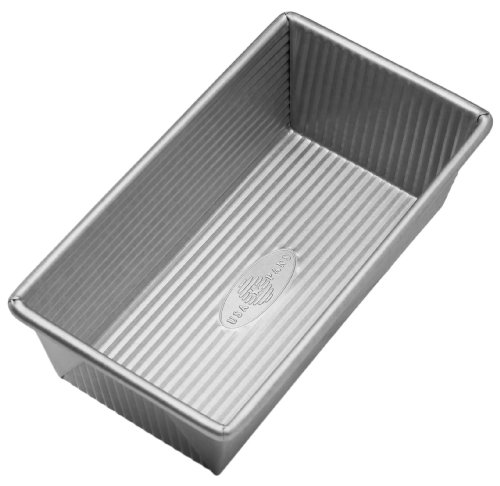
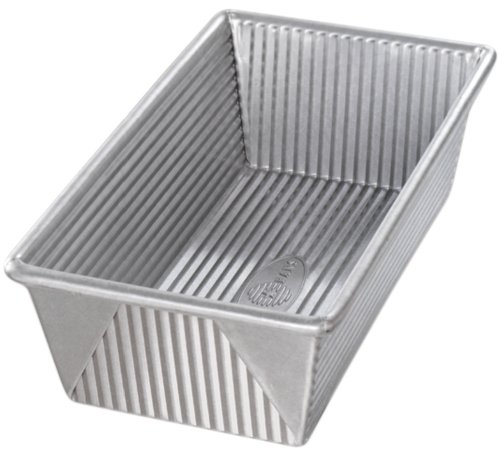
8.5-inch or 2lb loaf tin shapes our banana bread into the classic loaf form. The exact size matters for proper baking time and texture, so we always use this standard measurement.
Parchment paper lines our loaf tin to prevent sticking and makes removal effortless. We cut a piece large enough to cover the bottom and extend up the sides for easy lifting.
Oven completes our equipment list as the final step in transforming our simple batter into delicious banana bread. Preheating to the correct temperature ensures even baking throughout.
| Equipment | Purpose | Size/Specification |
|---|---|---|
| Large mixing bowl | Combining ingredients | 3-quart capacity minimum |
| Fork or potato masher | Mashing bananas | Standard dinner fork or potato masher |
| Whisk | Blending wet ingredients | Any size |
| Loaf tin | Shaping bread | 8.5-inch or 2lb capacity |
| Parchment paper | Lining tin | Cut to fit with overhang |
| Oven | Baking | 350°F (180°C) capability |


Instructions
 4")
Creating this 4-ingredient banana bread takes just 40-55 minutes from start to finish. We’ll guide you through each step to ensure your bread turns out perfectly moist and delicious.
Prep the Bananas
We start by mashing 3 large overripe bananas in our large mixing bowl. Use a fork or potato masher to break down the bananas until they reach a mostly smooth consistency with just a few small lumps remaining. The bananas should be heavily spotted or completely brown for the best natural sweetness and moisture.
If your bananas aren’t quite ripe enough, we can speed up the process by placing them in a 300°F oven for 15-20 minutes until the skins turn black and the fruit inside becomes soft and sweet.
Mix the Ingredients
Add the melted butter and granulated sugar to our mashed bananas. We whisk these wet ingredients together until they’re well combined and the mixture looks creamy. The sugar should dissolve partially into the banana mixture.
Next we add the all-purpose flour to the bowl. Using a gentle folding motion with our whisk or a wooden spoon, we mix the flour into the wet ingredients until just combined. Avoid overmixing as this can make our bread tough and dense. The batter should look slightly lumpy and thick.
Prepare the Pan
We preheat our oven to 350°F (180°C) while we prepare the loaf pan. Line an 8.5-inch or 2lb loaf tin with parchment paper, making sure the paper extends up the sides for easy removal later. This prevents sticking and creates clean edges on our finished bread.
For an optional decorative touch, we can slice an additional banana lengthwise and place it on top of the batter before baking.
Bake the Bread
Pour the batter into our prepared loaf pan and spread it evenly with a spatula. We place the pan in the center of the preheated oven and bake for 40-55 minutes. The exact timing depends on our oven and the depth of our pan.
We test for doneness by inserting a toothpick or skewer into the center of the bread. It should come out clean or with just a few moist crumbs attached. The top should be golden brown and spring back lightly when touched.
Once baked, we remove the bread from the oven and let it cool completely in the pan for at least 30 minutes before transferring to a wire rack. This cooling time prevents the bread from falling apart when we slice it.


Directions for Checking Doneness
 6")
Knowing when our 4-ingredient banana bread is perfectly baked ensures we achieve that ideal moist texture without underbaking or overbaking. We use several reliable methods to determine when our bread has reached the perfect doneness.
Toothpick Method
The toothpick test remains our most trusted technique for checking banana bread doneness. We insert a clean toothpick into the center of the bread where it’s thickest. When we pull it out the toothpick should have a few moist crumbs clinging to it but no wet batter. If we see liquid batter on the toothpick we need to continue baking for another 5-10 minutes before testing again.
Skewer Method
For those who prefer using a longer testing tool we recommend the skewer method as an excellent alternative. We insert a wooden skewer or thin knife into the center of our banana bread just like with the toothpick technique. The skewer provides better reach into deeper loaves and gives us the same reliable results. When the skewer comes out with just a few moist crumbs attached our bread is ready.
Visual and Touch Indicators
Beyond testing tools we can rely on visual cues to assess our banana bread’s doneness. The top should appear golden brown and spring back lightly when we gently press the center. Our bread will also start pulling away slightly from the sides of the pan when fully baked.
| Doneness Method | Tool Required | What to Look For | Baking Time Range |
|---|---|---|---|
| Toothpick Test | Clean toothpick | Few moist crumbs (no wet batter) | 40-50 minutes |
| Skewer Test | Wooden skewer | Few moist crumbs (no wet batter) | 40-50 minutes |
| Visual Check | None | Golden brown top that springs back | 40-50 minutes |
We always check for doneness starting at the 40-minute mark since oven temperatures can vary. If our bread needs more time we continue baking in 5-minute intervals while testing until we achieve the perfect results.


Storage Instructions
 8")
Proper storage keeps our 4-ingredient banana bread fresh and delicious for days or even months. We’ve tested various storage methods to help you maintain that perfect moist texture and rich banana flavor.
Storing at Room Temperature
We recommend storing our banana bread at room temperature for the best texture and flavor. Place the cooled loaf in an airtight container or wrap it tightly in plastic wrap or aluminum foil to prevent moisture loss. The bread stays fresh for up to 3 days when stored this way.
For sliced bread we suggest wrapping individual pieces to maintain freshness longer. Keep the storage container in a cool dry place away from direct sunlight or heat sources. Room temperature storage preserves the bread’s naturally moist crumb better than refrigeration.
If you notice the bread becoming slightly dry after a day or two we can refresh it by warming individual slices in the microwave for 10-15 seconds. This gentle heating restores the bread’s soft texture without making it soggy.
Freezing Options
Freezing extends our banana bread’s shelf life significantly while maintaining its quality. We can freeze the entire loaf or pre-slice it for convenient individual servings. The bread freezes beautifully for up to 3 months without losing flavor or texture.
| Storage Method | Duration | Best Practice |
|---|---|---|
| Room Temperature | 3 days | Airtight container |
| Refrigerated | 1 week | Airtight container |
| Frozen (whole loaf) | 3 months | Double-wrapped |
| Frozen (sliced) | 3 months | Individual wrapping |
For whole loaf freezing we wrap the completely cooled bread tightly in plastic wrap then place it in a freezer-safe bag or container. This double protection prevents freezer burn and maintains moisture.
Slicing before freezing offers maximum convenience for quick snacks or breakfast. We wrap each slice individually in plastic wrap then store all pieces in a labeled freezer bag. Individual wrapping prevents slices from sticking together and allows us to thaw only what we need.
Thawing frozen banana bread requires patience for best results. Leave whole loaves at room temperature for 2-3 hours or individual slices for 1-2 hours. For quicker thawing we can warm individual slices in the microwave for 20-30 seconds directly from frozen.
Serving Suggestions
 10")
Our simple banana bread transforms into countless delicious serving options that suit any time of day. We love how versatile this moist treat becomes with just a few creative additions.
Plain and Simple
We recommend serving slices at room temperature as the perfect afternoon snack or light dessert. The naturally sweet flavor of overripe bananas shines through when enjoyed plain, making it an ideal companion for your morning coffee routine.
Toasted to Perfection
Lightly toasting individual slices creates a delightful contrast between the crispy exterior and tender interior. We suggest spreading butter, cream cheese, or even a drizzle of honey over the warm toast for an elevated breakfast experience.
Elegant Garnishes
Fresh berries add vibrant color and complementary tartness to each slice. We often dust our banana bread with powdered sugar for special occasions, creating an attractive presentation that looks bakery-worthy. A light drizzle of honey enhances the natural sweetness while adding visual appeal.
Perfect Beverage Pairings
Coffee lovers will appreciate how our banana bread pairs beautifully with both hot and iced coffee drinks. We find that milk creates a classic combination that appeals to all ages, while herbal teas offer a soothing afternoon treat option.
Storage for Optimal Serving
Keep slices fresh in an airtight container at room temperature for up to 3 days, ensuring each serving maintains its moist texture. Refrigerated storage extends freshness for longer periods, though we recommend bringing slices to room temperature before serving for the best flavor experience.


Tips for Success
 12")
With our simple 4-ingredient approach, a few key techniques can make the difference between good and extraordinary banana bread. We’ve tested these methods countless times to ensure your loaf turns out perfectly moist and flavorful every time.
Banana Ripeness
We recommend using overripe bananas with brown or black peels for maximum sweetness and moisture. These heavily spotted bananas contain higher sugar levels and break down more easily during mashing, creating that signature tender texture we all love in banana bread.
When your bananas aren’t quite ripe enough, we have a quick solution that works every time. Place unpeeled bananas on a baking tray in your preheating oven until the peels turn black. This process mimics natural ripening and enhances the fruit’s natural sugars, giving you the same results as naturally ripened bananas.
The ripeness level directly impacts both flavor and texture in our recipe. Very ripe bananas mash more smoothly and distribute evenly throughout the batter, while their concentrated sweetness reduces the need for additional sugar.
Mixing Technique
We start by mashing our bananas thoroughly in a large bowl until they reach a mostly smooth consistency, though some small lumps are perfectly acceptable. This mashing process should be done with a fork or potato masher rather than a blender to maintain the right texture.
Next, we add eggs and brown sugar to the mashed bananas and mix them well until completely combined. The mixture should look uniform without streaks of egg or patches of unmixed sugar.
Our final step involves sifting the self-rising flour directly into the banana mixture and folding it gently with a spatula or spoon. We fold just until the ingredients are incorporated because overmixing can lead to dense or tough bread that lacks the tender crumb we’re aiming for.
| Mixing Stage | Technique | Key Point |
|---|---|---|
| Bananas | Mash thoroughly with fork | Mostly smooth, some lumps OK |
| Wet ingredients | Mix eggs and sugar well | Uniform mixture, no streaks |
| Flour incorporation | Fold gently with spatula | Just combined, avoid overmixing |


Recipe Variations
 14")
We can easily customize this basic 4-ingredient banana bread to suit different tastes and dietary preferences. These simple modifications allow us to create unique versions while maintaining the recipe’s simplicity.
Sweet Add-Ins
Chocolate Chips transform our banana bread into an indulgent treat that appeals to chocolate lovers. We recommend adding ½ to ¾ cup of mini chocolate chips, which distribute more evenly throughout the batter than regular-sized chips.
Cinnamon enhances the natural warmth of bananas with just ½ teaspoon mixed into the dry ingredients. Vanilla essence adds another layer of flavor complexity when we include 1 teaspoon in the wet ingredients.
Nuts and Seeds provide delightful texture contrast to our soft banana bread. Chopped walnuts offer classic pairing, while chia seeds boost nutritional value without overwhelming the flavor. We suggest adding ½ cup of either option for the perfect balance.
Healthier Substitutions
Natural Sweeteners can replace traditional sugar when we want to reduce refined ingredients. Honey or pure maple syrup work exceptionally well at ¼ cup, though we should reduce other liquid ingredients slightly to maintain proper batter consistency.
Whole Wheat Flour increases fiber content significantly when we substitute up to half of the all-purpose flour. This modification creates a denser texture while adding nutritional benefits that make our banana bread more satisfying.
Sugar Reduction becomes possible when our bananas are extremely ripe and naturally sweet. We can decrease sugar to ½ cup without compromising the bread’s structure, especially when the banana peels are completely brown or black.
| Ingredient | Standard Amount | Healthier Alternative | Notes |
|---|---|---|---|
| Sugar | ¾ cup | ¼ cup honey/maple syrup | Reduce liquid by 1-2 tbsp |
| All-Purpose Flour | 1¾ cups | ½ whole wheat + 1¼ all-purpose | Creates denser texture |
| Sugar (ripe bananas) | ¾ cup | ½ cup | Only with very ripe bananas |
Conclusion
We’ve shown you that incredible banana bread doesn’t require a pantry full of ingredients or complex techniques. With just four simple ingredients and basic kitchen tools you probably already own you can create bakery-quality results right at home.
This recipe proves that sometimes the best things in life are the simplest. Whether you’re a beginner baker looking for confidence or an experienced cook seeking convenience this foolproof method delivers consistent delicious results every time.
Your overripe bananas now have a perfect purpose and your kitchen will smell absolutely amazing. We’re confident this will become your go-to recipe for quick treats surprise guests or satisfying those sudden banana bread cravings.
Frequently Asked Questions
What are the 4 ingredients needed for this banana bread recipe?
The four essential ingredients are 3 large overripe bananas, ⅓ cup of melted butter or vegetable oil, ¾ cup of granulated sugar, and 1¾ cups of all-purpose flour. These simple pantry staples create a moist, naturally sweet banana bread that’s perfect for beginners.
How ripe should the bananas be for the best banana bread?
Use heavily spotted or completely brown bananas for the best flavor and sweetness. The browner the peel, the sweeter and more flavorful your banana bread will be. If your bananas aren’t ripe enough, you can quickly ripen them in the oven.
How long does it take to make this banana bread?
The entire process takes 40-55 minutes from start to finish. This includes preparation time for mashing bananas and mixing ingredients, plus baking time. The quick timeline makes it perfect for when you need a homemade treat in under an hour.
How do I know when the banana bread is done baking?
Use the toothpick test – insert a clean toothpick into the center of the loaf. It should come out with a few moist crumbs but no wet batter. The top should be golden brown and spring back when lightly pressed.
How should I store leftover banana bread?
Store at room temperature in an airtight container or wrapped tightly in plastic wrap for up to 3 days. For longer storage, wrap the loaf double and freeze for up to 3 months. Individual slices can be wrapped separately for convenience.
Can I substitute any ingredients in this 4-ingredient recipe?
Yes, you can make several substitutions while keeping it simple. Replace up to half the all-purpose flour with whole wheat flour, use brown sugar instead of granulated sugar, or substitute honey or maple syrup for the sugar. Vegetable oil can replace butter if preferred.
What equipment do I need to make this banana bread?
You need basic kitchen tools: a large mixing bowl, fork or potato masher, whisk, 8.5-inch loaf pan, parchment paper, and an oven preheated to 350°F (180°C). These common kitchen items ensure a smooth baking process and perfect results.
Can I add extra ingredients to this simple recipe?
Absolutely! While the base recipe uses just 4 ingredients, you can add chocolate chips, nuts, cinnamon, or vanilla extract for extra flavor. Keep additions to about ½ cup total to maintain the bread’s texture and structure.


