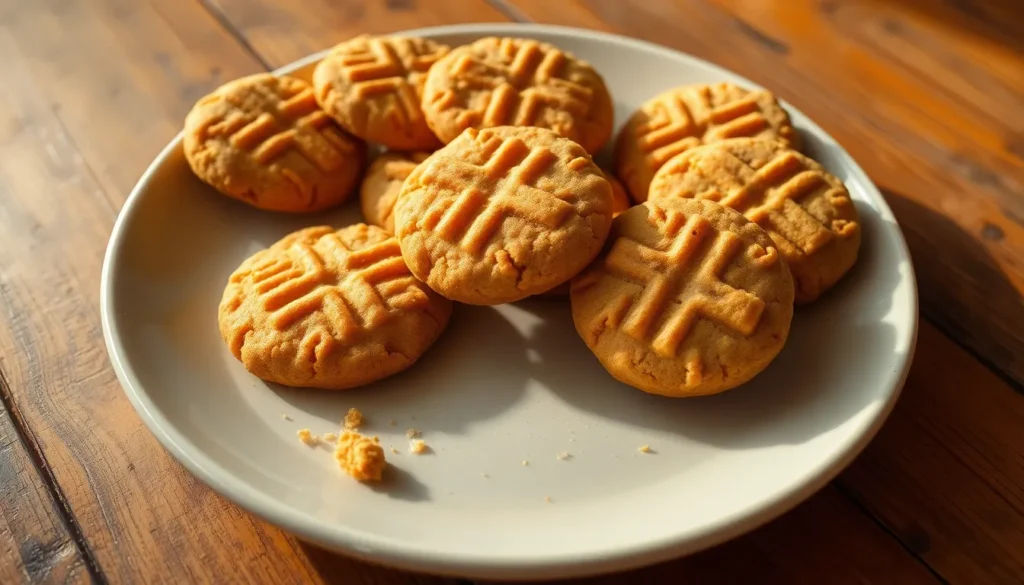
Nothing beats the pure joy of biting into a warm, chewy peanut butter cookie – especially when you can make them with just four simple ingredients! We’ve perfected this incredibly easy recipe that delivers all the rich, nutty flavor you crave without the fuss of complicated ingredient lists or lengthy prep time.
These 4-ingredient peanut butter cookies prove that sometimes the simplest recipes create the most satisfying results. With just peanut butter, sugar, an egg, and a touch of vanilla, you’ll have a batch of golden, melt-in-your-mouth cookies ready in under 20 minutes. They’re perfect for last-minute treats, bake sales, or when you’re craving homemade cookies but don’t want to spend hours in the kitchen.
What Makes These 4 Ingredient Peanut Butter Cookies Special
The beauty of these cookies lies in their incredible simplicity without sacrificing flavor. We use only four pantry staples to create treats that rival any complex recipe with dozens of ingredients.
Perfect texture emerges from minimal components. Our streamlined ingredient list produces cookies with crispy edges and chewy centers that satisfy every craving. The absence of flour might seem unusual but creates a naturally gluten-free treat with concentrated peanut butter flavor.
Time efficiency sets these cookies apart from traditional recipes. We eliminate lengthy preparation steps like creaming butter or chilling dough. The entire process from mixing to baking takes less than 20 minutes.
Foolproof results guarantee success every time. These cookies require no special techniques or equipment beyond basic kitchen tools. The simple ratio of ingredients prevents common baking mistakes that plague more complex recipes.
Customization opportunities abound even though the minimal ingredient count. We can easily transform the base recipe by rolling dough balls in cinnamon sugar, pressing chocolate chips on top, or creating a crisscross pattern with a fork.
Storage convenience makes them ideal for meal prep. The dough keeps well in the refrigerator for up to one week or freezes for three months. We can portion the dough into balls and freeze them for fresh cookies anytime.
Allergy-friendly nature accommodates various dietary needs. The naturally gluten-free composition makes these cookies suitable for those with gluten sensitivities while maintaining the classic peanut butter cookie taste everyone loves.


Ingredients
 2")
We only need four simple ingredients to create these delectable peanut butter cookies. Each ingredient plays a crucial role in achieving the perfect texture and flavor balance that makes these cookies irresistible.
Core Ingredients
- 1 cup creamy peanut butter (smooth variety works best for consistent texture)
- 1/2 to 1 cup granulated sugar (adjust based on your sweetness preference)
- 1 large egg (room temperature for easier mixing)
- 1 teaspoon vanilla extract OR 1/4 to 1/2 teaspoon baking soda (choose one based on desired texture)
Ingredient Selection Tips
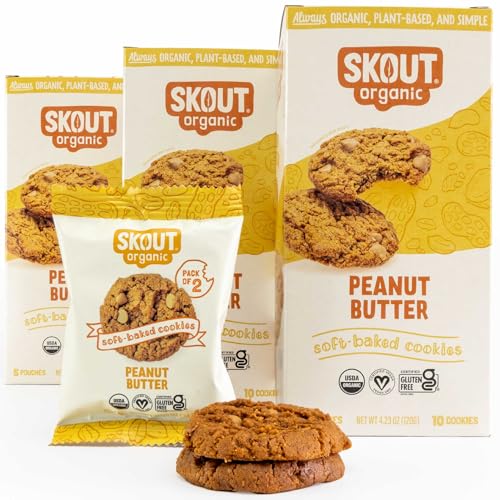
Our choice of peanut butter significantly impacts the final result. Commercial brands like Jif or Skippy provide a firmer cookie texture compared to natural varieties. Natural peanut butter works perfectly fine but may yield slightly softer cookies due to oil separation.
Sugar options offer flexibility in our recipe. White granulated sugar creates the classic crispy edge texture we love. Brown sugar can substitute for a chewier consistency and deeper molasses flavor. Caster sugar works equally well for those who prefer finer granulation.
The egg serves as our primary binding agent. We recommend using a large egg at room temperature to ensure smooth incorporation with the peanut butter mixture.
Optional Enhancement
We can choose between vanilla extract or baking soda as our fourth ingredient. Vanilla extract enhances the overall flavor profile with warm undertones. Baking soda promotes better rise and creates a softer, chewier texture throughout the cookie.
| Ingredient | Amount | Purpose |
|---|---|---|
| Peanut Butter | 1 cup | Primary flavor and structure |
| Sugar | 1/2 to 1 cup | Sweetness and texture |
| Egg | 1 large | Binding agent |
| Vanilla/Baking Soda | 1 tsp / 1/4-1/2 tsp | Flavor or texture enhancement |


Equipment Needed
 4")
Making these simple peanut butter cookies requires minimal kitchen equipment that most home bakers already have on hand. We recommend gathering these basic tools before starting your baking process to ensure smooth preparation.
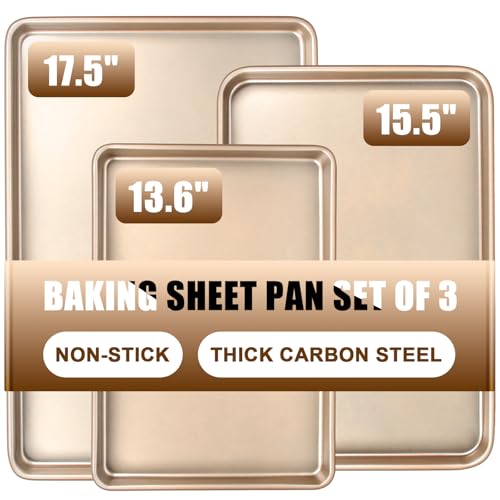
Baking Sheet serves as your primary cooking surface and should be lined with parchment paper or lightly greased to prevent sticking. We find that using parchment paper creates the most consistent results and makes cleanup effortless.
Medium Cookie Scoop helps create uniform cookie sizes that bake evenly. This tool ensures each cookie measures approximately 1.5 tablespoons and maintains consistent spacing on your baking sheet.
Fork becomes essential for creating the signature crisscross pattern that defines classic peanut butter cookies. We use this simple utensil to flatten each dough ball while adding the traditional decorative touch.
Mixing Bowl needs to be large enough to accommodate all ingredients comfortably. We recommend choosing a medium to large bowl that allows room for thorough mixing without ingredients spilling over the edges.
Electric Hand Mixer or Whisk blends your four ingredients into a cohesive dough. We prefer using an electric mixer for faster results though a sturdy whisk works equally well for those who prefer manual mixing.
| Equipment | Purpose | Alternative Options |
|---|---|---|
| Baking Sheet | Cookie baking surface | Any flat baking pan |
| Medium Cookie Scoop | Uniform portion control | Large spoon or ice cream scoop |
| Fork | Crisscross pattern creation | Any fork from your silverware |
| Mixing Bowl | Ingredient combination | Any medium to large bowl |
| Electric Hand Mixer | Dough blending | Manual whisk or wooden spoon |
The beauty of this recipe lies in its simplicity and the fact that no specialized equipment is required. We designed this approach to work with standard kitchen tools that every home cook possesses.
Instructions
 6")
We’ll guide you through the simple three-step process to create these delicious peanut butter cookies from start to finish. The entire preparation takes just minutes before we slide them into the oven.
Prep the Dough
Preheat your oven to 350°F (175°C) while gathering the ingredients. In a large mixing bowl, combine 1 cup creamy peanut butter with 1/2 cup granulated sugar until well blended. Crack the large egg directly into the mixture and add 1 teaspoon vanilla extract for enhanced flavor. Mix thoroughly using an electric hand mixer or wooden spoon until the ingredients form a smooth, cohesive dough. The mixture should hold together without being sticky or crumbly.
Shape the Cookies
Scoop approximately 1.5 tablespoons of dough and roll between your palms to form uniform balls. Place each dough ball onto a parchment-lined baking sheet, spacing them about 2 inches apart to allow for spreading. Press a fork gently into the top of each cookie, creating the classic crisscross pattern by rotating the fork 90 degrees for the second set of lines. This signature marking helps the cookies bake evenly while maintaining their traditional appearance.
Bake the Cookies
Slide the prepared baking sheet into the preheated oven for 10-12 minutes. Watch for the edges to become set and lightly golden while the centers remain slightly soft. Remove the cookies from the oven when the edges appear firm but the centers still look slightly underbaked. Allow the cookies to cool directly on the baking sheet for 5 minutes before transferring to a wire rack, as they continue cooking from residual heat.

Tips for Perfect 4 Ingredient Peanut Butter Cookies
 8")
We’ve discovered that a few strategic choices can transform your simple four ingredient cookies from good to absolutely irresistible. These proven techniques will help you achieve bakery quality results every single time.
Choosing the Right Peanut Butter
Use smooth store-bought peanut butter for the best texture in your cookies. We recommend avoiding chunky varieties since they can create uneven baking and disrupt the smooth consistency that makes these cookies so appealing.
Natural peanut butter works wonderfully in this recipe, but requires extra attention before use. We always ensure the oil and solids are thoroughly combined by stirring well before measuring. The natural oils in these brands can separate during storage, so proper mixing prevents oily or dry spots in your finished cookies.
Commercial peanut butter brands like Jif or Skippy contain stabilizers that help maintain consistent texture throughout the baking process. These brands produce cookies with firmer structure and more predictable results, making them ideal for beginners.
Getting the Texture Just Right
Bake until lightly golden to achieve that perfect balance of crispy edges and soft centers. We’ve found that overbaking even by a few minutes can result in dry, crumbly cookies that lack the chewy texture we’re after.
Chill the dough for 30 minutes if you’re working with natural peanut butter, as this makes the mixture much easier to handle and shape. The cooler temperature helps the oils solidify slightly, preventing the dough from spreading too much during baking.
Monitor your cookies closely during the final minutes of baking. The edges should appear set and lightly golden while the centers remain slightly soft and underbaked looking. This ensures they’ll finish cooking on the hot pan while maintaining that coveted chewy interior.
Storage and Freshness
Store in an airtight container at room temperature for up to 3 days to maintain optimal texture and flavor. We’ve tested longer storage periods and found that cookies begin losing their appealing contrast between crispy edges and soft centers after this timeframe.
Cooling is crucial for preventing soggy bottoms and maintaining structural integrity. We always let our cookies rest on the baking sheet for at least 10 minutes before transferring them to a wire rack. This allows the residual heat to finish the cooking process while the bottoms set properly.
For longer storage, these cookies freeze beautifully for up to 2 months when properly wrapped. We recommend placing parchment paper between layers in your storage container to prevent sticking and preserve the classic crisscross pattern on top.
Refrigerating cookies overnight actually enhances their flavor and crispiness, allowing the peanut butter oils to redistribute and intensify the overall taste profile.
Variations and Add-Ins
 10")
Our simple four-ingredient base transforms into countless delicious variations with just a few creative additions. We love how easily these cookies adapt to different tastes and dietary preferences while maintaining their signature simplicity.
Sugar Substitutions
Brown sugar creates our favorite texture variation, producing noticeably chewier cookies compared to the standard granulated sugar version. We recommend replacing the granulated sugar completely with packed brown sugar for the most dramatic texture change. Light brown sugar offers subtle molasses notes while dark brown sugar delivers richer caramel undertones.
Nut Butter Alternatives
Almond butter serves as our go-to substitution for households with peanut allergies, maintaining the same creamy consistency and nutty flavor profile. Cashew butter provides a milder taste that appeals to those preferring less intense nut flavors. We use these alternatives in exact 1:1 ratios with the original peanut butter measurement.
Popular Mix-Ins
Chocolate chips rank as our most requested addition, with 1/2 cup mini chocolate chips folding perfectly into the dough without overwhelming the peanut flavor. We distribute them evenly throughout the mixture for consistent chocolate in every bite.
Chopped peanuts amplify the peanut experience while adding satisfying crunch. We use 1/3 cup of roughly chopped salted peanuts, stirring them in just before shaping the cookies.
Shredded coconut introduces tropical sweetness and chewy texture. We incorporate 1/3 cup of sweetened shredded coconut for optimal flavor balance.
Mini marshmallows create delightful pockets of gooey sweetness that complement the nutty base. We add 1/3 cup of mini marshmallows, pressing them gently into the dough to prevent them from falling out during baking.
Peanut Butter Texture Options
Chunky peanut butter replaces smooth varieties for those craving extra texture without additional ingredients. We find that chunky versions create more rustic-looking cookies with pleasant peanut piece surprises.
Creamy peanut butter remains our standard recommendation for consistent results and smooth cookie texture.
Finishing Touches
Granulated sugar rolling elevates the cookies’ appearance and adds subtle sparkle. We roll each dough ball in granulated sugar before creating the fork pattern, which also prevents the fork from sticking during the crisscross pressing process.
These variations maintain the recipe’s core simplicity while expanding flavor possibilities to suit any preference or occasion.
Make-Ahead Instructions
 12")
Planning ahead transforms these simple cookies into an even more convenient treat for busy schedules or unexpected guests. We can prepare the cookie dough in advance using two effective methods that maintain the recipe’s quality and flavor.
Refrigerator Storage Method
We recommend mixing the peanut butter cookie dough completely according to our recipe instructions. The prepared dough stores beautifully in the refrigerator for up to 24 hours before baking. Simply cover the bowl tightly with plastic wrap or transfer the dough to an airtight container. This chilling period actually improves the cookie texture by allowing the ingredients to meld together while making the dough easier to handle.
When we’re ready to bake refrigerated dough, we let it sit at room temperature for 5-10 minutes to soften slightly. Rolling the chilled dough becomes much simpler, and the cookies maintain their shape better during baking.
Freezer Storage Method
For longer storage, we shape the dough into individual cookie balls before freezing. Roll each portion into a 1-inch ball and place them on a parchment-lined baking sheet. Freeze the shaped dough balls for 2 hours until solid, then transfer them to a freezer-safe bag or container.
These frozen cookie balls keep for up to 2 months without losing quality. We can bake them directly from frozen by adding 1-2 extra minutes to the original baking time. The oven temperature remains at 350°F, and we still create the classic crisscross pattern with our fork before baking.
Both make-ahead methods preserve the cookies’ signature chewy centers and crispy edges while offering maximum flexibility for our baking schedule.


Troubleshooting Common Issues
 14")
Even with our simple 4-ingredient recipe, bakers occasionally encounter challenges. We’ve compiled answers to the most common problems to ensure your cookies turn out perfectly every time.
Cookies Spreading Too Much
Dough spreading excessively during baking typically occurs when the peanut butter is too warm or oily. Natural peanut butters with separated oils create this issue more frequently than commercial brands. We recommend chilling your dough for 30 minutes before baking if you notice excessive spreading. Also, ensure your baking sheet isn’t warm from previous batches, as this accelerates spreading.
Cookies Too Dry or Crumbly
Dry cookies usually result from overbaking or using peanut butter with insufficient oils. Watch your cookies closely during the final 2-3 minutes of baking time. The edges should be set but the centers slightly soft when you remove them from the oven. Natural peanut butter brands with thick consistency may require an extra tablespoon of the separated oil to achieve proper moisture.
Cookies Not Holding Together
Cookies that fall apart often lack proper binding due to inadequate mixing or using peanut butter that’s too thick. Mix your ingredients thoroughly until the dough forms a cohesive ball that holds its shape when pressed. Room temperature eggs blend more easily than cold ones, creating better binding throughout the dough.
Uneven Baking Results
Inconsistent cookie sizes cause uneven baking, with smaller cookies browning faster than larger ones. Use a medium cookie scoop to portion uniform dough balls approximately 1.5 inches in diameter. Space cookies at least 2 inches apart on the baking sheet to allow for even heat circulation.
Cookies Too Sweet or Not Sweet Enough
Sugar balance affects both taste and texture in our recipe. Start with 1/2 cup of sugar for mildly sweet cookies, then adjust to 3/4 cup for moderate sweetness or the full cup for traditional sweetness levels. Brown sugar creates chewier cookies while white sugar produces crispier edges.
Flat Cookies Without Rise
Cookies that bake completely flat may be missing the leavening agent or have stale baking soda. If using the baking soda variation, ensure your baking soda is fresh (replace every 6 months for best results). The vanilla extract variation naturally produces flatter cookies, which is normal for this flourless recipe style.
Conclusion
We’ve shown you how four simple ingredients can create incredible homemade cookies that rival any bakery treat. This recipe proves that exceptional baking doesn’t require complicated techniques or endless ingredient lists.
Whether you’re dealing with unexpected guests or satisfying a sudden cookie craving these peanut butter cookies deliver every time. The flexibility to customize flavors and the make-ahead options make this recipe a true kitchen staple.
With just 20 minutes from start to finish you’ll have warm chewy cookies that’ll become your go-to dessert solution. Keep this recipe handy – you’ll find yourself reaching for it again and again.
Frequently Asked Questions
What ingredients do I need for 4-ingredient peanut butter cookies?
You only need four simple ingredients: 1 cup creamy peanut butter, 1/2 to 1 cup sugar (depending on sweetness preference), 1 large egg at room temperature, and either 1 teaspoon vanilla extract or 1/2 teaspoon baking soda. These basic pantry staples create delicious cookies with crispy edges and chewy centers.
How long does it take to make these peanut butter cookies?
The entire process takes less than 20 minutes. This includes mixing the ingredients (2-3 minutes), shaping the cookies (5 minutes), and baking them for 10-12 minutes. It’s perfect for last-minute treats or when you want homemade cookies without lengthy preparation.
Are these 4-ingredient peanut butter cookies gluten-free?
Yes, these cookies are naturally gluten-free since they contain no flour. The recipe relies on peanut butter, sugar, egg, and vanilla/baking soda to create the perfect texture and flavor. They’re ideal for those with gluten sensitivities or celiac disease.
Can I make the cookie dough ahead of time?
Absolutely! You can refrigerate the prepared dough for up to 24 hours or freeze shaped cookie balls for up to 2 months. Refrigerated dough should sit at room temperature for a few minutes before baking, while frozen cookies can be baked directly with slightly longer baking time.
What type of peanut butter works best for this recipe?
Creamy, store-bought peanut butter works best for consistent texture and easier mixing. Commercial brands like Jif or Skippy create firmer cookies with better structure. If using natural peanut butter, mix it thoroughly first, as it may result in softer cookies due to oil separation.
How do I store these peanut butter cookies?
Store cooled cookies in an airtight container at room temperature for up to 3 days. For enhanced flavor and crispiness, refrigerate them overnight. For longer storage, freeze cookies for up to 2 months, placing parchment paper between layers to prevent sticking.
Can I customize this basic recipe with add-ins?
Yes! Popular add-ins include chocolate chips, chopped peanuts, mini marshmallows, or shredded coconut. You can also roll dough balls in granulated sugar before baking for extra sweetness, or substitute brown sugar for chewier texture. Keep add-ins to about 1/2 cup maximum.
Why are my cookies spreading too much during baking?
Excessive spreading usually occurs when the dough is too warm or the oven temperature is too low. Chill your dough for 15-30 minutes before baking, ensure your oven is properly preheated to 350°F, and avoid overmixing the ingredients to prevent this issue.
What kitchen equipment do I need for this recipe?
You’ll need basic equipment most home bakers already have: a baking sheet, medium cookie scoop, fork for the crisscross pattern, mixing bowl, and electric hand mixer or whisk. Line your baking sheet with parchment paper for best results and easy cleanup.
How do I know when the cookies are done baking?
Bake for 10-12 minutes until the edges are set and lightly golden while centers remain slightly soft. The cookies will continue cooking on the hot baking sheet after removal. Avoid overbaking as they’ll become dry and crumbly rather than chewy.


