There’s something undeniably comforting about a rich chocolate pound cake that fills your kitchen with its heavenly aroma. This classic dessert transforms the traditional pound cake into a decadent chocolate lover’s dream that’s perfect for any occasion. We’ve perfected this recipe to deliver that dense, moist texture pound cakes are famous for while adding deep chocolate flavor that’ll have everyone asking for seconds.
What makes our chocolate pound cake truly special is its versatility and foolproof nature. Whether you’re celebrating a birthday, hosting a dinner party, or simply craving something sweet, this cake delivers every time. The beauty lies in its simplicity – you don’t need fancy techniques or exotic ingredients to create something absolutely spectacular.
Ingredients
We’ve carefully selected each ingredient to create the perfect balance of rich chocolate flavor and classic pound cake texture. Our ingredient list is organized by category to make preparation simple and efficient.
Dry Ingredients
- 2 cups all-purpose flour
- 3/4 cup unsweetened cocoa powder
- 1 teaspoon baking powder
- 1/2 teaspoon salt
- 1/4 teaspoon baking soda
Wet Ingredients
- 1 cup unsalted butter, softened to room temperature
- 1 3/4 cups granulated sugar
- 4 large eggs, room temperature
- 2 teaspoons vanilla extract
- 1 cup buttermilk, room temperature
- 1/2 cup sour cream, room temperature
Chocolate Components
- 4 ounces dark chocolate, melted and cooled slightly
- 1 cup mini chocolate chips
- 2 tablespoons hot coffee or hot water
Equipment Needed

Creating our perfect chocolate pound cake requires exact tools that ensure smooth preparation and optimal results. We recommend gathering all equipment before starting to streamline the baking process.
Essential Baking Equipment
A 9×5-inch loaf pan serves as our primary vessel for this rich dessert. Bundt pans work equally well and create an elegant presentation for special occasions. We always line our chosen pan with parchment paper to prevent sticking and ensure easy removal.
Mixing Tools
Our stand mixer makes quick work of creaming butter and sugar to the perfect light and fluffy consistency. Hand mixers provide excellent results as well if a stand mixer isn’t available. Large mixing bowls accommodate all ingredients comfortably during the preparation process.
Measuring and Preparation Tools
Accurate measurements guarantee consistent results every time we bake this cake. Standard measuring cups handle our dry ingredients like flour and cocoa powder precisely. Measuring spoons ensure we add the correct amounts of vanilla extract and other flavor enhancers.
Additional Helpful Items
Wire cooling racks allow proper air circulation around our finished cake. Rubber spatulas help us scrape down bowl sides thoroughly during mixing. Kitchen scales provide the most accurate measurements for professional results.
| Equipment Type | Exact Tools | Purpose |
|---|---|---|
| Baking Pans | 9×5-inch loaf pan or Bundt pan | Main baking vessel |
| Mixing Equipment | Stand mixer or hand mixer | Creaming and blending |
| Measuring Tools | Cups, spoons, kitchen scale | Ingredient accuracy |
| Preparation Items | Parchment paper, mixing bowls | Setup and organization |
Room temperature ingredients mix more easily so we remove butter and eggs from refrigeration about an hour before baking. This simple preparation step prevents lumpy batter and ensures our chocolate pound cake achieves its signature smooth texture.
Instructions

Follow these detailed steps to create our rich and decadent chocolate pound cake. Each stage builds upon the previous one to ensure perfect texture and flavor.
Prep the Pan and Oven
We need to preheat our oven to 325°F for optimal baking results. Generously grease our 9×5-inch loaf pan or Bundt pan with soft butter, making sure to coat every surface and crevice. Dust the buttered pan with flour, tapping out any excess to create a non-stick surface that ensures easy cake removal.
Mix the Dry Ingredients
We combine 2 cups all-purpose flour, 3/4 cup cocoa powder, 1 teaspoon baking powder, 1/2 teaspoon baking soda, and 1 teaspoon salt in a medium bowl. Sift these ingredients together using a fine-mesh strainer to eliminate lumps and create a light, aerated mixture. This sifting process ensures our cake will have a smooth, even texture throughout.
Cream Butter and Sugar
We beat 1 cup softened unsalted butter and 1 3/4 cups granulated sugar using our electric mixer on medium-high speed for 3-4 minutes. The mixture should become light, fluffy, and pale in color, indicating proper aeration. Scrape down the bowl sides periodically to ensure even mixing and prevent any butter lumps from remaining.
Add Eggs and Vanilla
We incorporate 4 large eggs one at a time, beating well after each addition to maintain the batter’s smooth consistency. Add 2 teaspoons vanilla extract and mix until just combined. Each egg should be fully incorporated before adding the next one to prevent the batter from breaking or becoming lumpy.
Combine Wet and Dry Ingredients
We alternate adding our dry ingredient mixture with 1 cup buttermilk and 1/2 cup sour cream, beginning and ending with the flour mixture. Add about one-third of the dry ingredients, mix on low speed, then add half the liquid ingredients. Continue this pattern until all ingredients are just combined, avoiding overmixing which can result in a tough cake.
Add Chocolate Elements
We gently fold in 6 ounces melted and slightly cooled dark chocolate using a rubber spatula, ensuring even distribution throughout the batter. Stir in 1/2 cup mini chocolate chips for added texture and bursts of chocolate flavor. Add 2 tablespoons hot coffee or water to enhance the chocolate’s depth and richness, mixing just until incorporated.
Bake the Cake
We pour our batter into the prepared pan, smoothing the top with a spatula to ensure even baking. Bake for 65-75 minutes, or until a toothpick inserted into the center comes out with just a few moist crumbs attached. The cake should spring back lightly when touched and begin pulling away from the pan edges. Allow the cake to cool in the pan for 15 minutes before turning it out onto a wire rack to cool completely.
Cooling and Storage

Proper cooling and storage techniques ensure our chocolate pound cake maintains its perfect texture and rich flavor for days to come.
Cooling Instructions
We recommend allowing the chocolate pound cake to cool in its pan for 10 to 20 minutes on a wire rack after baking. This initial cooling period helps set the cake’s structure and prevents crumbling when we remove it from the pan. Once this cooling stage is complete, we transfer the cake out of the pan onto the rack to cool completely to room temperature before wrapping or storing. For glazed cakes, we allow the glaze to set completely before proceeding with storage.
Storage Tips
Room Temperature Storage
We store our chocolate pound cake at room temperature by wrapping it tightly in plastic wrap or placing it in an airtight container. The cake keeps well for 3 to 5 days using this method, though storage time may vary depending on humidity levels.
Refrigeration
For extended freshness, we can refrigerate the cake in an airtight container for up to one week. This method works particularly well in warmer climates or humid conditions.
Freezing
To freeze our chocolate pound cake, we ensure it’s completely cool before wrapping tightly in plastic wrap. For added protection, we wrap again in aluminum foil or place in a freezer-safe zip-top bag. The cake freezes beautifully for up to 2 to 3 months. We thaw overnight in the refrigerator before serving, and if the cake was decorated with powdered sugar, we add fresh sugar after thawing.
Serving and Special Considerations
We serve chocolate pound cake at room temperature, cold, or slightly warmed according to preference. For convenience, we can freeze individual slices by arranging them in a single layer in an airtight container. When working with glazed or frosted cakes, we always allow decorative elements to set before storing or freezing.
Serving Suggestions

Our chocolate pound cake transforms into countless delicious presentations that cater to every taste preference and occasion. The cake’s rich flavor and dense texture make it an ideal canvas for both simple and elaborate serving options.
Traditional whipped cream remains one of our favorite accompaniments, providing a light contrast to the cake’s richness. We recommend trying flavored variations like peppermint or orange-infused whipped cream to add an extra layer of complexity to each bite.
For those seeking ultimate indulgence, chocolate ganache elevates this dessert to restaurant-quality status. The silky ganache coating intensifies the chocolate experience while adding a glossy, professional finish that impresses guests.
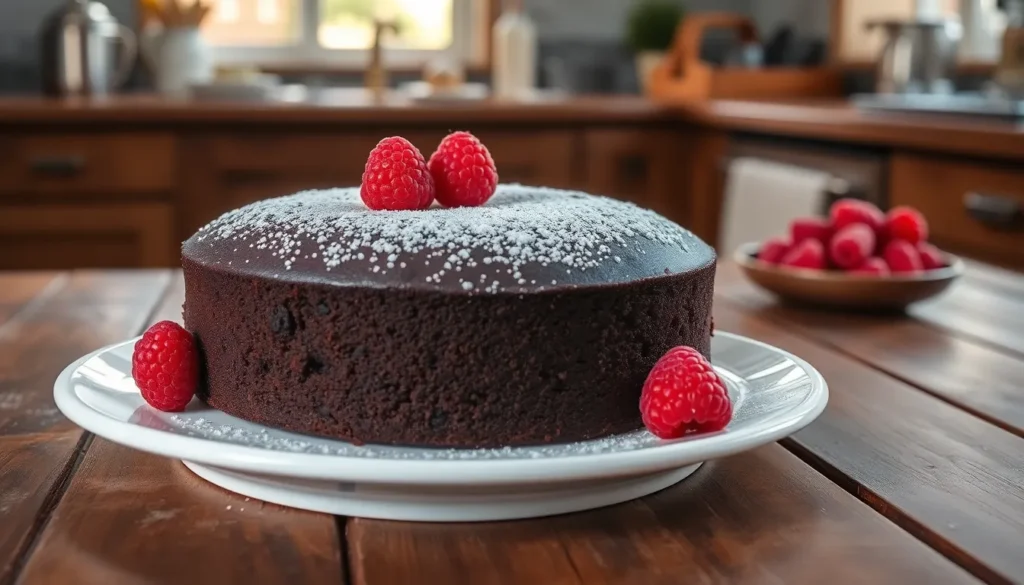
Fresh fruit creates a beautiful presentation when piled in the center and arranged on top of cake slices. Berries, sliced strawberries, or orange segments provide natural sweetness and vibrant color that balances the deep chocolate notes.
Classic ice cream pairings never disappoint with our chocolate pound cake. Vanilla ice cream offers timeless appeal, while raspberry, strawberry, or mocha flavors create more adventurous combinations that complement the cake’s rich profile.
Light dusting techniques add elegant finishing touches without overwhelming the cake’s natural beauty. A gentle sprinkle of icing sugar creates a snow-like effect, while cocoa powder dusting enhances the chocolate theme with sophisticated visual appeal.
Buttercream piping allows for creative decorative possibilities that transform simple slices into celebration-worthy desserts. We suggest using contrasting colors or flavored buttercreams to create stunning visual presentations.
Temperature preferences offer flexibility for serving this versatile dessert. The cake delivers exceptional taste whether served warm for cozy comfort, at room temperature for optimal texture, or chilled for refreshing summer enjoyment.
| Storage Method | Duration | Temperature |
|---|---|---|
| Room Temperature | 3 days | Wrapped in plastic |
| Refrigerated | 5 days | Airtight container |
| Frozen | 3 months | Plastic wrap + aluminum foil |
Variations and Tips

We can transform our basic chocolate pound cake into countless delicious variations while applying proven techniques for perfect results. These adaptations and methods ensure our cake achieves the ideal texture and flavor every time.
Flavor Variations
Chocolate Intensity Options
We recommend using both cocoa powder and melted chocolate for the most balanced flavor profile. Dutch-processed cocoa delivers a less bitter and darker chocolate taste while natural cocoa provides a classic slightly acidic flavor. For deeper chocolate notes we can add a teaspoon of espresso powder to intensify the overall chocolate experience.
Texture Enhancements
Adding cream cheese to our batter creates exceptional moisture and tenderness while contributing a luxurious mouthfeel. We can fold chocolate chips or chunks into the batter for bursts of chocolate and varied texture throughout each slice.
Creative Flavor Combinations
Our cake transforms beautifully with flavor swirls and mix-ins. We can create ribbons of peanut butter caramel or Nutella throughout the batter by adding dollops and gently swirling with a knife. For additional richness we can drizzle finished cake with chocolate ganache or dust with powdered sugar.
Serving Enhancements
We elevate our cake by pairing it with whipped cream or premium ice cream. The contrast between the dense cake and light accompaniments creates a perfect dessert experience.
Baking Tips for Success
Temperature and Preparation
Room temperature ingredients are essential for smooth batter consistency and even baking. We ensure butter eggs and dairy sit out for 30-60 minutes before mixing to achieve optimal results.
Mixing Techniques
Thorough creaming of butter and sugar incorporates air for a lighter more even crumb. We cream these ingredients for 3-4 minutes until the mixture appears light and fluffy before adding other components.
Flour Selection and Measuring
Cake flour yields a finer more tender crumb due to its lower protein content. When using all-purpose flour we expect a slightly denser texture but still delicious results. Accurate measuring prevents dry or dense outcomes.
Baking Precision
We preheat our oven to the specified temperature and maintain consistent heat throughout baking. Our doneness test involves inserting a toothpick in the center which should emerge with just a few moist crumbs attached.
Cooling Process
Proper cooling prevents breakage and maintains texture. We allow the cake to cool in its pan for 10-15 minutes before transferring to a wire rack for complete cooling.
Conclusion
We’ve shared everything you need to create an exceptional chocolate pound cake that’ll become your go-to dessert recipe. This versatile treat delivers rich chocolate flavor with the perfect dense texture that makes pound cake so beloved.
Whether you’re baking for a special celebration or simply treating yourself to something sweet our detailed guide ensures success every time. The beauty of this recipe lies in its simplicity – no complex techniques required just quality ingredients and careful attention to detail.
Remember that this cake tastes incredible on its own but also serves as an excellent canvas for your favorite toppings and accompaniments. From fresh berries to decadent ganache the possibilities are endless.
We’re confident this chocolate pound cake will earn a permanent spot in your baking repertoire delivering consistent delicious results that’ll impress family and friends alike.
Frequently Asked Questions
What type of pan should I use for chocolate pound cake?
A 9×5-inch loaf pan or Bundt pan works best for chocolate pound cake. Make sure to grease and dust the pan with flour before adding the batter to prevent sticking and ensure easy removal after baking.
How long does chocolate pound cake stay fresh?
Chocolate pound cake stays fresh at room temperature for 3 days when wrapped tightly in plastic wrap. It can be refrigerated in an airtight container for up to 5 days or frozen for up to 3 months with proper wrapping.
What temperature should I bake chocolate pound cake?
Bake chocolate pound cake at 325°F for 65-75 minutes. The lower temperature ensures even baking and prevents the outside from cooking too quickly while keeping the inside moist and dense.
Can I make chocolate pound cake without a stand mixer?
Yes, you can use a hand mixer instead of a stand mixer. The key is to cream the butter and sugar until light and fluffy, which may take a few extra minutes with a hand mixer but will produce the same results.
Why do I need to use room temperature ingredients?
Room temperature ingredients blend together more easily, creating a smooth batter without lumps. This ensures the cake has the proper dense, moist texture that pound cake is known for. Take ingredients out 30-60 minutes before baking.
How do I know when the chocolate pound cake is done?
Insert a toothpick into the center of the cake. It should come out with just a few moist crumbs attached, not wet batter. The cake should also start pulling slightly away from the sides of the pan.
What’s the best way to serve chocolate pound cake?
Chocolate pound cake is delicious at room temperature, chilled, or slightly warmed. Pair it with whipped cream, fresh berries, ice cream, or a light dusting of powdered sugar for added flavor and visual appeal.
Can I add different flavors to the basic recipe?
Yes, you can customize the cake with espresso powder for deeper chocolate flavor, cream cheese for richness, chocolate chips for texture, or swirls of peanut butter or Nutella for unique flavor combinations.