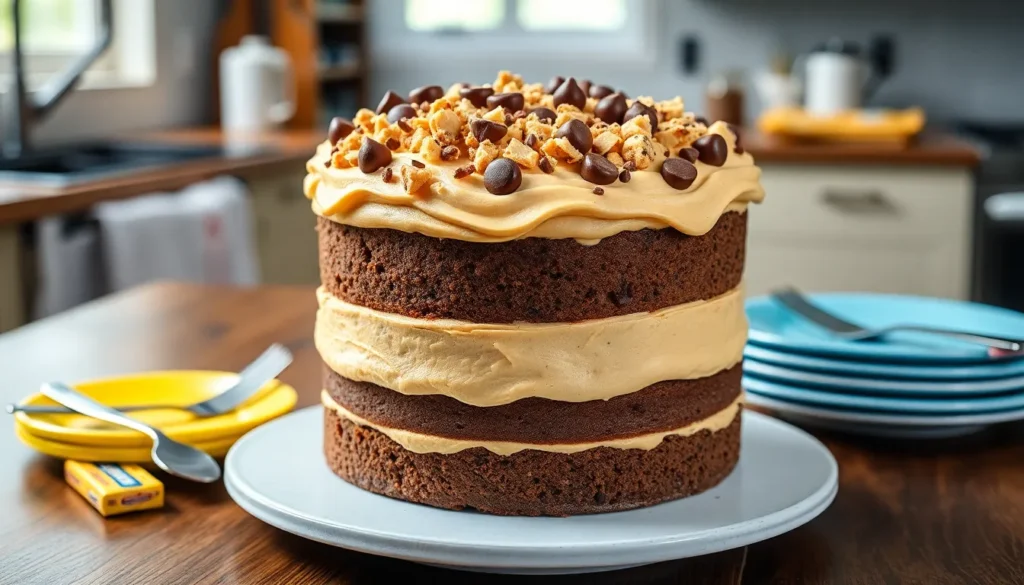
We’ve discovered the ultimate dessert that’ll make every Butterfinger lover’s dreams come true – a decadent Butterfinger cake that captures all the crispy peanut butter goodness of the beloved candy bar. This showstopper combines layers of moist chocolate cake with creamy peanut butter frosting and chunks of real Butterfinger candy pieces.
What makes this cake absolutely irresistible is how it transforms the iconic candy into an elegant dessert that’s perfect for birthdays celebrations or any time you’re craving something extraordinary. We’ve perfected this recipe to deliver the perfect balance of chocolate richness and that signature Butterfinger crunch in every single bite.
The best part? This impressive cake is surprisingly simple to make and uses ingredients you can easily find at your local grocery store. Whether you’re a seasoned baker or just starting out we’ll guide you through creating this crowd-pleasing masterpiece that’ll have everyone asking for seconds.
Ingredients
We’ve carefully selected each ingredient to create the perfect balance of chocolate richness and Butterfinger crunch. Our recipe delivers professional bakery results with ingredients you can easily find at your local grocery store.
For the Cake
- 1¾ cups all-purpose flour
- 2 cups granulated sugar
- ¾ cup unsweetened cocoa powder
- 2 teaspoons baking soda
- 1 teaspoon baking powder
- 1 teaspoon salt
- 2 large eggs, room temperature
- 1 cup buttermilk, room temperature
- 1 cup strong black coffee, cooled
- ½ cup vegetable oil
- 1 teaspoon vanilla extract
For the Butterfinger Frosting
- 1 cup unsalted butter, softened
- 1 cup creamy peanut butter
- 4 cups powdered sugar, sifted
- ½ cup heavy cream
- 2 teaspoons vanilla extract
- ¼ teaspoon salt
- 1 cup crushed Butterfinger candy bars
For the Topping
- 1½ cups crushed Butterfinger candy bars
- ¼ cup mini chocolate chips
- 2 tablespoons chopped peanuts
Equipment Needed
 2")
Creating our spectacular Butterfinger cake requires essential kitchen tools that ensure perfect results every time. We recommend gathering all equipment before starting to streamline the baking process.
Large Mixing Bowls serve as our foundation for combining ingredients thoroughly. We need at least two bowls to separate wet and dry ingredients properly.
Electric Hand Mixer or Stand Mixer helps us achieve the perfect texture for both cake batter and frosting. Stand mixers work exceptionally well for the peanut butter frosting since they provide consistent mixing power.
9×13 Inch Cake Pan creates the ideal rectangular shape for our Butterfinger masterpiece. We can also use an 8-inch springform pan for a round presentation that looks elegant at special gatherings.
Fork or Wooden Spoon becomes crucial for poking holes throughout the warm cake. This step allows our sweetened condensed milk mixture to penetrate deeply into every layer.
Measuring Cups and Spoons ensure accuracy with all ingredients from flour to vanilla extract. Precise measurements guarantee consistent results that match professional bakery standards.
Wire Cooling Rack prevents soggy bottoms by allowing proper air circulation around our finished cake. Proper cooling also makes frosting application much easier.
Offset Spatula gives us professional frosting techniques and smooth application across the entire surface. This tool helps create those picture perfect swirls that make our cake Instagram worthy.
Food Processor or Rolling Pin crushes Butterfinger candy bars to the perfect consistency. We want varied textures from fine crumbs to chunky pieces for maximum visual appeal and taste satisfaction.
Instructions
 4")
Follow these detailed steps to create our irresistible Butterfinger cake that combines rich chocolate flavors with that signature candy bar crunch. We’ll guide you through each stage to ensure perfect results every time.
Prep the Cake Batter
Preheat your oven to 350°F and generously grease your 9×13 inch cake pan with butter or cooking spray. In a large mixing bowl, combine 1¾ cups all-purpose flour, 2 cups granulated sugar, ¾ cup cocoa powder, 2 teaspoons baking soda, 1 teaspoon baking powder, and 1 teaspoon salt. Whisk these dry ingredients together until evenly distributed.
Create a well in the center of the dry ingredients and add 2 large eggs, 1 cup buttermilk, ½ cup vegetable oil, and 2 teaspoons vanilla extract. Using your electric mixer on medium speed, beat the mixture for 2 minutes until smooth and well combined. Gradually add 1 cup hot water while mixing on low speed until the batter is thin and fully incorporated.
Bake the Cake
Pour the prepared batter into your greased cake pan, spreading it evenly with a spatula. Bake for 30-35 minutes or until a toothpick inserted in the center comes out clean. Remove the cake from the oven and immediately use a wooden skewer to poke holes evenly across the surface, spacing them about 1 inch apart.
While the cake is still warm, combine ¾ cup sweetened condensed milk with ¼ cup caramel sauce in a small bowl. Pour this mixture slowly over the warm cake, allowing it to seep into the holes. Let the cake cool completely at room temperature for at least 2 hours.
Make the Butterfinger Frosting
In a large mixing bowl, beat ½ cup softened unsalted butter and ½ cup creamy peanut butter with your electric mixer until light and fluffy, about 3 minutes. Gradually add 3 cups powdered sugar, alternating with 3-4 tablespoons heavy cream, beating on low speed initially then increasing to medium speed.
Add 1 teaspoon vanilla extract and continue beating until the frosting reaches a smooth, spreadable consistency. Gently fold in 1 cup of crushed Butterfinger candy bars using a spatula, reserving additional crushed candy for the topping.
Assemble the Cake
Spread the Butterfinger frosting evenly over the completely cooled cake using an offset spatula, creating smooth, even strokes. Start from the center and work outward to achieve professional looking coverage. Sprinkle the remaining ½ cup crushed Butterfinger candy bars over the frosted surface, followed by 2 tablespoons mini chocolate chips and 2 tablespoons chopped peanuts.
Gently press the toppings into the frosting to ensure they adhere properly. Refrigerate the assembled cake for at least 30 minutes before serving to allow the frosting to set and the flavors to meld together perfectly.
Directions for Serving
 6")
We recommend chilling the completed Butterfinger cake in the refrigerator for at least 2 hours before serving to allow the flavors to meld and the frosting to set properly. This chilling period enhances the cake’s texture and makes cutting clean slices much easier.
Cut the cake into squares using a sharp knife that has been dipped in warm water and wiped clean between cuts. This technique prevents the frosting from sticking to the blade and ensures professional-looking portions. Each square should measure approximately 3×3 inches for generous servings.
Serve each portion on individual dessert plates and garnish with additional crushed Butterfinger candy if desired. We suggest adding a small dollop of whipped topping alongside each slice to complement the rich chocolate and peanut butter flavors.
Store any leftover cake covered in the refrigerator where it will maintain its freshness for up to 4 days. The cake actually improves in flavor after the first day as the sweetened condensed milk and caramel mixture continues to penetrate the cake layers.
For special occasions we recommend serving the cake slightly chilled rather than at room temperature to maintain the integrity of the frosting and toppings. The contrast between the cool creamy frosting and the moist cake creates an ideal dessert experience that showcases the distinctive Butterfinger crunch in every bite.
Storage Instructions
 8")
Proper storage keeps our Butterfinger cake fresh and maintains its delicious texture for days. We need to store the completed cake covered in the refrigerator due to the whipped topping and candy pieces that require cold temperatures to remain safe and maintain quality.
Refrigerator Storage
We store our finished Butterfinger cake in the refrigerator for optimal freshness and food safety. The cake keeps well for 3 to 7 days when properly covered with plastic wrap or stored in an airtight container. Our cake remains delicious throughout this period though the Butterfinger pieces will gradually soften and lose some of their signature crunch.
| Storage Method | Duration | Notes |
|---|---|---|
| Refrigerated (covered) | 3-7 days | Butterfinger pieces soften over time |
| Room temperature | Up to 3 days | Only for cakes without whipped toppings |
| Frozen (cake base only) | Up to 3 months | Add toppings after thawing |
Make Ahead Tips
We recommend storing only the cake base when preparing in advance to preserve the crunch of our Butterfinger topping. Store the unfrosted cake covered in the refrigerator and add the whipped topping and crushed candy pieces just before serving for maximum texture contrast.
Freezing Instructions
We can freeze our Butterfinger cake base for longer storage but should leave off the whipped topping and candy pieces as these components do not freeze well. Wrap the cake tightly in plastic wrap or store in an airtight freezer container for up to 3 months. Thaw the frozen cake overnight in the refrigerator before adding fresh whipped topping and chopped Butterfinger pieces.
Room Temperature Storage
We only store Butterfinger cake at room temperature when the recipe contains no whipped cream or perishable toppings. These versions keep for up to 3 days when tightly covered at room temperature before requiring refrigeration or consumption.
Make-Ahead Tips
 10")
Planning ahead transforms our Butterfinger cake experience into a stress-free celebration. We can prepare various components at different stages to streamline the process and enhance the final result.
Our cake layers freeze beautifully for up to two months when properly wrapped. After baking and cooling completely, we wrap each layer tightly in plastic wrap followed by aluminum foil. The caramel and sweetened condensed milk mixture can be added either before or after freezing, depending on our preference.
| Component | Make-Ahead Timeline | Storage Method |
|---|---|---|
| Baked Cake Layers | Up to 2 months | Freeze wrapped in plastic and foil |
| Frosting | 1 month refrigerated, 3 months frozen | Airtight container |
| Assembled Cake | 1 week refrigerated, 1 month frozen | Covered without fresh toppings |
We recommend making the frosting ahead of time for convenience. Our buttercream frosting stores in the refrigerator for up to one month or in the freezer for three months. Before using refrigerated frosting, we bring it to room temperature and rewhip it to restore the smooth texture.
The assembled cake benefits from advance preparation when we follow exact guidelines. We can refrigerate the completed cake for up to one week or freeze it for one month. But, we should wait to add fresh whipped cream and crushed Butterfinger pieces until just before serving to maintain optimal texture and crunch.
Timing the caramel absorption requires attention to detail. We poke holes in the warm cake using a fork or wooden skewer immediately after removing it from the oven. The cake should cool slightly but remain warm when we pour the caramel and condensed milk mixture over it for maximum absorption into the layers.
Our final assembly strategy involves refrigerating the completed cake for at least one hour before serving. This resting period allows the flavors to meld beautifully and helps the topping set properly. We always add the final garnish of fresh crushed Butterfinger and any additional toppings right before presentation to ensure the signature crunch remains intact.
Variations and Substitutions
 12")
We can customize our Butterfinger cake in many ways to suit different tastes and dietary preferences. The beauty of this recipe lies in its flexibility and adaptability to various ingredients and flavor profiles.
Cake Base Options
Our chocolate cake base creates the perfect foundation, but we can substitute yellow or vanilla cake mix for a milder flavor profile. This substitution works particularly well when we want the Butterfinger flavor to be the dominant taste. We recommend using the same measurements and following identical mixing instructions regardless of which cake base we choose.
Caramel Variations
Store-bought caramel sauce offers convenience, but we can elevate our cake by making homemade caramel for deeper flavor complexity. A jar of caramel ice cream topping provides another excellent option that pours easily through the holes in our poke cake. We can also substitute dulce de leche for the sweetened condensed milk to create a richer caramel flavor throughout the cake.
Frosting Alternatives
Traditional whipped cream creates a light topping, but we can substitute Cool Whip for easier preparation and longer stability. Peanut butter whipped cream enhances the candy bar flavor by mixing creamy peanut butter directly into our whipped topping. For those preferring richer textures, peanut butter cream cheese frosting delivers more pronounced peanut butter taste and firmer consistency than standard whipped toppings.
Candy Substitutions
Chopped Butterfinger bars remain the classic choice, but Butterfinger baking bits offer more uniform distribution and easier incorporation. Heath bars provide an excellent substitute when Butterfinger products are unavailable, though the flavor profile shifts slightly toward toffee. We can crush any candy-coated peanut butter chocolate bars to achieve similar results while maintaining the signature crunch our cake requires.
Liquid Additions
Sweetened condensed milk creates moisture and sweetness, but we can omit it entirely for a less sweet version. Combining both caramel sauce and sweetened condensed milk maximizes flavor absorption into our poke cake holes. We recommend using one or both liquids based on desired sweetness levels and moisture preferences.
Temperature and Texture Considerations
Serving our cake chilled maintains the integrity of whipped toppings and allows flavors to meld properly. Room temperature serving works best when using cream cheese based frostings that hold their shape without refrigeration. We can store completed cakes in the refrigerator for up to one day for optimal texture, though longer storage may soften the candy pieces.
Conclusion
This Butterfinger cake recipe delivers everything we’ve promised – a show-stopping dessert that’s surprisingly simple to create. With its rich chocolate base creamy peanut butter frosting and signature candy crunch it’s bound to become your go-to recipe for special occasions.
The beauty of this cake lies in its flexibility. Whether you’re following our exact recipe or experimenting with the variations we’ve shared you’ll create something truly memorable. The make-ahead tips ensure you can prepare this impressive dessert without stress.
We’re confident this Butterfinger cake will earn rave reviews from family and friends. The combination of familiar flavors presented in an elegant format makes it perfect for everything from birthday parties to holiday gatherings. Happy baking!
Frequently Asked Questions
What makes this Butterfinger cake special?
This Butterfinger cake combines moist chocolate cake layers with creamy peanut butter frosting and crunchy Butterfinger candy pieces. The recipe creates a perfect balance of chocolate richness and peanut butter flavor, topped with a delightful crunch that mimics the popular candy bar. It’s elegant enough for celebrations yet easy enough for beginners.
What ingredients do I need for the Butterfinger cake?
The main ingredients include all-purpose flour, granulated sugar, cocoa powder, unsalted butter, creamy peanut butter, powdered sugar, and crushed Butterfinger candy bars. You’ll also need sweetened condensed milk, caramel sauce, mini chocolate chips, and chopped peanuts for toppings. All ingredients are easily available at local grocery stores.
What kitchen equipment is essential for making this cake?
You’ll need large mixing bowls, an electric hand mixer or stand mixer, and a 9×13 inch cake pan. Additional tools include measuring cups, a wire cooling rack, an offset spatula for frosting, and a food processor or rolling pin for crushing Butterfinger bars. Having all equipment ready beforehand streamlines the baking process.
How long should I chill the cake before serving?
The Butterfinger cake should be refrigerated for at least 2 hours before serving to allow flavors to meld and frosting to set properly. For best results, chill for up to 4 hours. This helps maintain the integrity of the frosting and toppings while enhancing the overall flavor profile of the dessert.
How do I store leftover Butterfinger cake?
Store the completed cake covered in the refrigerator for 3-7 days for optimal freshness. The cake can be stored at room temperature for up to 3 days if it doesn’t contain whipped toppings. For longer storage, freeze the unfrosted cake base for up to 3 months, adding toppings after thawing.
Can I make this cake ahead of time?
Yes, you can prepare components in advance. Cake layers can be frozen for up to two months when properly wrapped. The frosting stores in the refrigerator for one month or freezer for three months. For best results, assemble the cake and add fresh toppings just before serving to maintain texture and crunch.
What variations can I make to this recipe?
You can substitute the chocolate cake base with yellow or vanilla cake mix for different flavors. Alternative candy bars can replace Butterfinger, and different frosting flavors work well too. You can also adjust the caramel sauce or add different nuts and toppings to customize the cake to your preferences.
How do I get clean slices when cutting the cake?
Use a warm knife to cut the chilled cake into clean 3×3 inch squares. Run the knife under warm water and dry it between cuts. This prevents the frosting from sticking to the blade and ensures neat, professional-looking slices. Serve each portion with additional crushed Butterfinger as garnish.


