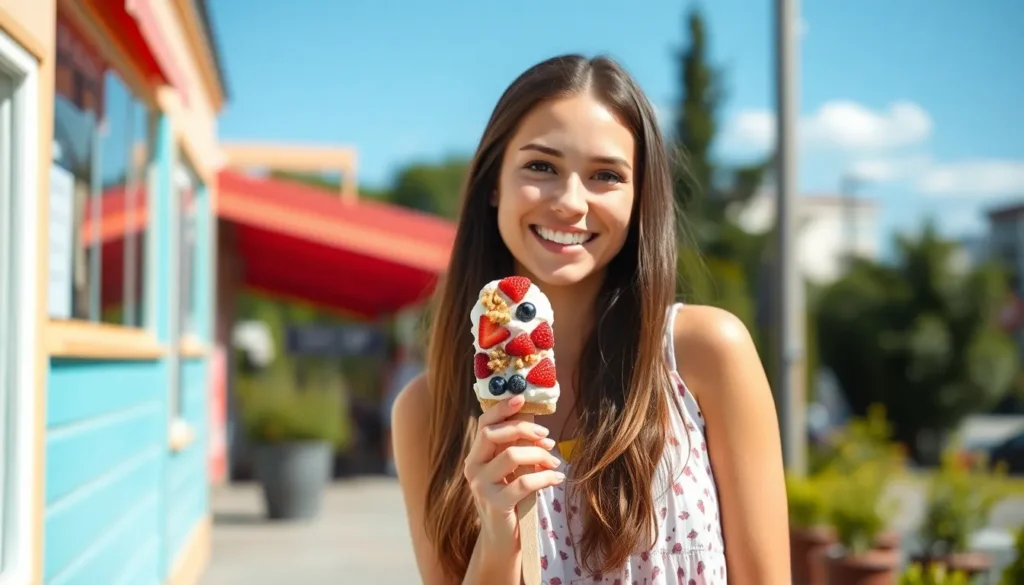
We’ve discovered the perfect solution for your summer dessert cravings that won’t derail your healthy eating goals. These frozen yogurt bars combine the creamy satisfaction of ice cream with the nutritional benefits of yogurt, creating a guilt-free treat that’s both refreshing and delicious.
What makes these bars truly special is their incredible versatility. We can customize them with endless flavor combinations – from classic vanilla swirled with fresh berries to indulgent chocolate chip cookie dough. The best part? They’re surprisingly simple to make at home with just a few basic ingredients and minimal prep time.
Not only do these frozen treats satisfy your sweet tooth, but they’re also packed with probiotics and protein that’ll keep you feeling satisfied. Whether you’re hosting a summer barbecue or simply need a cool afternoon snack, these homemade frozen yogurt bars deliver restaurant-quality results right from your own freezer.
Ingredients
We’ve kept our frozen yogurt bar recipe simple with just a handful of wholesome ingredients that deliver maximum flavor and nutrition. These basic components create the perfect foundation for customizable frozen treats that everyone will love.
For the Yogurt Base
- 2 cups plain Greek yogurt (full-fat or 2% for creamiest texture)
- 1/3 cup honey or pure maple syrup
- 1 teaspoon vanilla extract
- 2 tablespoons fresh lemon juice
- Pinch of sea salt
For the Toppings and Mix-ins
- 1/2 cup fresh berries (strawberries, blueberries, or raspberries)
- 1/4 cup chopped nuts (almonds, walnuts, or pistachios)
- 2 tablespoons mini dark chocolate chips
- 1 tablespoon chia seeds or flax seeds
- 2 tablespoons granola clusters
- 1 tablespoon coconut flakes (unsweetened)
- Fresh mint leaves for garnish (optional)
Equipment Needed

Creating frozen yogurt bars at home requires exact equipment to ensure professional results and efficient preparation. We recommend gathering these essential items before starting your frozen yogurt bar project.
Core Equipment
Frozen Yogurt Bar Molds or Pans serve as the foundation for shaping your treats. Silicone molds work exceptionally well because they allow easy removal without breaking the bars. Alternatively, we can use a standard 9×13 inch baking pan lined with parchment paper for cutting bars after freezing.
Mixing Equipment includes a medium mixing bowl and whisk or electric mixer for combining ingredients smoothly. The Greek yogurt base requires thorough mixing to achieve the creamy texture that makes these bars irresistible.
Commercial Equipment for High Volume Production
For those considering larger scale production, commercial frozen yogurt machines become essential. These machines must be selected based on production capacity and consistency requirements.
| Equipment Type | Production Capacity | Best Use |
|---|---|---|
| Low-volume machines | 4 or fewer servings per minute | Small operations |
| Medium-volume machines | 4-8 servings per minute | Self-serve bars |
| High-volume machines | 8+ servings per minute | Commercial operations |
Refrigeration and Storage
Reach-in Refrigerators store yogurt mixes and refrigerated toppings before service. These units maintain optimal temperature for ingredient freshness and food safety compliance.
Reach-in Freezers preserve pre-prepared items like additional frozen yogurt bar batches and cold toppings. Proper freezer storage extends product shelf life and maintains quality.
Serving and Presentation Equipment
Toppings Bar Setup includes compartments for dry and fresh toppings when serving frozen yogurt bars at gatherings. Dispensers for syrups and bins for candy and fruit enhance the self-serve experience.
Cups, Lids, and Spoons in various sizes accommodate different serving preferences. Standard 16 oz cups work well for self-serve portions, while eco-friendly spoons support sustainable practices.
Kitchen Preparation Tools
Cutting Tools such as sharp knives and cutting boards prepare fresh fruit toppings safely. Food-grade buckets store prepared ingredients while maintaining sanitation standards.
Three-Compartment Sink handles cleaning and sanitation requirements, ensuring all equipment meets food safety standards throughout the preparation process.
Instructions

Now that we have gathered our ingredients and equipment let’s walk through the simple process of creating these delicious frozen yogurt bars. Each step builds upon the previous one to ensure perfectly textured and flavorful results.
Prep the Molds
We begin by preparing our molds for the freezing process. For popsicle molds simply ensure they are clean and dry with no additional preparation needed. When using a baking sheet we line it with parchment paper to prevent sticking and make removal effortless. This preparation step ensures our frozen yogurt bars will release cleanly once they’re fully set.
Make the Yogurt Mixture
Creating the base mixture requires combining our yogurt with sweeteners and flavor enhancers. We start with Greek yogurt or coconut yogurt as our foundation then add protein powder maple syrup honey and vanilla extract to boost both flavor and nutritional value. For those preferring simplicity we can use just yogurt and honey for a clean taste. Mix these ingredients thoroughly until the texture becomes smooth and well incorporated.
Add Mix-ins and Flavors
Mix-ins transform our basic yogurt base into exciting flavor combinations. Fresh fruit like strawberries and blueberries provide natural sweetness and vibrant color while granola adds satisfying crunch. Spices like cinnamon introduce warm notes that complement the creamy yogurt base. For indulgent variations we incorporate peanut butter and banana creating a creamy protein rich twist that appeals to all ages.
Fill the Molds
Filling requires different techniques depending on our chosen mold type. For popsicle molds we pour the yogurt mixture carefully leaving space for expansion during freezing. When using a baking sheet we spread the mixture evenly across the parchment lined surface ensuring consistent thickness. Some recipes benefit from layering where we add yogurt followed by mix-ins then another yogurt layer to create visual appeal and flavor distribution.
Insert the Sticks
Popsicle stick insertion happens at the optimal moment for stability. We insert sticks into the yogurt layer when the mixture has begun to set but remains soft enough for easy penetration. This timing prevents sticks from sinking completely while ensuring they stay securely in place during the freezing process.
Freeze the Bars
The freezing stage requires patience for best results. We place our filled molds or baking sheet in the freezer for at least 3 hours allowing complete solidification. This timeframe ensures our bars maintain their shape during removal and eating. Once frozen solid we remove bars from popsicle molds or cut sheet frozen mixture into individual portions before serving.
Directions for Unmolding

Successfully removing our frozen yogurt bars from their molds requires proper timing and technique to ensure clean results without breaking. We recommend removing the bars from the freezer and allowing them to thaw for a few minutes on the counter to make them easier to handle.
Removing Bars from Baking Pans
When we use a lined baking pan method, we start by lifting the parchment paper edges to remove the entire frozen block from the pan. Using a sharp knife, we score the surface where we want to cut before making the actual cuts. This scoring technique prevents cracking and ensures uniform bar sizes. We cut along those scored lines with steady pressure to create clean edges.
Unmolding from Popsicle Molds
For popsicle style molds, we simply pull out the frozen yogurt bars from the molds once they reach complete solidification. Silicone molds release most easily when we gently twist the base while pulling the stick. If bars resist removal, we run the outside of the mold under lukewarm water for 10 to 15 seconds to loosen the edges.
Handling Tips for Clean Results
We handle unmolded bars minimally to prevent melting from body heat. Working quickly prevents surface melting that can make bars sticky and difficult to store. If bars feel too soft during unmolding, we return them to the freezer for an additional 30 minutes before attempting removal again.
Flavor Variations

Once you’ve mastered the basic frozen yogurt bar technique, endless flavor possibilities await your creativity. These popular variations transform your simple yogurt base into gourmet frozen treats that rival any store-bought option.
Berry Bliss Bars
We combine the natural sweetness of mixed berries to create these antioxidant-rich frozen treats. Fresh strawberries, blueberries, and raspberries provide vibrant color and bursts of fruity flavor in every bite. Simply fold 1 cup of mixed berries into your prepared yogurt base, reserving some whole berries for pressing into the top before freezing. The berries release their juices during the freezing process, creating beautiful marbled patterns throughout the bars.
Chocolate Chip Delight
Chocolate lovers will appreciate this indulgent variation that maintains the healthy benefits of our yogurt base. We recommend using mini dark chocolate chips for the best distribution and flavor balance. Mix 1/2 cup of mini chocolate chips into your yogurt mixture, ensuring even distribution throughout. The chips remain perfectly chewy even when frozen, providing delightful texture contrast against the smooth yogurt base.
Tropical Paradise
Transport yourself to an island getaway with this exotic flavor combination featuring pineapple, mango, and coconut. We blend 1/2 cup of diced fresh pineapple and 1/2 cup of diced mango into the yogurt base along with 2 tablespoons of unsweetened coconut flakes. The tropical fruits add natural sweetness while the coconut provides a subtle nutty flavor that complements the creamy yogurt perfectly.
Peanut Butter Banana
This protein-packed variation combines the classic flavor pairing of peanut butter and banana for a satisfying treat. We recommend using natural peanut butter for the cleanest flavor profile. Mash 1 large ripe banana and swirl it into your yogurt base along with 3 tablespoons of smooth peanut butter. The banana adds natural sweetness while the peanut butter contributes healthy fats and additional protein to make these bars extra filling.
Make-Ahead Instructions

Planning ahead with frozen yogurt bars transforms your weekly meal prep into a delicious convenience strategy. We recommend preparing these bars during weekend meal prep sessions to have healthy treats ready throughout the week.
Batch Preparation Timeline
| Preparation Stage | Time Required | Storage Duration |
|---|---|---|
| Initial mixing and molding | 15-20 minutes | N/A |
| Freezing time | 3-6 hours | N/A |
| Optimal texture development | Overnight | N/A |
| Maximum storage | N/A | 1-3 months |
Storage Container Setup
We begin by preparing proper storage containers before making our bars. Line your chosen molds or baking sheets with parchment paper for effortless removal later. Silicone molds work exceptionally well since they flex to release frozen bars without breaking.
Freezing Process
After filling your molds with the yogurt mixture and desired toppings, we place them in the freezer on a level surface. The bars require a minimum of 3 hours to achieve a firm texture, though overnight freezing delivers the best results. During this extended freezing period, the yogurt develops its optimal creamy yet solid consistency.
Long-Term Storage Strategy
Once completely frozen, we remove the bars from their molds and transfer them to airtight containers or freezer bags. This secondary storage method prevents freezer burn and maintains freshness for up to three months. Layer parchment paper between bars to prevent them from sticking together.
Serving Preparation
We allow frozen bars to thaw at room temperature for 2-3 minutes before serving. This brief thawing period makes cutting easier and prevents the bars from being too hard to bite. The slight softening enhances the creamy texture while maintaining the bar’s structural integrity.
Weekly Meal Prep Integration
These bars integrate seamlessly into weekly meal preparation routines. We typically make 2-3 different flavor variations simultaneously, storing them in labeled containers for easy identification. This approach provides variety throughout the week while maximizing our prep time efficiency. The extended storage capability means we can prepare larger batches monthly rather than weekly if preferred.
Storage Tips

We recommend storing your frozen yogurt bars properly to maintain their quality and extend their shelf life. These storage methods will help preserve the creamy texture and prevent unwanted freezer burn.
Optimal Storage Methods
Airtight containers provide the best protection for our frozen yogurt bars. We place the bars in sealed containers to maintain freshness and prevent ice crystals from forming on the surface. This method consistently delivers the best results for long-term storage.
Freezer bags offer another excellent storage option that we frequently use. We slide individual bars into freezer bags to keep them separate and prevent sticking. This approach makes it easy to grab single servings when needed.
Parchment paper separation becomes essential when storing multiple bars in one container. We layer parchment paper between each bar to prevent them from freezing together. This simple step saves time and prevents damage when removing individual bars.
Storage Duration Guidelines
Our frozen yogurt bars maintain optimal quality when stored for exact timeframes:
| Storage Method | Duration | Quality Level |
|---|---|---|
| Airtight containers | 1-3 months | Excellent |
| Freezer bags | 1-3 months | Excellent |
| Single container with parchment | 2 weeks | Good |
We find that bars stored for 1 to 3 months retain their best texture and flavor when properly sealed. Some recipes suggest consuming within 2 weeks for peak freshness, though our experience shows longer storage periods work well with proper technique.
Essential Handling Guidelines
Freezer-only storage remains non-negotiable for these treats. We never store frozen yogurt bars in the refrigerator or at room temperature, as this causes immediate melting and structural breakdown.
Pre-serving preparation enhances the eating experience significantly. We remove bars from the freezer and let them sit at room temperature for 2-3 minutes before serving. This brief thawing period makes the bars easier to bite and improves their creamy texture.
Minimal handling during storage prevents melting and maintains shape integrity. We use clean utensils or gloves when transferring bars between containers to avoid introducing moisture or heat from our hands.
Serving Suggestions

Our frozen yogurt bars shine brightest when we present them with thoughtful accompaniments and creative toppings. The beauty of these bars lies in their versatility, allowing us to create customized experiences for every palate and occasion.
Toppings Bar Setup
We recommend creating a toppings station similar to a parfait or sundae bar for maximum enjoyment. Fresh berries work wonderfully as toppings, with strawberries, blueberries, and raspberries providing natural sweetness and vibrant color. Sliced bananas and kiwi add tropical flair while delivering essential nutrients. Chopped nuts like peanuts, walnuts, almonds, and cashews contribute satisfying crunch and healthy fats. Chocolate chips, shredded coconut, and granola clusters round out our recommended toppings selection.
Flavor Enhancement Options
We can elevate our bars by incorporating additional sweeteners and flavorings before freezing. A tablespoon of maple syrup or honey stirred into the yogurt base creates deeper sweetness. Flavored jams work beautifully for fruit-forward profiles. Lemon zest brightens the overall taste while vanilla extract adds warmth. Peanut butter mixed into the base creates rich, protein-packed variations that satisfy longer.
Presentation Techniques
Our bars should be served straight from the freezer for optimal texture. For gatherings, we cut larger sheets of frozen yogurt bark into bite-sized pieces or rectangles, then arrange them on attractive trays for guests to select freely. Individual portions work best when we use popsicle molds or small square containers with inserted sticks before freezing.
Meal Pairing Opportunities
These bars pair beautifully with breakfast items, making them perfect for morning enjoyment. They serve as excellent afternoon snacks when energy levels dip. As desserts, they provide a guilt-free ending to meals. We can also serve them alongside fresh fruit platters, granola bowls, or yogurt-based dips for more substantial snacking experiences during events.
Storage for Convenience
We wrap individual bars for quick grab-and-go snacking throughout the week. Storing them in airtight containers in the freezer maintains their quality while preventing freezer burn. This storage method supports our meal prep routines and ensures healthy treats remain readily available.
Dietary Adaptations
Our bars accommodate various dietary preferences effortlessly. We can substitute dairy yogurt with non-dairy alternatives for vegan guests. Gluten-free ingredients ensure those with sensitivities can enjoy these treats. Allergen-free components make them suitable for individuals with exact dietary restrictions while maintaining their delicious appeal.
Troubleshooting Common Issues

Making frozen yogurt bars at home can occasionally present challenges, but understanding common problems and their answers helps ensure consistent results. We’ve compiled the most frequent issues home cooks encounter along with practical fixes to keep your frozen treat production running smoothly.
Frozen Yogurt Base Problems
Mixture Won’t Freeze Properly
Temperature control plays a crucial role in achieving the perfect frozen yogurt bar texture. Check that your freezer maintains a consistent temperature below 0°F (-18°C). If the mixture remains too soft after the recommended freezing time, adjust your freezer settings or ensure adequate air circulation around the molds.
Icy Texture Instead of Creamy
Overrun adjustment can prevent icy crystals from forming in your bars. Mix the yogurt base thoroughly before pouring into molds to incorporate air properly. Adding a tablespoon of cornstarch or gelatin to the mixture helps create a smoother texture by preventing large ice crystal formation.
Mold and Equipment Issues
Bars Won’t Release from Molds
Hard frozen yogurt often makes removal difficult from standard molds. Allow the bars to sit at room temperature for 2-3 minutes before attempting removal. Silicone molds typically release more easily than plastic alternatives, but running warm water over the bottom of any mold for 10-15 seconds helps loosen stubborn bars.
Uneven Freezing
Power distribution in freezers can create hot spots that affect freezing consistency. Rotate your molds halfway through the freezing process to ensure even temperature exposure. Position molds in the center of freezer shelves rather than against walls where temperature fluctuations occur more frequently.
Production and Storage Challenges
Air Pockets in Finished Bars
Oversized air pockets can create uneven texture and weak spots in your bars. Tap molds gently on the counter after filling to release trapped air bubbles. For thicker mixtures, use a toothpick to swirl through the yogurt base and eliminate air pockets before freezing.
Freezer Burn Development
Low humidity and temperature fluctuations cause freezer burn on stored bars. Wrap finished bars individually in parchment paper before placing in airtight containers. This double protection method prevents ice crystal formation and maintains optimal texture for up to three months.
| Common Issue | Primary Cause | Solution Time | Prevention Method |
|---|---|---|---|
| Won’t freeze properly | Freezer temperature too high | 30-60 minutes | Check freezer at 0°F or below |
| Icy texture | Insufficient mixing | 5 minutes prep | Add cornstarch to base |
| Stuck in molds | Hard frozen product | 2-3 minutes thaw | Use silicone molds |
| Air pockets | Trapped air bubbles | 1 minute tapping | Gentle counter tapping |
| Freezer burn | Poor storage | Immediate wrapping | Parchment + airtight containers |
Equipment Maintenance
Drive Motor Overload
When using electric mixers for larger batches, overloaded motors may shut down automatically. Allow the motor to cool for 15-20 minutes before resuming operation. Mixing smaller quantities prevents strain on home kitchen equipment.
Inconsistent Results
Circuit breaker trips or power fluctuations can interrupt the freezing process. Check that your freezer circuit can handle the electrical load, especially when running multiple appliances simultaneously. Reset any tripped breakers and ensure stable power supply to your freezing equipment.
Regular maintenance prevents most common issues from occurring. Clean molds thoroughly after each use and store equipment in dry conditions to prevent damage that could affect future batches.
Conclusion
These homemade frozen yogurt bars prove that healthy treats don’t have to sacrifice flavor or satisfaction. We’ve shown you how simple ingredients can transform into gourmet-style desserts that rival store-bought options while delivering superior nutritional value.
The beauty of this recipe lies in its adaptability – whether we’re craving tropical flavors or classic chocolate chip our base formula accommodates every preference. With proper storage techniques and troubleshooting knowledge we can enjoy these protein-rich treats for months.
Making frozen yogurt bars at home puts us in complete control of ingredients quality and flavor combinations. We’re confident that once you try this recipe it’ll become a staple in your healthy dessert rotation bringing joy to family gatherings and personal indulgences alike.
Frequently Asked Questions
What ingredients do I need to make frozen yogurt bars?
You’ll need 2 cups of plain Greek yogurt, 1/3 cup of honey or pure maple syrup, 1 teaspoon of vanilla extract, 2 tablespoons of fresh lemon juice, and a pinch of sea salt. Optional toppings include fresh berries, chopped nuts, mini dark chocolate chips, chia seeds, granola clusters, and coconut flakes.
How long do frozen yogurt bars need to freeze?
Frozen yogurt bars should be frozen for at least 3 hours for proper consistency. However, overnight freezing (8-12 hours) yields the best results with optimal texture and firmness. Allow bars to thaw briefly before serving for enhanced creaminess.
How long can I store homemade frozen yogurt bars?
When stored properly in airtight containers or freezer bags, frozen yogurt bars can last 1-3 months in the freezer. If stored in a single container with parchment paper separation, consume within 2 weeks for best quality and taste.
What equipment do I need to make frozen yogurt bars at home?
Essential equipment includes frozen yogurt bar molds (preferably silicone for easy removal), a medium mixing bowl, and a whisk or electric mixer. You’ll also need proper freezer storage containers and parchment paper for separating multiple bars during storage.
Can I make different flavor variations of frozen yogurt bars?
Yes! Popular variations include Berry Bliss with mixed berries, Chocolate Chip Delight with mini dark chocolate chips, Tropical Paradise with pineapple and mango, and Peanut Butter Banana for a protein-packed treat. The basic yogurt base allows endless creative combinations.
How do I prevent my frozen yogurt bars from becoming icy?
Ensure proper mixing of ingredients to achieve a smooth, creamy texture before freezing. Use Greek yogurt for thickness, maintain consistent freezer temperature, and avoid over-handling the bars. Adding natural sweeteners like honey also helps prevent ice crystal formation.
Are frozen yogurt bars healthy?
Yes! These bars are rich in probiotics and protein from Greek yogurt, making them a nutritious alternative to traditional ice cream. They provide the creamy satisfaction of frozen desserts while offering digestive benefits and essential nutrients, making them a guilt-free treat option.
Can I make frozen yogurt bars dairy-free?
Absolutely! Substitute regular Greek yogurt with non-dairy alternatives like coconut yogurt, almond yogurt, or cashew yogurt. Use plant-based sweeteners and ensure all mix-ins are dairy-free to accommodate vegan diets and lactose intolerance.


