Nothing beats the aroma of freshly baked cherry danish wafting through your kitchen on a weekend morning. This beloved Danish pastry combines flaky buttery layers with sweet-tart cherry filling that’ll make your taste buds dance with joy. We’ve perfected this classic recipe to bring you bakery-quality results right from your home oven.
Originally from Denmark but popularized in American bakeries, cherry danish represents the perfect marriage of technique and flavor. The secret lies in creating those signature laminated dough layers that puff up beautifully while baking, creating pockets of buttery goodness around the vibrant cherry center.
We’ll guide you through each step to achieve that coveted golden-brown exterior and tender, flaky interior that makes cherry danish irresistible. Whether you’re hosting brunch or treating yourself to something special, this homemade version surpasses anything you’ll find at the store.
Ingredients
Creating bakery-quality cherry danish requires precise ingredients for each component. We’ve organized our ingredients by their exact purpose to ensure perfect results.
For the Danish Dough
- 2 cups all-purpose flour
- 1/4 cup granulated sugar
- 1 teaspoon active dry yeast
- 1/2 teaspoon salt
- 1/2 cup whole milk, warmed to 110°F
- 1 large egg, room temperature
- 2 tablespoons melted unsalted butter
- 1 cup cold unsalted butter, for laminating
For the Cherry Filling
- 2 cups fresh or frozen cherries, pitted and chopped
- 1/3 cup granulated sugar
- 2 tablespoons cornstarch
- 1 tablespoon fresh lemon juice
- 1/2 teaspoon vanilla extract
- 1/4 teaspoon almond extract
- Pinch of salt
For the Cream Cheese Filling
- 8 ounces cream cheese, softened
- 1/4 cup powdered sugar
- 1 large egg yolk
- 1 teaspoon vanilla extract
- 1 tablespoon heavy cream
For the Egg Wash and Topping
- 1 large egg
- 2 tablespoons heavy cream
- 2 tablespoons sliced almonds
- 1 tablespoon coarse sugar for sprinkling
Equipment Needed

Creating bakery-quality cherry danish at home requires the right tools to ensure optimal results. We’ve compiled a comprehensive list of essential equipment that will help you achieve those perfect flaky layers and professional presentation.
Essential Baking Tools
Large Mixing Bowl serves as our primary workspace for combining the danish dough ingredients. A capacity of at least 4 quarts allows adequate room for mixing without spillage during the initial dough formation process.
Stand Mixer with Dough Hook streamlines the kneading process and ensures consistent dough texture. While hand kneading remains possible, a stand mixer reduces preparation time and delivers more reliable results for the laminated dough base.
Rolling Pin becomes crucial for creating the thin, even layers that define authentic danish pastry. A traditional wooden rolling pin or marble version provides the weight and control needed for proper dough lamination.
Baking Sheet accommodates multiple danish portions during the baking process. We recommend using heavy-duty aluminum sheets that distribute heat evenly and prevent hot spots that could cause uneven browning.
Preparation and Shaping Equipment
Parchment Paper prevents the pastries from sticking to baking surfaces while promoting easy removal after baking. This non-stick barrier also simplifies cleanup and maintains the danish’s delicate structure during transfer.
Pizza Cutter or Sharp Knife enables precise cutting of puff pastry into uniform rectangles. Clean, straight cuts prevent the pastry edges from sealing improperly and ensure professional-looking finished products.
Pastry Brush applies egg wash evenly across the danish surfaces for that signature golden-brown finish. A natural bristle brush distributes the wash without tearing the delicate pastry layers.
Kitchen Scale measures ingredients with accuracy that cup measurements cannot match. Professional baking relies on weight measurements for consistent results, particularly when working with flour and butter ratios in laminated dough.
Instructions

Now we’ll walk through each step to create these bakery-quality cherry danish pastries. Follow these detailed instructions to achieve perfectly flaky layers and delicious fillings.
Prep the Dough
We begin by activating our yeast in the warmed milk mixed with a pinch of granulated sugar. Let this mixture sit for 5-10 minutes until foamy. In our large mixing bowl, we combine the all-purpose flour, remaining granulated sugar, and salt. Add the activated yeast mixture, egg, and melted butter to the dry ingredients. Using our stand mixer with the dough hook attachment, we knead the mixture on medium speed for 8-10 minutes until the dough becomes smooth and elastic.
Transfer the dough to a lightly floured surface and roll it into a rectangle approximately 12×8 inches. Take our cold unsalted butter and place it between two sheets of parchment paper, then pound and roll it into a 6×4 inch rectangle. Position the butter rectangle in the center of our dough rectangle. We fold the dough over the butter, sealing the edges completely to encase the butter. Roll the dough gently into a larger rectangle, then fold it into thirds like a letter. Wrap in plastic wrap and refrigerate for 30 minutes. Repeat this rolling and folding process two more times, chilling between each fold.
Make the Cherry Filling
We start by combining our fresh or frozen cherries with granulated sugar in a medium saucepan over medium heat. Cook the mixture for 5-7 minutes, stirring occasionally until the cherries release their juices and begin to soften. In a small bowl, we whisk together the cornstarch with 2 tablespoons of cold water to create a slurry.
Add the cornstarch slurry to our cherry mixture along with the fresh lemon juice, vanilla extract, almond extract, and salt. Continue cooking for 3-4 minutes, stirring constantly until the mixture thickens and becomes glossy. The filling should coat the back of a spoon when properly thickened. Remove from heat and let the cherry filling cool completely before using.
Prepare the Cream Cheese Filling
We combine the softened cream cheese and powdered sugar in our mixing bowl. Using the paddle attachment, we beat the mixture on medium speed for 2-3 minutes until completely smooth and creamy. Add the egg yolk, vanilla extract, and heavy cream to our cream cheese mixture.
Beat the ingredients for another 1-2 minutes until the filling is light and spreadable. The texture should be smooth without any lumps of cream cheese remaining. Set aside until ready to assemble our danish pastries.
Assemble the Danish
We remove our chilled dough from the refrigerator and roll it out on a lightly floured surface to approximately 1/4 inch thickness. Using our pizza cutter or sharp knife, we cut the dough into 4-inch squares or rectangles. Place each piece on our parchment-lined baking sheet, spacing them about 2 inches apart.
Spoon about 1 tablespoon of cream cheese filling into the center of each dough piece, keeping it within the borders. Top the cream cheese with approximately 1 tablespoon of our cooled cherry filling. We can create decorative edges by making small cuts in the corners and folding them over the filling, or by twisting the edges for an attractive presentation.
Final Prep and Baking
We preheat our oven to 375°F while the assembled danish rest at room temperature for 15-20 minutes. In a small bowl, we whisk together the egg and heavy cream to create our egg wash. Using our pastry brush, we carefully brush the exposed pastry edges with the egg wash, avoiding the fillings.
Sprinkle the sliced almonds and coarse sugar over the egg-washed surfaces for added texture and flavor. Bake the danish for 15-20 minutes until the pastry is golden brown and flaky. The edges should be crisp and the bottoms should sound hollow when tapped. Allow the danish to cool on the baking sheet for 5 minutes before transferring to a wire rack.
Directions for Serving

Our freshly baked cherry danish tastes best when served immediately while the pastry remains crisp and the filling stays warm. We recommend allowing the danish to cool for just 5 minutes after removing from the oven to prevent burning your tongue on the hot cherry filling.
Immediate Serving Steps:
- Cool Briefly: Let danish rest on the baking sheet for 5 minutes to set the filling
- Dust with Sugar: Sprinkle powdered sugar generously over each pastry while still warm
- Transfer Carefully: Use a spatula to move danish to serving plates to maintain their shape
- Serve Warm: Present immediately for the best texture contrast between flaky pastry and soft filling
Make-Ahead Serving Options:
We can prepare these danish for later enjoyment by following proper storage techniques. Store cooled pastries in an airtight container at room temperature for up to 3 days to maintain peak freshness. For longer storage we recommend freezing the danish in a single layer within a freezer bag.
Reheating Instructions:
Reheat room temperature danish in a 350°F oven for 3-5 minutes to restore crispness. Frozen danish should thaw at room temperature for 30 minutes before reheating using the same oven method. Avoid microwaving as this creates soggy pastry layers.
Presentation Tips:
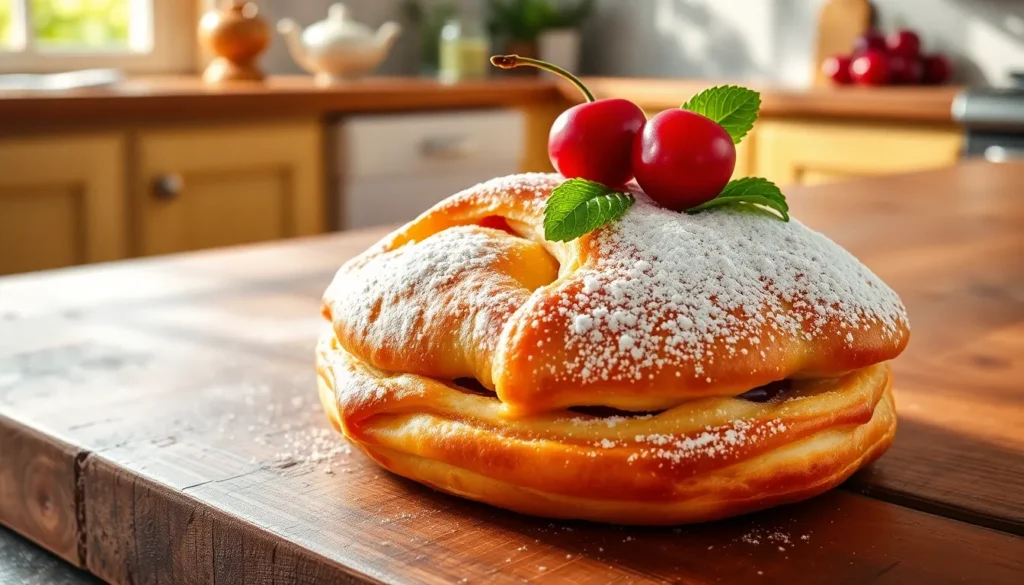
Arrange danish on a decorative platter with fresh cherries and mint leaves for an elegant brunch display. We suggest pairing these pastries with hot coffee or tea to complement the sweet and tart flavors. Individual serving plates work best to showcase the beautiful golden layers and colorful cherry filling that peek through the pastry folds.
Storage and Make-Ahead Tips

Proper storage techniques will keep your cherry danish fresh and delicious for days. We’ll share the best methods to preserve that perfect flaky texture and sweet cherry flavor.
Storing Leftover Danish
Store your danish at room temperature in a paper bag or airtight container for up to one day to prevent the pastry from drying out. This method maintains the ideal balance between crispness and moisture retention.
Refrigerate leftover cherry danish in an airtight container for up to three days when you need longer storage. We recommend this approach for maintaining freshness while extending the pastry’s life beyond the first day.
Freeze cooled pastries for up to three months by placing them in a single layer within a freezer bag or wrapping each danish individually in plastic wrap before storing in a freezer-safe container. Thaw frozen danish in the refrigerator before reheating to ensure even temperature distribution.
| Storage Method | Duration | Container Type |
|---|---|---|
| Room Temperature | 1 day | Paper bag or airtight container |
| Refrigeration | 3 days | Airtight container |
| Freezing | 3 months | Freezer bag or wrapped individually |
Make-Ahead Instructions
Prepare the dough and cherry filling components ahead of time, then assemble and bake the danish when you’re ready to serve them fresh. This strategy allows you to enjoy homemade pastries without spending hours in the kitchen on busy mornings.
Bake the danish completely, allow them to cool, and freeze them for convenient future enjoyment. Thaw frozen baked danish in the refrigerator overnight before reheating.
Reheat leftover or thawed danish in an oven, air fryer, or toaster oven at 400°F for a few minutes to restore the pastry’s crispy exterior. Monitor the reheating process carefully to avoid overcooking and maintain the delicate texture we worked so hard to achieve.
Tips for Perfect Cherry Danish

Our years of perfecting cherry danish have taught us that success lies in mastering a few critical techniques. Temperature control becomes the foundation of exceptional pastry making.
Chill the Pastry Before Baking
We always chill our assembled danish for at least 30 minutes before baking. This crucial step helps maintain the pastry’s shape during baking and improves the flaky texture we all love. The cold butter layers create steam pockets that result in those beautiful, crispy layers.
Choose Your Cherries Wisely
Fresh cherries deliver the best flavor and texture for our danish filling. When fresh cherries aren’t available, we reach for frozen cherries rather than canned varieties. Frozen cherries maintain their natural tartness and don’t release excess liquid that could make our pastry soggy.
Balance Your Fillings Perfectly
Finding the right amount of filling requires careful attention. Too much cherry or cream cheese filling will cause the pastry to become soggy and lose its delicate structure. We use approximately 1 tablespoon of each filling per danish square to achieve the perfect balance of flavors without overwhelming the pastry.
Master the Baking Temperature
Moderate oven temperature ensures even baking without burning the delicate pastry or causing the filling to overflow. We bake our cherry danish at 375°F (190°C) for optimal results. This temperature allows the pastry to develop its golden color while cooking the filling completely.
Prevent Soggy Bottoms
Creating a moisture barrier protects our pastry’s bottom layer. We lightly brush the dough with beaten egg before adding the cherry filling. This technique creates a seal that prevents fruit juices from penetrating the pastry layers.
Time Your Assembly
Working quickly during assembly prevents the butter layers from melting. We keep our work surface cool and handle the dough minimally once we’ve created the laminated layers. Room temperature dough becomes difficult to work with and won’t create the flaky texture we desire.
Variations and Substitutions

We’ve designed this cherry danish recipe to be incredibly adaptable, allowing you to customize the pastry based on your preferences and available ingredients. Our variations maintain the same delicious foundation while offering exciting alternatives that suit different tastes and dietary needs.
Pastry Base Options
Puff Pastry Alternative: We can substitute our homemade danish dough with store-bought puff pastry for a quicker preparation. This option creates equally flaky layers while reducing our prep time by several hours. Thaw the puff pastry completely before rolling and cutting into squares.
Crescent Roll Variation: For an even faster version, we recommend using refrigerated crescent roll dough. This substitution works particularly well with cherry pie filling, creating a more casual but equally delicious danish perfect for busy mornings.
Fruit Substitutions
Seasonal Fruit Options: We can replace cherries with raspberries, blueberries, or strawberries depending on what’s in season. Fresh apricots work beautifully in summer, while cranberries add tartness during winter months.
Cherry Alternatives: When fresh cherries aren’t available, we substitute with frozen cherries (thawed and drained) or high-quality canned cherries in juice. Dried cherries rehydrated in warm water for 15 minutes also create excellent results.
| Fruit Option | Preparation Time | Sugar Adjustment | Best Season |
|---|---|---|---|
| Fresh Cherries | 15 minutes | Standard recipe | Summer |
| Frozen Cherries | 20 minutes | Reduce by 1 tbsp | Year-round |
| Raspberries | 10 minutes | Increase by 1 tbsp | Summer/Fall |
| Apricots | 12 minutes | Standard recipe | Summer |
Filling Variations
Cream Cheese Alternatives: We can replace our traditional cream cheese filling with mascarpone for a richer flavor, or use Greek yogurt mixed with powdered sugar for a lighter option. Ricotta cheese sweetened with honey creates a delightful Italian-inspired variation.
Extract Substitutions: Our recipe calls for almond extract, but we easily substitute vanilla extract for a more familiar flavor profile. Lemon zest adds brightness, while orange extract complements cherry flavors beautifully.
Spice Additions: We enhance the cherry filling with a pinch of cinnamon or cardamom for warmth. A small amount of ground ginger pairs exceptionally well with stone fruits like cherries and apricots.
Make-Ahead Substitutions
Pie Filling Shortcut: When time is limited, we use high-quality cherry pie filling instead of making our own. Look for brands with whole cherries and minimal additives for the best results.
Prepared Dough Options: Frozen danish dough from specialty bakery suppliers works excellently when homemade isn’t possible. We allow extra thawing time and follow the manufacturer’s rolling instructions.
These substitutions ensure we can enjoy fresh cherry danish regardless of ingredient availability or time constraints, maintaining the pastry’s signature flaky texture and sweet-tart flavor balance.
Conclusion
Creating homemade cherry danish transforms your kitchen into a bakery and fills your home with irresistible aromas. We’ve shown you that achieving professional-quality results isn’t impossible when you follow the right techniques and use quality ingredients.
The beauty of this recipe lies in its flexibility – you can prepare components ahead of time or customize with different fruits and fillings. Whether you’re planning a special brunch or simply treating yourself to something extraordinary the effort you put into making these flaky golden pastries will reward you with bakery-worthy results.
With proper storage techniques and reheating methods you’ll enjoy fresh-tasting danish for days. We’re confident that once you master this recipe you’ll find yourself returning to it again and again for those moments when only homemade excellence will do.
Frequently Asked Questions
What makes homemade cherry danish better than store-bought?
Homemade cherry danish offers superior flavor and texture with flaky, buttery layers and fresh cherry filling. You control the quality of ingredients, avoiding preservatives and artificial flavors. The laminated dough technique creates authentic bakery-style layers that are impossible to achieve with store-bought versions. Plus, you can customize the sweetness and filling to your preference.
Can I use frozen cherries instead of fresh ones?
Yes, frozen cherries work perfectly for this recipe. Thaw them completely and drain excess liquid before cooking to prevent soggy pastry. Frozen cherries may release more juice, so you might need slightly more cornstarch to achieve the proper filling consistency. The flavor remains excellent, making this a year-round treat.
How long does it take to make cherry danish from scratch?
The entire process takes about 4-5 hours, including chilling time for the laminated dough. Active preparation time is approximately 2 hours, with the remaining time for dough rest periods and chilling. The laminating process requires patience but creates the signature flaky layers that make homemade danish special.
Can I make the dough ahead of time?
Yes, you can prepare the laminated dough up to 2 days in advance. Wrap it tightly in plastic wrap and refrigerate. You can also freeze the prepared dough for up to 1 month. Allow frozen dough to thaw overnight in the refrigerator before rolling and assembling your danish.
What’s the best way to store leftover cherry danish?
Store cooled danish in an airtight container at room temperature for up to 3 days. For longer storage, wrap individually and freeze for up to 2 months. To restore crispness, reheat in a 350°F oven for 5-7 minutes. Avoid microwaving as it makes the pastry soggy.
Can I substitute the cream cheese filling with something else?
Absolutely! Try mascarpone cheese, Greek yogurt mixed with honey, or vanilla pastry cream. You can also use ricotta cheese sweetened with powdered sugar, or even skip the cream cheese entirely and use just the cherry filling for a simpler version while maintaining the delicious flavor profile.
What temperature should I bake cherry danish at?
Bake at 375°F (190°C) for 18-22 minutes until golden brown. This temperature ensures the pastry cooks through while achieving a beautiful golden color. Avoid higher temperatures as they can burn the exterior before the inside is properly cooked, and lower temperatures may result in soggy pastry.
How do I prevent the bottom of my danish from getting soggy?
Create a moisture barrier by lightly brushing the dough with beaten egg before adding fillings. Don’t overfill with cherry mixture, and make sure your filling isn’t too wet. Bake on the lower oven rack for the first 10 minutes to ensure the bottom crisps up properly.
Can I use store-bought puff pastry instead of making dough?
Yes, high-quality frozen puff pastry makes an excellent shortcut. Thaw according to package directions and roll to your desired thickness. While the texture will be slightly different from traditional danish dough, you’ll still achieve delicious, flaky results with significantly less time and effort.
What’s the best way to serve cherry danish?
Serve warm or at room temperature, dusted with powdered sugar. They’re perfect for brunch, breakfast, or dessert. Pair with hot coffee, tea, or milk. For an elegant presentation, arrange on a platter with fresh cherries and mint leaves. They’re best enjoyed within a few hours of baking.


