We’ve all dreamed of sinking our teeth into the legendary chocolate cake from Roald Dahl’s beloved story Matilda. This isn’t just any ordinary dessert – it’s the towering masterpiece that made Bruce Bogtrotter famous and left readers craving a slice of their own.
Our version captures all the rich decadence described in Dahl’s magical tale. We’re talking about layers of moist chocolate sponge slathered in silky chocolate buttercream that’ll make you forget every diet you’ve ever attempted. This cake doesn’t mess around – it’s pure chocolate bliss from the first bite to the last crumb.
Whether you’re planning a themed party or simply want to indulge in some nostalgic baking we guarantee this recipe will transport you straight back to Miss Trunchbull’s office. Get ready to create the kind of chocolate cake that legends are made of.
What Makes Matilda’s Chocolate Cake Special
We believe this cake stands apart from ordinary chocolate desserts because of its incredible moisture and depth of flavor. The secret lies in our use of both cocoa powder and melted chocolate, creating layers of chocolate intensity that develop with each bite.
Our recipe incorporates coffee to enhance the chocolate notes without overwhelming the palate. The addition of buttermilk ensures the crumb stays tender and creates that signature melt-in-your-mouth texture that made Bruce Bogtrotter’s challenge so memorable.
We create the chocolate buttercream using real butter and high-quality cocoa, resulting in a frosting that’s neither too sweet nor too dense. This balance allows the chocolate flavor to shine through while providing the perfect complement to the moist cake layers.
The cake’s impressive size makes it worthy of any celebration. We design each layer to be substantial yet light, ensuring every slice delivers maximum chocolate satisfaction without feeling heavy or overly rich.
Temperature control during baking creates the perfect texture we’re after. Our method ensures even cooking throughout, preventing the dry edges or sunken centers that can plague other chocolate cake recipes.
We include exact techniques for achieving the glossy, smooth finish that makes this cake visually stunning. The frosting application method we recommend creates professional-looking results that capture the grandeur of the fictional cake from Dahl’s story.
The versatility of our recipe allows for customization while maintaining the core characteristics that make this cake special. Whether served at room temperature or slightly chilled, each slice delivers consistent flavor and texture that honors the beloved literary inspiration.
Essential Equipment and Tools

Creating Matilda’s legendary chocolate cake requires the right tools to achieve those perfect moist layers and silky buttercream frosting. We recommend gathering these essential items before starting your baking adventure.
Stand Mixer or Electric Hand Mixer serves as our most crucial tool for this recipe. We need consistent mixing power to cream butter properly and achieve the light, fluffy texture that makes this cake extraordinary. The mixer ensures our chocolate buttercream reaches that perfect silky consistency without overworking the ingredients.
Quality Whisk becomes indispensable for multiple stages of preparation. We use it to combine our dry ingredients evenly and incorporate the wet ingredients without creating lumps. The whisk also helps us achieve the glossy finish on our chocolate frosting.
8-inch Cake Pans provide the ideal dimensions for creating those impressive layers that capture the essence of Bruce Bogtrotter’s memorable cake. We specifically recommend this size because it allows proper heat distribution and creates layers thick enough to showcase the cake’s dramatic height.
Parchment Paper Rounds guarantee easy cake release without damaging our precious layers. We cut these to fit perfectly in our cake pans, ensuring every bit of our moist chocolate sponge comes out intact.
Cooking Spray or Baking Spray adds an extra layer of insurance for flawless cake removal. We apply this plus to our parchment paper rounds because this cake’s rich, moist texture can sometimes stick even though our best efforts.
| Equipment | Primary Purpose | Why It Matters |
|---|---|---|
| Stand Mixer | Creaming and mixing | Ensures proper texture |
| 8-inch Cake Pans | Baking layers | Perfect size for impressive height |
| Parchment Paper | Cake release | Prevents sticking |
| Whisk | Combining ingredients | Smooth, lump-free batter |
| Cooking Spray | Additional release aid | Extra protection |
Having these tools ready before we begin ensures our Matilda’s chocolate cake turns out with the same magical quality that made it legendary in Roald Dahl’s story.
Ingredients

We’ve carefully selected each ingredient to recreate the legendary chocolate cake that made Bruce Bogtrotter famous. These components work together to deliver the incredible moisture and rich chocolate flavor that makes this cake truly special.
For the Chocolate Cake
- 2 cups all-purpose flour
- 1¾ cups granulated sugar
- ¾ cup unsweetened Dutch-process cocoa powder
- 2 teaspoons baking powder
- 1 teaspoon baking soda
- 1 teaspoon kosher salt
- 2 large eggs
- 1 cup buttermilk
- ½ cup vegetable oil
- 1 teaspoon vanilla extract
- 1 cup hot coffee (freshly brewed)
For the Chocolate Frosting
- 1 cup (2 sticks) unsalted butter, softened
- 8 oz dark chocolate (60-70% cocoa), melted and cooled
- ½ cup unsweetened cocoa powder
- 1½ cups heavy cream
- 1½ cups powdered sugar, sifted
- ½ cup sour cream (optional, for extra tanginess)
Instructions

We’ll walk through each step of creating this legendary chocolate cake that would make Bruce Bogtrotter proud. Our detailed process ensures every layer achieves maximum chocolate flavor and perfect texture.
Prep Work
We start by preheating our oven to 350°F (175°C) and positioning the rack in the center position. Next we’ll prepare our cake pans by greasing two 8-inch round pans with cooking spray and lining the bottoms with parchment paper rounds. We dust the pans lightly with cocoa powder to prevent sticking and enhance the chocolate flavor.
Our dry ingredients need to be sifted together in a large mixing bowl. We combine the all-purpose flour, granulated sugar, cocoa powder, baking powder, baking soda, and kosher salt using a whisk to ensure even distribution. Setting up our workspace with all ingredients measured and tools ready creates a smooth baking experience.
Making the Cake Batter
We begin by whisking together our wet ingredients in a separate large bowl or measuring cup. Our buttermilk, vegetable oil, eggs, and vanilla extract should be thoroughly combined until the mixture appears smooth and unified.
Adding the wet ingredients to our dry mixture requires gentle folding motions to prevent overmixing. We create a well in the center of the dry ingredients and pour in our liquid mixture. The batter will appear thick at this stage.
Hot water transforms our batter into the perfect consistency for Matilda’s cake. We gradually stir in the hot water until the batter becomes smooth and pourable. The mixture will look thin but this creates the incredibly moist texture we’re after.
Baking the Cake Layers
We divide our batter evenly between our prepared cake pans using a kitchen scale for accuracy. Each pan should receive approximately equal amounts of batter to ensure even baking and uniform layers.
Our cakes need 35-40 minutes in the preheated oven until a toothpick inserted in the center comes out clean. We avoid opening the oven door during the first 30 minutes to prevent the cakes from sinking.
Cooling requires patience but creates the best results. We let the cakes cool in their pans for 10 minutes before turning them out onto wire racks. Complete cooling takes about 1 hour and ensures our frosting won’t melt during assembly.
Preparing the Chocolate Frosting
We start our frosting by melting the dark chocolate in a microwave-safe bowl using 30-second intervals. Stirring between each interval prevents burning and creates a smooth melted chocolate base.
Our butter needs to reach room temperature and get beaten until light and fluffy using an electric mixer. We gradually add the confectioners’ sugar and beat until the mixture becomes pale and creamy.
Cocoa powder gets incorporated next followed by the sour cream and our melted chocolate. We mix everything until the frosting becomes smooth and spreadable. The final consistency should hold its shape but spread easily across our cake layers.
Assembling Matilda’s Chocolate Cake
We place our first completely cooled cake layer on our serving plate or cake stand. A small amount of frosting on the plate prevents the cake from sliding during assembly.
Our frosting spreads best when applied in generous amounts. We cover the first layer with approximately one-third of our chocolate frosting using an offset spatula for even distribution.
The second layer gets positioned carefully on top and pressed gently to secure it in place. We apply the remaining frosting to the top and sides using smooth sweeping motions. Our finished cake should have clean lines and an even chocolate coating that would make any Matilda fan proud.
Pro Tips for Perfect Results

Choose the Right Cocoa Powder
We strongly recommend using Dutch Processed cocoa powder for optimal flavor depth. This type of cocoa delivers a richer chocolate taste that makes our Matilda’s cake truly exceptional. Regular cocoa powder simply cannot match the intensity that Dutch processing provides.
Master the Sugar and Fat Combination
Our secret lies in combining both granulated sugar and brown sugar with vegetable oil and melted butter. This dual sugar approach creates incredible moisture while the fat combination ensures a tender crumb. We use this technique because it prevents the cake from becoming too dense or dry.
Avoid Overmixing at All Costs
When we combine our ingredients we whisk slowly and deliberately. Overmixing develops too much gluten which results in a tough cake. We stop mixing immediately once our ingredients are just combined to maintain that perfect tender texture.
Perfect Your Baking Time
We bake our cakes for 25-30 minutes and test doneness with a toothpick. The toothpick should come out with just a few moist crumbs clinging to it. Completely clean toothpicks indicate overbaking while wet batter means more time is needed.
Follow Proper Cooling Techniques
Our cooling process requires patience for best results. We let cakes cool in their pans for exactly 10 minutes before transferring to wire racks. This prevents cracking while ensuring the cakes maintain their structure during removal.
Use High Quality Chocolate for Frosting
We invest in premium dark chocolate for our buttercream frosting. Quality chocolate makes a dramatic difference in flavor intensity and overall cake experience. Cheap chocolate chips or inferior cocoa cannot deliver the rich taste our Matilda’s cake deserves.
Apply Cake Soak for Maximum Moisture
We brush our cooled cake layers with chocolate simple syrup before frosting. This cake soak technique locks in moisture and adds an extra layer of chocolate flavor. The syrup prevents drying and keeps our cake incredibly moist for days.
| Baking Parameter | Recommended Value |
|---|---|
| Baking Time | 25-30 minutes |
| Cooling Time in Pan | 10 minutes |
| Dutch Cocoa Amount | ½ cup |
| Flour Measurement | 2½ cups |
| Total Sugar | 1¾ cups |
Storage and Make-Ahead Instructions

This incredible chocolate cake offers flexibility when it comes to storage and preparation timing. We’ve tested various storage methods to help you enjoy Matilda’s chocolate cake at its best regardless of when you plan to serve it.
Room Temperature Storage
We recommend storing the fully frosted cake at room temperature for optimal texture and flavor. Cover the cake with a cake dome or wrap it carefully in plastic wrap to maintain moisture. The cake will stay fresh for up to 2 days using this method.
Refrigerated Storage
Extended storage requires refrigeration to maintain food safety and quality. Place the frosted cake in an airtight container or wrap it thoroughly with plastic wrap before refrigerating. Your cake will remain delicious for up to 5 days in the refrigerator.
The frosting will harden during refrigeration. Allow the cake to sit at room temperature for 30 to 45 minutes before serving to restore the buttercream’s creamy texture.
Freezer Storage
Long-term storage becomes simple with proper freezing techniques. Wrap individual cake slices or the entire frosted cake in plastic wrap first. Place the wrapped cake in an airtight container or freezer-safe bag to prevent freezer burn.
Properly stored frozen cake maintains its quality for up to 3 months. Thaw the cake overnight in the refrigerator and bring it to room temperature before serving for the best eating experience.
Make-Ahead Cake Layers
Unfrosted cake layers provide excellent make-ahead options for busy bakers. Store unfrosted layers at room temperature for up to 2 days by wrapping them tightly in plastic wrap. Refrigerated unfrosted layers remain fresh for up to one week.
Freezing unfrosted layers extends storage time significantly. Wrap cooled layers in plastic wrap and aluminum foil before freezing for up to 2 months. Thaw the layers in the refrigerator overnight before assembling and frosting your cake.
Fully Frosted Cake Freezing
Complete frosted cakes freeze beautifully when handled correctly. Allow the frosted cake to firm up in the freezer for 1 to 2 hours before wrapping and storing. This prevents the frosting from sticking to the wrapping material.
Frozen frosted cakes maintain quality for up to 1 month. Thaw overnight in the refrigerator and let the cake come to room temperature before serving.
Storage Enhancement Tips
Room temperature ingredients create the best cake texture during initial preparation. Hot coffee remains essential for improving chocolate flavor and should never be omitted from the recipe.
Brushing cake layers with milk or sugar syrup helps lock in moisture during storage. This technique proves especially valuable for cakes stored longer than 24 hours.
| Storage Method | Duration | Temperature Requirement |
|---|---|---|
| Room Temperature (Frosted) | 2 days | Cover with dome or plastic wrap |
| Refrigerated (Frosted) | 5 days | Airtight container or plastic wrap |
| Frozen (Frosted) | 3 months | Double wrap, then container |
| Room Temperature (Unfrosted) | 2 days | Tightly wrapped in plastic |
| Refrigerated (Unfrosted) | 1 week | Wrapped in plastic wrap |
| Frozen (Unfrosted) | 2 months | Plastic wrap and foil |
Serving Suggestions

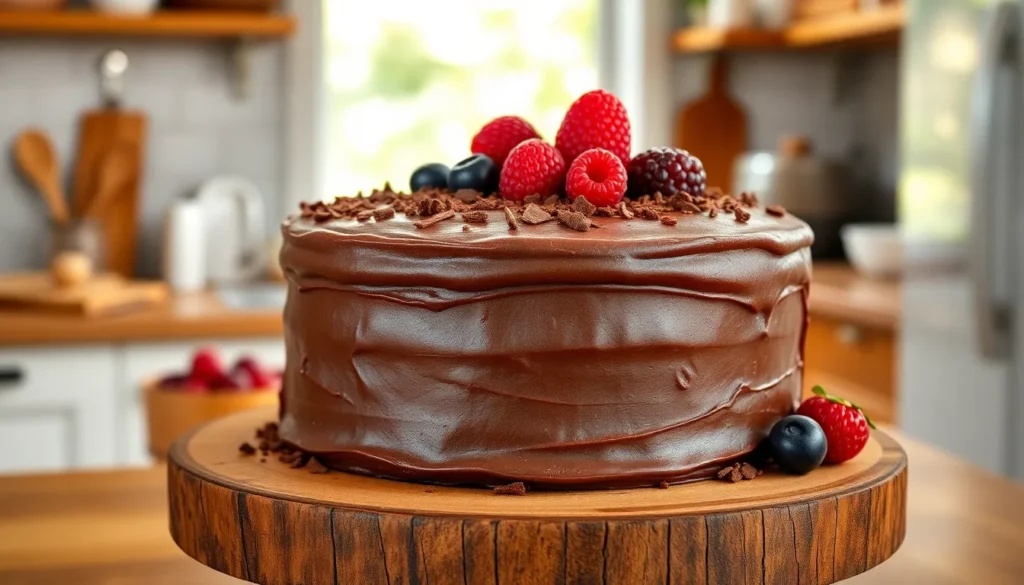
We recommend presenting Matilda’s chocolate cake as the star centerpiece at celebrations such as birthdays, parties, or special events. The cake’s generous layers and glossy chocolate fudge frosting create an inviting appearance that captures the messy, indulgent spirit from the iconic 1996 film scene.
Portioning Guidelines
Our multi-layer cake typically yields 12-15 generous servings when sliced properly. We suggest cutting clean slices using a sharp knife dipped in warm water between cuts. For smaller gatherings, we can create individual serving portions using ramekins or small cake pans during the baking process.
| Serving Style | Portion Count | Best For |
|---|---|---|
| Traditional layered cake | 12-15 servings | Large celebrations |
| Individual ramekins | 6-8 single serves | Intimate gatherings |
| Sheet cake format | 20-24 servings | Parties and events |
Perfect Pairings
We pair this rich chocolate creation with cold milk to balance the intense cocoa flavors. Coffee serves as an excellent companion that enhances the cake’s deep chocolate notes. A scoop of vanilla ice cream provides a cooling contrast that complements the warm, fudgy texture beautifully.
Presentation Excellence
We enhance the visual appeal by garnishing with chocolate shavings, colorful sprinkles, or fresh berries around the cake’s base. The rustic frosting finish we create with an offset spatula adds authentic charm reminiscent of the movie’s memorable scene. We recommend serving on a pedestal cake stand to elevate the presentation and make slicing easier for guests.
Temperature Considerations
We serve the cake at room temperature for optimal flavor and texture. When stored in the refrigerator, we allow 30-45 minutes for the cake to return to room temperature before serving. This ensures the frosting maintains its creamy consistency and the cake layers remain tender and moist.
Variations and Substitutions

We can easily customize Matilda’s chocolate cake to suit different preferences or dietary needs while maintaining its legendary status. These variations allow us to experiment with flavors and textures without compromising the cake’s essential chocolate character.
Cocoa Powder Options
Dutch-processed cocoa powder delivers the deepest chocolate flavor for our cake. Regular unsweetened cocoa powder works as a substitute but produces a slightly more acidic taste. We recommend sticking with Dutch-processed cocoa when possible since it creates the rich chocolate depth that makes this cake memorable.
Sugar Variations
White granulated sugar provides the classic sweetness profile for our recipe. Brown sugar can replace up to half the white sugar to add molasses notes and extra moisture. This substitution creates a more complex flavor while maintaining the cake’s tender crumb structure.
Fat Substitutions
Vegetable oil makes our cake incredibly moist and simplifies the mixing process compared to butter. We can substitute melted butter for oil using a 1:1 ratio for richer flavor. Coconut oil works as another alternative but should be melted and cooled slightly before mixing.
Liquid Ingredient Swaps
Buttermilk creates the tender texture we love in this recipe. Sour cream can replace buttermilk using equal amounts for extra richness. Regular milk mixed with 1 tablespoon of lemon juice per cup serves as an emergency buttermilk substitute.
Flavor Enhancement Options
Instant coffee or espresso powder intensifies the chocolate flavor without making the cake taste like coffee. We can add 1-2 teaspoons to the hot water or dissolve it directly into the batter. Vanilla extract can be increased to 2 teaspoons for those who prefer more pronounced vanilla notes.
Frosting Alternatives
Traditional chocolate buttercream can be replaced with chocolate ganache for a smoother texture. Cream cheese frosting mixed with cocoa powder offers a tangy contrast to the sweet cake. Chocolate fudge frosting provides an ultra-rich coating that mirrors the movie’s indulgent presentation.
Leavening Agent Adjustments
Both baking powder and baking soda are essential for our cake’s light texture. We can reduce baking soda slightly if using regular cocoa powder instead of Dutch-processed. Never omit both agents as they create the cake’s characteristic rise and tender crumb.
Conclusion
We’ve shared everything you need to recreate Bruce Bogtrotter’s legendary chocolate cake from Matilda. This isn’t just another chocolate cake recipe – it’s a gateway to pure chocolate bliss that’ll transport you straight into Roald Dahl’s magical industry.
The beauty of this recipe lies in its versatility and reliability. Whether you’re planning a themed birthday party or simply craving an indulgent treat we’ve equipped you with all the tools techniques and insider tips to guarantee success every time.
Remember that baking is about creating memories as much as it’s about creating delicious food. With proper storage techniques serving suggestions and customization options you can make this cake work for any occasion while maintaining that legendary status that made it famous.
Now it’s time to roll up your sleeves preheat that oven and create your own chocolate masterpiece. Trust us – one bite of this incredibly moist rich cake and you’ll understand exactly why it became the stuff of literary legend.
Frequently Asked Questions
What makes Matilda’s chocolate cake different from regular chocolate cake?
Matilda’s chocolate cake stands out due to its incredible moisture and rich flavor achieved through both cocoa powder and melted chocolate. The addition of coffee enhances chocolate notes, while buttermilk creates a tender crumb. The recipe uses Dutch-process cocoa for deeper flavor and combines multiple techniques to create the legendary texture that made Bruce Bogtrotter famous.
What equipment do I need to make this chocolate cake?
Essential equipment includes a stand mixer or electric hand mixer for proper texture, quality whisk for smooth mixing, 8-inch cake pans for impressive layers, parchment paper rounds, and cooking spray. These tools ensure you achieve the light, fluffy cake texture and silky buttercream consistency that makes this cake truly special.
Can I make this cake ahead of time?
Yes! Fully frosted cake stays fresh at room temperature for 2 days or refrigerated for 5 days. Unfrosted layers can be stored at room temperature for 2 days, refrigerated for a week, or frozen for 2 months. The complete cake can be frozen for up to 3 months, making it perfect for planned celebrations.
How many servings does Matilda’s chocolate cake provide?
The cake typically yields 12-15 generous servings when cut traditionally. You can also serve it in individual ramekins for portion control or convert it to sheet cake format for larger gatherings. The impressive size and rich flavor make it perfect for celebrations where you want to make a memorable impression.
What are the best pairings for this chocolate cake?
Cold milk, coffee, and vanilla ice cream are perfect companions that enhance the rich chocolate experience. For presentation, garnish with chocolate shavings, colorful sprinkles, or fresh berries. Serve at room temperature for optimal flavor and texture, allowing the cake’s legendary qualities to shine through completely.
Can I customize the recipe with substitutions?
Absolutely! You can use regular cocoa powder instead of Dutch-process, substitute brown sugar for granulated, or use melted butter instead of oil. Add instant coffee for intensified chocolate flavor, or try different frosting options like chocolate ganache or cream cheese frosting while maintaining the cake’s essential chocolate character.


