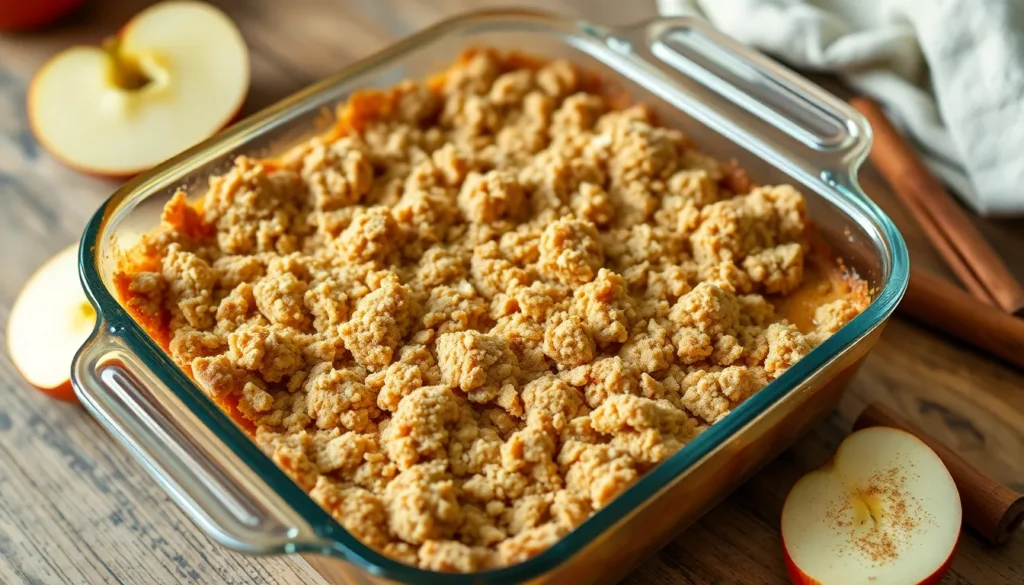
Nothing beats the warm comfort of a homemade apple crisp bubbling in the oven, especially when you’re craving that perfect balance of tender spiced apples and golden crispy topping. But what happens when you’re out of oats or simply prefer a different texture? We’ve got you covered with this incredible apple crisp without oats that’ll become your new go-to dessert.
Our oat-free version creates an irresistibly buttery streusel topping that’s both crunchier and more delicate than traditional recipes. We use a simple combination of flour, butter, and sugar that transforms into golden perfection while baking. The result? A dessert that lets the sweet-tart apple filling truly shine through.
Ingredients
Our apple crisp without oats relies on simple pantry staples that create a perfectly balanced dessert. We’ll divide the ingredients into two essential components to ensure our crisp turns out beautifully layered.
For the Apple Filling
- 6 large Granny Smith or Honeycrisp apples, peeled and sliced into 1/4-inch thick pieces
- 1/2 cup granulated sugar
- 2 tablespoons all-purpose flour
- 1 teaspoon ground cinnamon
- 1/4 teaspoon ground nutmeg
- 1/8 teaspoon salt
- 2 tablespoons fresh lemon juice
- 1 teaspoon vanilla extract
For the Crisp Topping
- 1 cup all-purpose flour
- 3/4 cup packed light brown sugar
- 1/2 cup cold unsalted butter, cubed into small pieces
- 1/2 teaspoon ground cinnamon
- 1/4 teaspoon salt
- 1/2 cup chopped walnuts or pecans (optional)
Equipment Needed

Creating our apple crisp without oats requires exact kitchen tools that ensure perfect results every time. We recommend gathering these essential items before starting to streamline the baking process.
Baking dish serves as the foundation for our apple crisp. An 8×8 inch glass or ceramic baking dish provides the ideal size and heat distribution for this recipe. Glass dishes allow us to monitor browning while ceramic options retain heat beautifully for even cooking.
Large mixing bowls become indispensable when preparing both components of our dessert. We need two separate bowls to keep the apple filling and crisp topping ingredients organized and properly mixed without cross contamination.
Paring knife handles the apple preparation with precision. This sharp tool makes peeling and slicing our apples quick and efficient while maintaining consistent thickness for even baking.
Apple corer offers an optional but helpful addition to our toolkit. While not absolutely necessary, this tool removes cores cleanly and speeds up apple preparation significantly.
Pastry blender or forks creates the perfect crumbly texture for our flour based topping. These tools help us incorporate cold butter into dry ingredients without overworking the mixture, ensuring that coveted crispy texture.
Oven completes our equipment list as the essential appliance for transforming raw ingredients into golden, bubbling perfection. Proper preheating ensures consistent baking results throughout the cooking process.
| Equipment | Purpose | Size/Type |
|---|---|---|
| Baking dish | Main cooking vessel | 8×8 inch glass or ceramic |
| Mixing bowls | Ingredient preparation | 2 large bowls |
| Paring knife | Apple preparation | Sharp blade |
| Pastry blender | Topping texture | Alternative: forks |
Instructions

We’ll transform our simple ingredients into a perfect apple crisp without oats by following these straightforward steps. Our process focuses on creating tender spiced apples beneath a golden buttery crumble.
Prep the Apples
We begin by preheating our oven to 375°F for optimal baking results. Peel and slice our 6 large apples into uniform 1/4 to 1/2-inch pieces, ensuring even cooking throughout the dish. Place the apple slices in a large mixing bowl and toss them with 1/2 cup granulated sugar and 1 teaspoon ground cinnamon until evenly coated.
Add 2 tablespoons of all-purpose flour to help thicken the natural juices that will release during baking. Sprinkle in the ground nutmeg and salt for depth of flavor. Drizzle the fresh lemon juice and vanilla extract over the apples, then gently fold everything together until the apples are thoroughly coated with the spice mixture.
Make the Crisp Topping
We combine 1 1/2 cups all-purpose flour, 1 cup light brown sugar, 1 teaspoon ground cinnamon, and 1/2 teaspoon salt in our second large mixing bowl. Cut our cold unsalted butter into small cubes and add them to the dry ingredients.
Using a pastry blender or two forks, we work the cold butter into the flour mixture until it resembles coarse crumbs with some pea-sized butter pieces remaining. The cold butter creates steam during baking, which gives us that coveted crispy texture. Mix in the chopped nuts if we’re using them for added crunch and flavor.
Assemble the Apple Crisp
We transfer our seasoned apple mixture to our prepared 8×8 inch baking dish, spreading it evenly across the bottom. The apples should fill the dish without overflowing to prevent spillage during baking.
Distribute the crumb topping evenly over the apples, covering them completely from edge to edge. We gently pat the topping down to ensure it adheres well and creates a uniform layer that will brown beautifully in the oven.
Bake the Apple Crisp
We place our assembled apple crisp in the preheated oven and bake for 45 to 50 minutes until the topping turns golden brown and the apples bubble around the edges. The aroma of cinnamon and baked apples will fill our kitchen as it nears completion.
Check for doneness at the 35-minute mark if our oven runs hot, as baking times can vary. Remove the crisp from the oven when the top is golden and crispy, and the apple juices are bubbling. Allow it to rest for 15 to 20 minutes before serving to let the filling set properly and prevent burning our tongues on the hot fruit.
Serving Suggestions

We recommend serving this apple crisp warm for the ultimate comfort dessert experience. The contrast between the hot bubbling apple filling and cold accompaniments creates a perfect temperature balance that enhances every bite.
Vanilla ice cream stands as our top choice for pairing with apple crisp without oats. The creamy texture complements the crispy topping while the vanilla flavor allows the apple and cinnamon notes to shine through. We suggest scooping the ice cream directly onto each serving while the crisp is still warm to create that delightful melting effect.
Caramel sauce transforms this dessert into an indulgent treat by adding an extra layer of sweetness and rich flavor. We drizzle the warm caramel over both the crisp and ice cream for maximum impact. The buttery caramel notes pair beautifully with the apple filling and enhance the overall dessert experience.
Whipped cream offers a lighter alternative that we particularly enjoy when serving this dessert after a heavy meal. Fresh whipped cream provides a fluffy texture contrast to the dense apple filling while adding just enough sweetness without overwhelming the natural apple flavors.
We also recommend dusting individual servings with a light sprinkle of ground cinnamon for an aromatic finishing touch. This simple addition reinforces the warm spice profile and creates an appealing visual presentation that signals the comforting flavors waiting beneath.
For special occasions we suggest serving the apple crisp in individual ramekins alongside a small pitcher of heavy cream for guests to pour as desired. This presentation style allows everyone to customize their portion while maintaining the dessert’s elegant appeal.
Storage Instructions

We recommend storing your apple crisp without oats properly to maintain its delicious texture and flavor. The first day after baking allows you to keep the dessert covered on your counter at room temperature. This storage method preserves the crispy topping while keeping the apple filling perfectly tender.
For longer storage we suggest transferring your apple crisp to an airtight container and refrigerating it for up to 3 days. The refrigerated storage prevents spoilage while maintaining the dessert’s quality and taste.
| Storage Method | Duration | Temperature |
|---|---|---|
| Counter (covered) | 1 day | Room temperature |
| Refrigerated (airtight container) | Up to 3 days | 35-40°F |
Reheating your stored apple crisp brings back its fresh-baked appeal. Individual portions heat beautifully in the microwave for quick serving. When reheating the entire dish we recommend using your oven at 350°F for approximately 10 to 12 minutes until warmed through.
The reheating process restores the topping’s crispness while warming the apple filling to that perfect temperature. We find that oven reheating produces superior results compared to microwave heating when serving multiple portions. Your apple crisp will taste nearly as good as when freshly baked with proper storage and reheating techniques.
Recipe Variations

We love experimenting with different approaches to create unique apple crisp experiences that suit various tastes and dietary needs. These variations allow you to customize our basic recipe while maintaining the delicious essence of this classic dessert.
Different Spice Combinations
Cinnamon and Nutmeg remains our go-to classic combination that adds warmth and depth to every bite of apple crisp. This timeless pairing enhances the natural apple flavors without overwhelming the fruit’s sweetness.
Vanilla and Lemon creates a bright and fresh flavor profile that we find particularly appealing during warmer months. Adding vanilla extract and fresh lemon juice brightens the apple filling while improving the fruit’s natural acidity.
Ginger and Cloves delivers a more complex and spicy flavor that transforms our apple crisp into something extraordinary. We recommend using these warming spices sparingly to avoid overpowering the delicate apple taste.
Alternative Sweeteners
Brown Sugar provides a richer and more complex flavor compared to granulated sugar in our crisp topping. We often substitute brown sugar for granulated sugar to achieve deeper caramel notes that complement the buttery streusel perfectly.
Honey or Maple Syrup offers natural sweetness options that we frequently use in place of traditional sugar. These liquid sweeteners add unique flavor dimensions while reducing the processed sugar content in our recipe.
| Sweetener Type | Flavor Profile | Best Use |
|---|---|---|
| Brown Sugar | Rich, caramel notes | Topping mixture |
| Honey | Floral, natural sweetness | Apple filling |
| Maple Syrup | Complex, woodsy sweetness | Both filling and topping |
Gluten-Free Options
Gluten-Free Flour Blend seamlessly replaces all-purpose flour in our crisp topping without compromising texture or taste. We recommend using a high-quality gluten-free flour blend that contains xanthan gum for the best binding results.
Our gluten-free version maintains the same golden brown appearance and crumbly texture as the traditional recipe. We suggest checking that all other ingredients including spices and vanilla extract are certified gluten-free to ensure complete dietary compliance.
Tips for Perfect Apple Crisp Without Oats

Achieving the perfect apple crisp without oats requires attention to exact details that make the difference between good and exceptional results. We’ve gathered essential techniques to ensure your dessert turns out perfectly every time.
Choose the Right Apples
Selecting proper baking apples forms the foundation of outstanding apple crisp. We recommend using Granny Smith, Honeycrisp, or Braeburn varieties for their superior flavor balance and structural integrity during baking. These apples maintain their shape while developing tender texture and deliver the ideal sweet-tart profile that complements the buttery topping.
Master the Cold Butter Technique
Cold butter creates the crispiest and most crumbly topping texture. We cut our butter into small cubes and keep it refrigerated until ready to use. Working the cold butter into the flour mixture produces distinct crumb pieces that bake into golden, crunchy clusters rather than forming a dense layer.
Focus on Even Layering
Proper distribution ensures consistent baking throughout your crisp. We spread the seasoned apple mixture evenly in our baking dish to prevent crowding, which can lead to soggy areas. The topping should cover the apples uniformly without being packed down, allowing heat to circulate freely and create optimal crispiness.
Monitor Baking Time Carefully
Oven temperatures vary significantly between different models and brands. We check our apple crisp between 35 and 50 minutes of baking time, looking for a deep golden brown topping and bubbling apple juices around the edges. The topping should feel firm when gently touched with a spoon.
Allow Proper Resting Time
Patience during the cooling period improves both texture and presentation. We let our apple crisp rest for 15 to 20 minutes after removing it from the oven. This resting period allows the apple juices to thicken naturally and makes serving much easier while preventing the filling from running when cut.
Serve at Optimal Temperature
Warm apple crisp delivers the most satisfying eating experience. We serve our dessert while still warm to maximize the contrast between the hot apple filling and cold accompaniments like vanilla ice cream or caramel sauce. The gentle warmth enhances the cinnamon and apple aromas that make this dessert so appealing.
Conclusion
We’ve shown you that creating an incredible apple crisp without oats is not only possible but absolutely delicious. This recipe proves that sometimes the simplest approaches yield the most satisfying results.
The buttery flour-based topping delivers that perfect crunch we all crave while letting the spiced apples shine as the true star of this classic dessert. With just basic pantry ingredients and our helpful tips you’re equipped to create a memorable treat that’ll have everyone asking for seconds.
Whether you’re serving it for a cozy family dinner or entertaining guests this oat-free apple crisp is sure to become a cherished recipe in your collection. Get ready to enjoy the perfect balance of tender apples and crispy golden topping in every single bite.
Frequently Asked Questions
Can I make apple crisp without oats?
Yes! This recipe creates a delicious apple crisp using flour, butter, and sugar for the streusel topping instead of oats. The result is a crunchier, more delicate texture that allows the sweet-tart apple filling to shine through beautifully.
What are the best apples to use for apple crisp?
Granny Smith, Honeycrisp, and Braeburn apples work best for apple crisp. These varieties maintain their texture during baking and provide the perfect balance of sweet and tart flavors that complement the buttery streusel topping.
How long should I bake apple crisp?
Bake your apple crisp at 375°F for 45 to 50 minutes, until the topping is golden brown and the filling is bubbly. Keep an eye on it during the last 10 minutes to prevent over-browning.
How do I store leftover apple crisp?
Store apple crisp covered at room temperature for one day, or refrigerate in an airtight container for up to three days. For best results, reheat individual portions in the microwave or the entire dish in a 350°F oven for 10-12 minutes.
What should I serve with apple crisp?
Serve apple crisp warm with vanilla ice cream, caramel sauce, or whipped cream. A sprinkle of ground cinnamon adds an aromatic finishing touch. For special occasions, serve in individual ramekins with a small pitcher of heavy cream.
Can I make this recipe gluten-free?
Yes! Simply substitute the all-purpose flour with a gluten-free flour blend in both the filling and topping. This swap won’t compromise the texture or taste of your apple crisp.
Why is my apple crisp topping not crispy?
Ensure you’re using cold butter and properly incorporating it into the dry ingredients until the mixture resembles coarse crumbs. Also, avoid covering the dish while baking, as this traps steam and prevents the topping from getting crispy.
How do I prevent my apple crisp from being too watery?
Toss your sliced apples with flour before adding other ingredients – this helps absorb excess moisture. Also, let the finished crisp rest for 10-15 minutes after baking to allow the filling to set properly.


