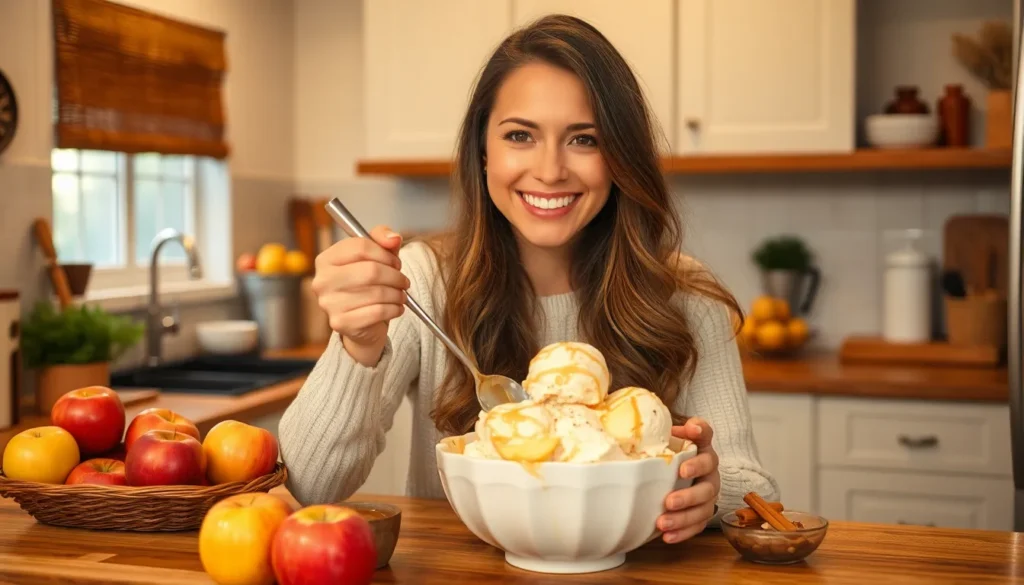
We’ve discovered the perfect way to transform crisp autumn apples into the most refreshing frozen dessert you’ll ever taste. Apple ice cream brings together the best of both worlds – the comforting warmth of spiced apples and the cool satisfaction of creamy homemade ice cream.
This isn’t your typical fruit ice cream that leaves you wanting more flavor. Our recipe captures the essence of fresh apples while creating a luxuriously smooth texture that rivals any premium store-bought variety. We’ve perfected the balance of natural apple sweetness with just a hint of cinnamon and vanilla.
What makes this recipe truly special is how it celebrates apple season year-round. Whether you’re using crisp Honeycrisps from the orchard or tart Granny Smiths from your pantry, this ice cream transforms any apple variety into pure frozen bliss that’ll have everyone asking for seconds.
Ingredients
Our apple ice cream recipe requires two key components that work together to create the perfect balance of apple flavor and creamy texture. We’ve organized the ingredients by preparation stage to make your cooking process seamless.
For the Apple Base
- 4 large apples (Honeycrisp or Granny Smith work best), peeled and diced
- 1/4 cup granulated sugar
- 2 tablespoons butter
- 1 teaspoon ground cinnamon
- 1/4 teaspoon ground nutmeg
- 1 tablespoon lemon juice
- 1/4 teaspoon salt
For the Ice Cream Base
- 2 cups heavy cream
- 1 cup whole milk
- 3/4 cup granulated sugar
- 6 large egg yolks
- 1 tablespoon vanilla extract
- 1/4 teaspoon salt
- 2 tablespoons apple brandy (optional)


Equipment Needed

Creating our homemade apple ice cream requires several essential tools that will ensure smooth preparation and perfect results. We’ve organized this equipment list to help you gather everything before starting the cooking process.
Essential Cooking Equipment
A heavy-bottomed pan serves as our primary tool for cooking down the apple mixture. This type of pan distributes heat evenly and prevents the apples from burning while they caramelize. We recommend using a medium-sized saucepan that can comfortably hold our 200 grams of chopped apples along with the sugar and water.
Our blender or food processor transforms the cooked apples into a smooth puree. Either appliance works effectively for this step, though a high-powered blender typically produces the silkiest texture. A food processor offers more control over the final consistency if you prefer slight apple pieces in your ice cream.
Ice Cream Making Tools
The ice cream maker stands as the most crucial piece of equipment for achieving that perfect creamy texture. Whether you own a traditional churn-style maker or a modern electric version, both will churn our mixture into delicious ice cream. Make sure to freeze your ice cream maker’s bowl at least 24 hours before use if your model requires pre-freezing.
A freezer-safe container becomes essential for storing our finished ice cream. We prefer using a shallow, wide container that allows for easy scooping and faster freezing. Glass or plastic containers both work well, though we recommend choosing one with an airtight lid to prevent ice crystals from forming.
Preparation Accessories
Our fine-mesh sieve helps create an ultra-smooth apple puree by removing any remaining apple skin or lumps. This step elevates the final texture of our ice cream significantly. A sturdy ladle assists in pushing the apple mixture through the sieve efficiently, ensuring we extract maximum flavor while achieving perfect smoothness.
These tools work together seamlessly to transform simple ingredients into extraordinary apple ice cream that captures the essence of fresh apples in every spoonful.


Instructions

Follow these detailed steps to create our exceptional apple ice cream that perfectly balances creamy texture with bold apple flavor. Each stage builds upon the previous one to ensure optimal results and maximum flavor development.
Prep the Apples
Peel and core 4 large apples using a sharp paring knife. Cut the apples into uniform dice for even cooking. Reserve the prepared apple pieces in a bowl with lemon juice to prevent browning while you gather the remaining ingredients.
Make the Apple Mixture
Heat butter in a heavy-bottomed skillet over medium heat until melted and fragrant. Add the diced apples along with brown sugar, cinnamon, and nutmeg. Stir the mixture occasionally while cooking for 10-15 minutes until the apples soften completely and most liquid evaporates. The apples should appear caramelized and tender when properly cooked. Remove from heat and cool the mixture completely before proceeding. Divide the cooled apple mixture in half, reserving one portion in large pieces and blending the other portion into a smooth puree using your food processor.
Prepare the Ice Cream Base
Combine milk, sugar, and salt in a heavy-bottomed saucepan over medium heat. Whisk egg yolks in a separate bowl until smooth and pale. Gradually add the heated milk mixture to the egg yolks while whisking constantly to prevent curdling. Return the entire mixture to the saucepan and cook while stirring continuously until the custard thickens enough to coat the back of a spoon. The temperature should reach approximately 170°F without boiling. Strain the custard through a fine-mesh sieve into a clean bowl. Stir in heavy cream and vanilla extract until well combined. Cool the custard completely using an ice bath or refrigerate until thoroughly chilled.
Churn the Ice Cream
Combine the chilled custard base with the apple puree in your ice cream maker. Pour the mixture into the machine and churn according to manufacturer instructions until it reaches a soft-serve consistency. This process typically takes 20-25 minutes depending on your exact ice cream maker model.
Final Assembly and Freezing
Fold the reserved apple chunks gently into the churned ice cream using a spatula. Transfer the mixture to a freezer-safe container and layer any additional mix-ins such as cinnamon swirl or cookie pieces between portions. Press parchment paper directly onto the surface to prevent ice crystals from forming. Freeze the ice cream for at least 4 hours or until firm enough to scoop properly.


Make-Ahead Tips

We love how apple ice cream becomes an even more convenient dessert when prepared with strategic make-ahead techniques. Planning certain components in advance transforms this elaborate treat into a manageable project that delivers exceptional results.
Preparing the Ice Cream Base
Our ice cream base benefits tremendously from extended chilling time before churning begins. We recommend allowing the custard mixture to rest in the refrigerator for at least 4 hours though overnight chilling produces superior results. This extended cooling period ensures our final product achieves that perfectly smooth consistency we’re seeking.
When we need to cool our custard base quickly after cooking we turn to an ice bath technique. Preparing an ice bath with vanilla extract allows us to bring down the temperature rapidly while infusing additional flavor into our base. This method prevents overcooking and maintains the silky texture we want.
Apple Filling Advancement
Our apple filling responds beautifully to advance preparation and actually improves with time. We cook our apples with sugar and spices until they reach that perfect caramelized state then allow them to cool completely before incorporating them into our ice cream. The cooling process is essential for maintaining the proper texture balance in our final product.
Making our apple filling a full day ahead proves to be one of our most valuable time-saving strategies. We store the prepared filling in the refrigerator where the flavors have time to meld together and develop greater complexity. This technique creates depth that simply cannot be achieved with same-day preparation.
Storage Answers
| Component | Storage Duration | Storage Method |
|---|---|---|
| Apple filling | 3-4 days | Refrigerator in airtight container |
| Graham cracker crumbs | 3-4 days | Refrigerator in airtight container |
| Finished ice cream | Several months | Freezer in airtight container |
We find that our apple filling and any additional mix-ins like graham cracker crumbs maintain their quality for up to 3 to 4 days when stored properly in the refrigerator. This flexibility allows us to prepare components well in advance of our intended serving date.
Once we complete the churning process we transfer our ice cream to an airtight container and freeze for several hours until it reaches the proper firmness. Our finished apple ice cream stores beautifully in the freezer for several months making it an excellent option for entertaining and special occasions that require advance planning.
Churning Considerations
We ensure optimal texture by churning our ice cream for at least 20 minutes regardless of the exact machine we’re using. This extended churning time creates the smooth consistency that sets homemade ice cream apart from store-bought alternatives. The investment in proper churning time pays dividends in the final texture and mouthfeel of our apple ice cream.


Storage Instructions

After churning our delicious apple ice cream, proper storage becomes crucial for maintaining its creamy texture and preventing ice crystals from forming. We recommend transferring the freshly churned ice cream immediately to a freezer-safe, airtight container to minimize air exposure and prevent freezer burn.
Immediate Storage Steps
Place a sheet of plastic wrap directly onto the surface of the ice cream before sealing the container with its lid. This direct contact method helps reduce ice crystal formation and preserves the smooth, creamy consistency we worked so hard to achieve. For extra protection against freezer odors and temperature fluctuations, we suggest wrapping the entire container in aluminum foil as a secondary barrier.
Freezing Requirements
Freeze the apple ice cream for at least 4 to 6 hours, though we recommend leaving it overnight for optimal setting. This extended freezing time ensures the ice cream reaches the perfect consistency for serving.
Shelf Life and Quality
| Storage Duration | Quality Level | Notes |
|---|---|---|
| First week | Best texture and flavor | Optimal consumption period |
| Up to 2 months | Acceptable with some ice crystals | May affect smoothness |
Our homemade apple ice cream lacks commercial preservatives, so we advise consuming it within the first week for the best texture and flavor experience. While the ice cream can last up to 2 months in an airtight container, ice crystals may begin forming after the first week, potentially affecting the smooth texture.
Serving Preparation
Before serving, allow the ice cream to sit at room temperature for approximately 5 minutes. This brief softening period makes scooping easier and ensures the perfect serving consistency that showcases all those wonderful apple flavors we’ve created.
Serving Suggestions

Our apple ice cream transforms into an extraordinary dessert experience when paired with complementary flavors and textures. We recommend serving it alongside classic apple pie for a double dose of apple goodness that creates an irresistible combination. The creamy texture perfectly balances the flaky crust and tender fruit filling.
Apple crumble becomes even more decadent when topped with a generous scoop of our homemade apple ice cream. The warm spiced fruit contrasts beautifully with the cold creamy dessert. We also love pairing it with baked apples for an elegant presentation that showcases apple flavors in multiple forms.
Enhance the warmth and complexity by adding aromatic spices to your serving presentation. Dust the ice cream with ground cinnamon or cardamom just before serving. We find that nutmeg creates an especially sophisticated flavor profile that elevates the entire dessert experience.
Caramelized apples make an exceptional topping that adds both visual appeal and intense flavor. Drizzle salted caramel sauce over individual scoops to create layers of sweetness with a hint of salt that brings out the apple notes. This combination works particularly well when serving the ice cream with apple crisps or tarts.
For special occasions we suggest adding a sophisticated touch with an apple-based liqueur drizzle. This adult-friendly enhancement creates depth and complexity that makes the dessert perfect for autumnal gatherings and dinner parties.
Consider our no-churn variant when serving large groups or when you want an effortlessly creamy texture. This version allows for easy flavor customization with rum and additional cinnamon that creates an even richer apple experience without requiring specialized equipment.


Recipe Variations

We can transform our basic apple ice cream recipe into exciting new flavors that capture different aspects of autumn’s favorite fruit. These creative adaptations build on our foundational recipe while introducing complementary ingredients that enhance the natural apple taste.
Caramel Apple Ice Cream
Our caramel apple variation elevates the dessert with rich buttery sweetness and a luxurious texture. We start by preparing caramelized apples using dark brown sugar and butter to create deep flavor complexity. The ice cream base combines double cream with egg yolks and caster sugar for exceptional richness.
We create the signature caramel element by making a salted caramel sauce that gets swirled throughout the churned ice cream. This variation requires heating the apples until they become golden and tender before incorporating vanilla extract. The salted caramel sauce adds a sophisticated contrast that balances the fruit’s natural sweetness.
Spiced Apple Ice Cream
This warming variation brings apple pie flavors directly into our ice cream base. We enhance our standard recipe by incorporating cinnamon throughout the custard preparation process. The whole milk base gets infused with ground cinnamon while heating with sugar.
We add half and half to create a lighter texture that allows the spices to shine through each bite. Whipping cream provides the necessary fat content for smooth churning. Graham crackers get crushed and folded into the final product to mimic apple pie crust elements and add textural interest.
Apple Cinnamon Swirl
Our swirl variation features a cinnamon-infused base with ribbons of concentrated apple cinnamon filling throughout. We prepare the ice cream base using heavy cream and enhance it with brown sugar instead of white sugar for deeper molasses notes. Ground nutmeg adds warmth that complements the dominant cinnamon flavor.
We create the swirl component by cooking down our apple mixture with additional brown sugar and cinnamon until it reaches a jam-like consistency. Vanilla extract brightens the overall flavor profile. The swirl gets added during the final minutes of churning to create beautiful ribbons without completely mixing into the base.

Troubleshooting Tips

Even experienced home cooks encounter challenges when making apple ice cream from scratch. We’ve compiled answers to the most common issues you might face during the process.
Preventing Icy Texture
Large ice crystals form when excess water remains in your apple mixture or when freezing takes too long. We recommend cooking your apples thoroughly until most moisture evaporates before incorporating them into the custard base. Simmer the apple pieces until they become tender and slightly caramelized to concentrate flavors while reducing water content. Ensure your ice cream maker churns properly and transfer the finished product to the freezer immediately after churning.
Fixing Crumbly or Hard Ice Cream
Your apple ice cream may become difficult to scoop if the recipe lacks sufficient sugar or contains too few solids. We suggest checking that your custard base includes adequate granulated sugar as specified in the recipe. Apple puree and cooked apple chunks provide essential solids that contribute to proper texture. Avoid overchurning the mixture as this can create a dense consistency that becomes overly firm when frozen.
Resolving Grainy Caramel Issues
When adding caramel elements to your apple ice cream, graininess occurs from crystallized sugar during the melting process. We advise melting sugar without stirring until it completely dissolves into a smooth amber liquid. If your caramel becomes grainy, start fresh and avoid any stirring motions while the sugar melts. Allow the caramel to cool slightly before swirling it into your ice cream base.
Addressing Fat Splitting Problems
Fat globules may clump together if your custard contains excessive butterfat or experiences too much churning. We recommend balancing your dairy ratios by using the specified amounts of heavy cream and whole milk. Reduce churning time if you notice the mixture becoming too thick or grainy during the process. Monitor the custard temperature carefully to prevent overheating which can cause fat separation.
Balancing Apple Flavors
Weak apple taste often results from using insufficient fruit or not concentrating the flavors properly. We suggest using concentrated apple sources like apple butter or well-cooked apple puree to intensify the fruit flavor. Increase the quantity of cooked apples in your recipe if the apple taste seems muted. Add cinnamon or nutmeg during the mixing stage to enhance the overall flavor profile and create that signature apple pie taste.
Proper Serving Preparation
Hard ice cream straight from the freezer requires patience for optimal serving consistency. We recommend removing your apple ice cream from the freezer and letting it sit in the refrigerator for 10 to 15 minutes before scooping. This softening period allows for easier serving while maintaining the creamy texture you worked to achieve.
Conclusion
We’ve covered everything you need to create exceptional apple ice cream that captures the essence of fresh apples in every scoop. From selecting the right apple varieties to mastering the churning process this recipe delivers restaurant-quality results right from your kitchen.
The beauty of this dessert lies in its versatility. Whether you stick to the classic version or experiment with our caramel apple and spiced variations you’ll have a treat that celebrates apple season year-round.
Remember that proper storage and serving techniques make all the difference in achieving that perfect creamy texture. With our troubleshooting tips you’ll confidently navigate any challenges that arise during the process.
This apple ice cream isn’t just a dessert—it’s a celebration of one of nature’s most beloved fruits transformed into something truly special.
Frequently Asked Questions
What types of apples work best for homemade apple ice cream?
Honeycrisp and Granny Smith apples are the top choices for apple ice cream. Honeycrisp provides natural sweetness and excellent texture, while Granny Smith offers tartness that balances the cream’s richness. Both varieties hold their shape well during cooking and provide robust apple flavor that won’t get lost in the creamy base.
How long does homemade apple ice cream last in the freezer?
Homemade apple ice cream can last up to 2 months in the freezer when stored properly in an airtight container. However, for the best texture and flavor, consume it within the first week. Use plastic wrap directly on the surface and wrap the container in aluminum foil for optimal storage and to prevent ice crystals.
Can I make apple ice cream without an ice cream maker?
Yes, you can make a no-churn version of apple ice cream. This method involves whipping heavy cream, combining it with the apple mixture and condensed milk, then freezing until firm. While the texture differs slightly from churned ice cream, it’s still creamy and delicious, making it perfect for larger gatherings or when you lack specialized equipment.
Why is my apple ice cream turning out icy instead of creamy?
Icy texture usually results from insufficient cooking of the apple mixture or improper custard preparation. Ensure the apple mixture is thoroughly cooked and caramelized, and that your custard base reaches the proper thickness. Also, make sure to churn for at least 20 minutes and store with plastic wrap directly touching the surface to minimize air exposure.
How far in advance can I prepare the apple ice cream components?
The apple filling can be prepared up to 24 hours in advance and stored in the refrigerator, which actually improves flavor complexity. The ice cream base benefits from chilling for at least 4 hours or overnight before churning. This extended chilling time results in superior texture and easier churning process.
What’s the best way to serve apple ice cream for optimal texture?
Remove the ice cream from the freezer and let it sit at room temperature for about 5 minutes before serving. This brief thawing period ensures easy scooping and the perfect serving consistency. The ice cream should be firm but not rock-hard, allowing you to create smooth, rounded scoops that maintain their shape.