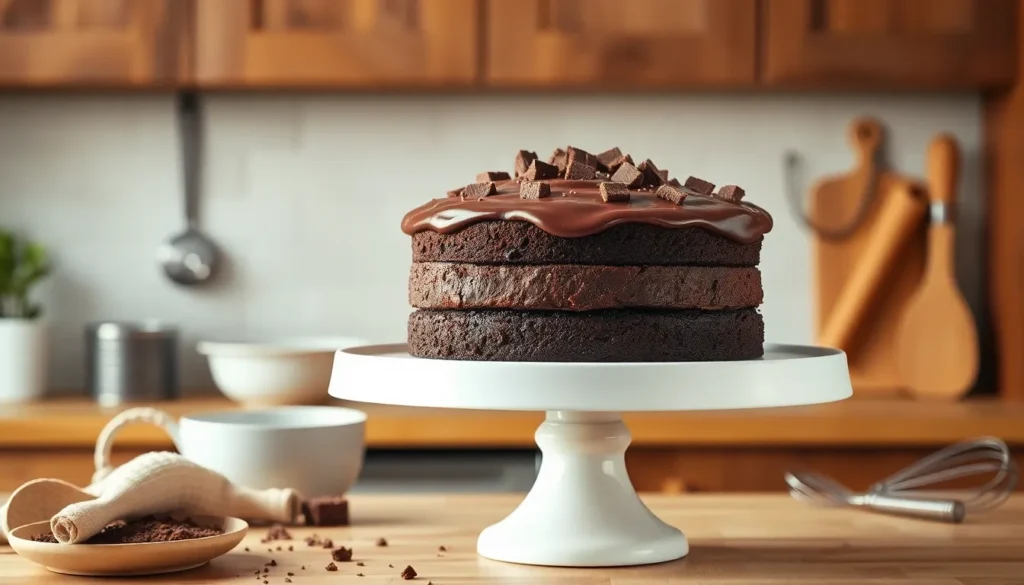
We’ve discovered the perfect dessert that bridges the gap between fudgy brownies and fluffy cake – the irresistible brownie cake. This decadent treat combines the best of both worlds, delivering the rich chocolate intensity you crave from brownies with the light, airy texture of traditional cake.
What makes brownie cake so special? It’s all about achieving that perfect balance of dense chocolatey goodness without the heaviness that sometimes comes with regular brownies. We’re talking about a dessert that’s sophisticated enough for dinner parties yet simple enough for weeknight cravings.
The beauty of this recipe lies in its versatility and foolproof nature. Whether you’re a baking novice or a seasoned pro, you’ll find this brownie cake incredibly forgiving and consistently delicious. It’s the kind of dessert that’ll have your family and friends begging for the recipe after just one bite.
Ingredients
Creating the perfect brownie cake requires three distinct components that work together harmoniously. We’ve organized the ingredients by layer to streamline your baking process.
For the Brownie Base
- 1 cup unsalted butter
- 8 oz dark chocolate (70% cocoa), chopped
- 1 cup granulated sugar
- 3 large eggs, room temperature
- 1 teaspoon vanilla extract
- ¾ cup all-purpose flour
- ¼ cup unsweetened cocoa powder
- ½ teaspoon salt
For the Cake Layer
- ½ cup unsalted butter, softened
- ¾ cup granulated sugar
- 2 large eggs, room temperature
- 1 teaspoon vanilla extract
- 1 cup all-purpose flour
- 1½ teaspoons baking powder
- ¼ teaspoon salt
- ½ cup whole milk, room temperature
- 2 tablespoons unsweetened cocoa powder
For the Chocolate Ganache
- 8 oz heavy cream
- 8 oz semi-sweet chocolate, finely chopped
- 2 tablespoons unsalted butter
- 1 tablespoon light corn syrup
- Pinch of salt
Equipment Needed

Creating our fudgy brownie cake requires exact tools that ensure professional results in your home kitchen. We need three 6-inch round cake pans to achieve those thick and dense layers that make this dessert truly special. These smaller pans create the perfect height for our layered masterpiece.
Our mixing station starts with a large stainless steel or glass mixing bowl for combining all ingredients. We prefer these materials for their durability and easy cleanup after working with chocolate. A sturdy whisk helps incorporate air into our batter while a flexible spatula becomes essential for folding ingredients and scraping every bit of chocolate goodness from the bowl.
Temperature control makes all the difference in brownie cake success. We rely on a reliable oven paired with an oven thermometer to maintain accurate heat throughout the baking process. This combination prevents the disappointment of unevenly baked layers.
Precision in measurements separates good brownie cakes from extraordinary ones. We use both measuring cups and a kitchen scale to ensure our ingredients are perfectly proportioned. The scale particularly helps when working with chocolate and butter ratios.
Additional Helpful Tools
Beyond the essentials we can enhance our baking experience with a few extra tools. An instant read thermometer helps us monitor chocolate melting temperatures when preparing our ganache. A kitchen torch adds versatility if we decide to toast any decorative elements or caramelize sugar accents.
We can also substitute a traditional 9×13-inch baking pan if we prefer a more classic brownie texture over the layered cake approach. This flexibility allows us to adapt the recipe to our available equipment while maintaining the delicious chocolate intensity our brownie cake promises.
Instructions

Now that we have our ingredients ready and equipment prepared, let’s create this spectacular brownie cake step by step. These detailed instructions will guide us through each component to achieve the perfect balance of fudgy richness and airy texture.
Prep the Brownie Base
We begin by melting our chocolate foundation. Place the unsalted butter and semisweet chocolate in a large microwave-safe bowl and heat in 30-second intervals until completely smooth. Stir the granulated sugar and light brown sugar into the melted chocolate mixture using a sturdy whisk. The mixture should appear glossy and well combined without any sugar granules visible. Beat in the eggs one at a time followed by vanilla extract until the batter becomes smooth and uniform. Sift the all-purpose flour cocoa powder and salt directly into the chocolate mixture. Fold these dry ingredients gently with a flexible spatula until just incorporated to avoid overmixing.
Make the Cake Batter
Start by creaming the softened unsalted butter with granulated sugar in our large mixing bowl until the mixture becomes light and fluffy. This process typically takes 3-4 minutes of vigorous whisking. Add eggs one at a time beating well after each addition then incorporate the vanilla extract. In a separate bowl whisk together the all-purpose flour baking powder cocoa powder and salt. Alternate adding the dry ingredients and whole milk to the butter mixture beginning and ending with the flour mixture. Mix until the batter just comes together avoiding overworking which can result in a dense cake layer.
Assemble the Brownie Cake
Grease our three 6-inch round cake pans thoroughly and dust with cocoa powder for easy release. Divide the brownie batter evenly among two of the prepared pans using a kitchen scale for precision. Pour the cake batter into the remaining pan ensuring an even distribution. Gently tap each pan on the counter to release air bubbles and create smooth surfaces. The brownie layers will be denser while the cake layer should appear lighter in texture.
Bake the Brownie Cake
Preheat the oven to 340°F and position the racks in the center for even heat distribution. Place all three pans in the oven simultaneously and bake for approximately 40 minutes. We test doneness by inserting a toothpick into the center of each layer. The brownie layers should have a few moist crumbs attached while the cake layer should come out mostly clean. Remove from the oven and cool in pans for 10 minutes before turning out onto wire racks to cool completely.
Prepare the Chocolate Ganache
Heat the heavy cream in a small saucepan over medium heat until it just begins to simmer around the edges. Remove from heat and pour the hot cream over the chopped semisweet chocolate in a bowl. Let the mixture sit undisturbed for 2 minutes to allow the chocolate to soften. Whisk the ganache from the center outward until completely smooth and glossy. Add the unsalted butter and light corn syrup stirring until fully incorporated. The ganache should coat the back of a spoon when properly prepared.
Final Assembly and Decoration
Place one brownie layer on our serving plate and spread a thin layer of chocolate ganache on top. Add the cake layer next followed by more ganache then crown with the final brownie layer. Apply a generous coating of ganache to the outside of the entire cake using an offset spatula for smooth coverage. Drizzle additional warm ganache over the top allowing it to cascade down the sides naturally. Decorate with crumbled brownie pieces around the base if desired. Refrigerate the assembled cake for at least 2 hours before serving to allow the ganache to set properly and the flavors to meld together.
Directions for Serving

We recommend storing your finished brownie cake in the refrigerator until ready to serve. This storage method keeps the ganache firm and maintains the cake’s structural integrity while preserving the rich chocolate flavors.
Temperature Preparation
Allow the cake to reach the ideal serving temperature by removing it from refrigeration 15-20 minutes before serving. This brief warming period softens the ganache slightly and brings out the full depth of chocolate flavors in both the brownie and cake layers.
Thawing Instructions
For frozen brownie cake portions, we suggest thawing at room temperature for several hours before serving. Place the cake on a serving plate and cover loosely with plastic wrap to prevent condensation from affecting the ganache surface.
Garnishing Techniques
Transform your brownie cake into a stunning centerpiece with simple garnishing methods. Sprinkle chocolate shavings over the ganache surface using a vegetable peeler on a chocolate bar. We also recommend adding small brownie pieces around the base or on top for extra texture and visual appeal.
Serving Size Guidelines
| Serving Type | Portion Size | Serves |
|---|---|---|
| Dessert Course | 2-inch slice | 8-10 people |
| Party Portion | 1.5-inch slice | 12-14 people |
| Sample Size | 1-inch slice | 16-18 people |
Presentation Tips
Warm your serving knife under hot water and wipe clean between cuts for perfectly smooth slices. The dense brownie layer requires a gentle sawing motion while the cake layer cuts easily with downward pressure. Serve each slice on chilled dessert plates to maintain the ganache consistency and create an elegant presentation that showcases the distinct layers of your brownie cake masterpiece.
Storage Instructions

Proper storage techniques ensure our brownie cake maintains its delicious taste and perfect texture for days after baking. We’ve developed these proven methods to help you preserve your dessert’s quality and extend its enjoyment.
Room Temperature Storage
We recommend storing uncut brownie cake at room temperature for up to 4 days in an airtight container. Cut brownie cake stays fresh for 2 to 3 days using this method. Sealing the cake completely prevents air exposure and maintains the perfect balance of moisture between the brownie base and cake layers.
Refrigerated Storage
Refrigeration extends our brownie cake’s freshness for up to a week while creating an even fudgier texture. We wrap the cooled cake tightly with plastic wrap before placing it in an airtight container or plastic bag. This method particularly benefits the chocolate ganache by keeping it firm and glossy.
Freezer Storage
Long term storage requires freezing our brownie cake in airtight bags or containers for up to one month. We prevent freezer burn by removing excess air and double wrapping when necessary. Frozen portions thaw beautifully at room temperature while maintaining their original taste and texture.
Special Storage Considerations
| Storage Situation | Recommended Method | Duration |
|---|---|---|
| Uncut cake at room temperature | Airtight container | 4 days |
| Cut cake at room temperature | Airtight container | 2-3 days |
| Refrigerated storage | Wrapped + container | 1 week |
| Frozen storage | Airtight bag/container | 1 month |
Brownie cakes with additional toppings or mix-ins requiring refrigeration need cold storage regardless of our standard recommendations. We always refrigerate cut portions to prevent the exposed surfaces from drying out and compromising the cake’s signature moist texture.
Make-Ahead Tips

Planning ahead transforms brownie cake preparation from stressful to seamless. We recommend several strategic approaches that maintain our cake’s exceptional quality while accommodating busy schedules.
Advance Baking Strategies
Brownie cake layers excel when baked ahead of time. We suggest preparing both the brownie base and cake components up to two days before assembly. Allow each layer to cool completely at room temperature before moving to the next storage step.
Our refrigeration process requires cooling the baked layers for at least 30 minutes in the fridge. This cooling period sets the structure and makes cutting or handling much easier. Store the individual layers wrapped tightly in plastic wrap to prevent moisture loss.
Storage Timeline and Methods
| Storage Method | Duration | Temperature Range | Best For |
|---|---|---|---|
| Room Temperature | 2-3 days | 68°F-72°F | Uncut layers |
| Refrigeration | 5-7 days | 35°F-40°F | Cut pieces and assembly |
| Freezing | 3-4 weeks | 0°F or below | Long-term storage |
Freezer storage offers maximum flexibility for event planning. We wrap each layer individually in plastic wrap then aluminum foil to prevent freezer burn. Label each package with the date and contents for easy identification.
Assembly Timing
Assembled brownie cakes benefit from overnight refrigeration before serving. This resting period allows the ganache to set properly and flavors to meld together. We find that cakes assembled 12 to 24 hours ahead taste even better than freshly assembled ones.
Thawing frozen components requires patience for best results. Transfer frozen layers to the refrigerator 8 to 12 hours before assembly. Room temperature thawing works for individual pieces but may compromise texture in whole layers.
Ganache Preparation Tips
Chocolate ganache can be made up to three days ahead and stored in the refrigerator. We reheat chilled ganache gently in the microwave using 15-second intervals until spreadable. Avoid overheating which can cause the ganache to separate or become grainy.
Fresh ganache reaches optimal consistency when cooled to room temperature before application. This timing prevents melting of cake layers while ensuring smooth spreading across surfaces.
Conclusion
We’ve shown you how to create a show-stopping brownie cake that’ll become your go-to dessert for any occasion. This recipe delivers the perfect marriage of rich brownie and fluffy cake textures that guests won’t soon forget.
The beauty of this dessert lies in its flexibility – you can prepare components ahead of time and customize the presentation to match your style. Whether you’re hosting a birthday party or treating yourself to something special the techniques we’ve shared ensure consistent professional results.
Now it’s time to gather your ingredients and start baking. Your kitchen will smell incredible and the end result will taste even better than it looks.
Frequently Asked Questions
What is brownie cake and how is it different from regular brownies?
Brownie cake is a unique dessert that combines the rich, fudgy qualities of traditional brownies with the light, fluffy texture of cake. Unlike regular brownies which are dense and chewy, brownie cake features distinct layers including a brownie base, cake layer, and chocolate ganache, creating a perfect balance of chocolate intensity and airy consistency.
What are the main ingredients needed for brownie cake?
The recipe requires three components: brownie base (butter, dark chocolate, sugar, eggs, vanilla, flour, cocoa powder, salt), cake layer (butter, sugar, eggs, vanilla, flour, baking powder, salt, milk, cocoa powder), and chocolate ganache (heavy cream, semi-sweet chocolate, butter, corn syrup, salt). All ingredients work together to create this delectable layered dessert.
What equipment do I need to make brownie cake at home?
Essential equipment includes three 6-inch round cake pans, a large mixing bowl, sturdy whisk, and flexible spatula. For professional results, consider using a kitchen scale for precise measurements and an instant-read thermometer for temperature control. These tools ensure your brownie cake turns out perfectly every time.
How long does brownie cake last and how should I store it?
Uncut brownie cake stays fresh at room temperature for up to 4 days in an airtight container. Cut cake lasts 2-3 days at room temperature or up to one week refrigerated. For long-term storage, freeze for up to one month. Refrigeration creates a fudgier texture, while room temperature maintains the original consistency.
Can I make brownie cake ahead of time?
Yes! Bake the brownie base and cake layers up to two days in advance, cool completely, and wrap tightly in plastic wrap. Assembled cakes benefit from overnight refrigeration to set the ganache and meld flavors. You can also prepare chocolate ganache ahead and reheat for optimal consistency when ready to assemble.
What’s the best way to serve brownie cake?
Remove refrigerated cake 15-20 minutes before serving to enhance chocolate flavors. Use a warmed knife for clean cuts and serve on chilled dessert plates. Garnish with chocolate shavings or small brownie pieces for visual appeal. This timing ensures the perfect texture and temperature for maximum enjoyment.


