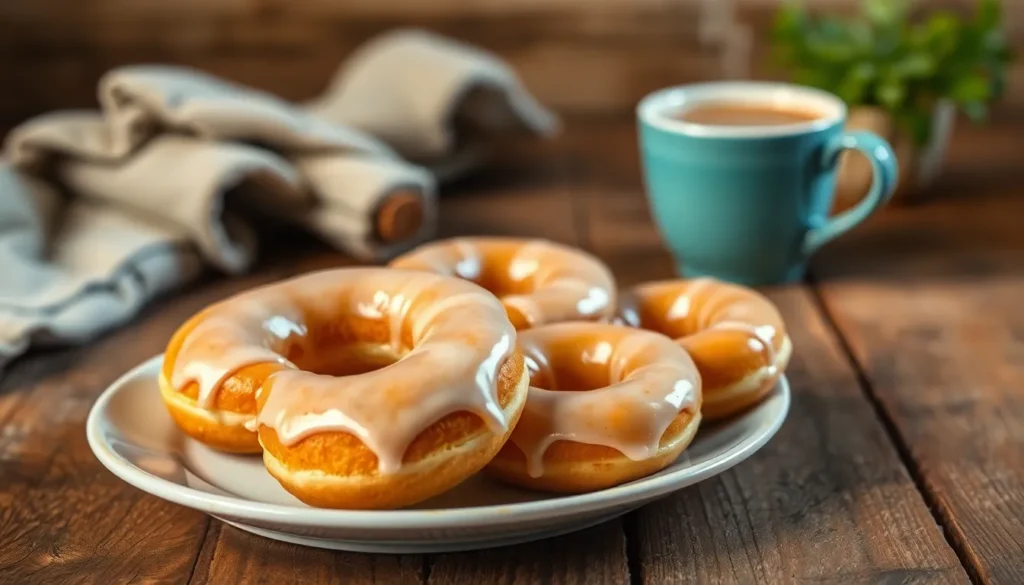
There’s something magical about the perfect buttermilk donut – that tender crumb, subtle tang, and golden exterior that makes your morning coffee taste even better. We’ve spent countless hours perfecting this classic recipe that transforms simple pantry staples into bakery-quality treats that’ll have your kitchen smelling like heaven.
These aren’t your typical cake donuts. The secret lies in the buttermilk, which creates an incredibly moist texture while adding just the right amount of tangy flavor to balance the sweetness. Whether you’re planning a special weekend breakfast or want to surprise your family with something extraordinary, these homemade buttermilk donuts deliver that nostalgic, old-fashioned taste we all crave.
What makes this recipe truly special is how achievable it is for home bakers. You don’t need fancy equipment or professional techniques – just a few quality ingredients and our foolproof method that guarantees fluffy, delicious results every single time.
Ingredients
We’ve carefully selected ingredients that work together to create tender, flavorful buttermilk donuts with the perfect balance of sweetness and tang. Our recipe uses pantry staples to deliver bakery-quality results every time.
For the Donuts
- 2 cups all-purpose flour
- 3/4 cup granulated sugar
- 2 teaspoons baking powder
- 1 teaspoon salt
- 1/2 teaspoon ground nutmeg
- 1/4 teaspoon ground cinnamon
- 3/4 cup buttermilk, room temperature
- 2 large eggs, room temperature
- 4 tablespoons unsalted butter, melted and cooled slightly
- 1 teaspoon vanilla extract
- Vegetable oil for frying (about 6 cups)
For the Glaze
- 2 cups powdered sugar, sifted
- 1/3 cup whole milk
- 2 tablespoons unsalted butter, melted
- 1 teaspoon vanilla extract
- Pinch of salt
Equipment Needed

Creating perfect buttermilk donuts requires the right tools to ensure smooth preparation and consistent results. We’ve compiled this essential equipment list to help you achieve bakery-quality donuts at home.
Mixing and Preparation Tools
- Stainless steel dough scraper for efficient dough handling and easy cleanup
- Natural pastry brush for applying egg wash or melted butter evenly
- Large mixing bowls for combining ingredients without spillage
- Measuring cups and spoons for accurate ingredient portions
Temperature Control Equipment
- Candy or deep fry thermometer for monitoring oil temperature accurately
- Digital models offer the most precise readings and are easier to read during frying
- Instant read thermometer as a backup for oil temperature verification
Frying Equipment
- 4 to 5 quart Dutch oven or large heavy bottomed pot for maintaining steady oil temperature
- Cast iron or stainless steel pots work exceptionally well for heat retention
- Stainless steel flexible fish turner or spider strainer for gentle donut handling
- Long handled wooden spoon for stirring and testing oil readiness
Baking Alternative Equipment
- Donut pans made from silicone or metal for those preferring baked versions
- Standard muffin tins can substitute for donut pans when needed
- Cooking spray or butter for greasing pans
Finishing and Cooling Equipment
- Stainless steel cooling rack for proper air circulation around cooling donuts
- Paper towels for draining excess oil from fried donuts
- Fine mesh sieve for dusting powdered sugar evenly
- Wire whisk for preparing smooth glazes and toppings
Each piece of equipment serves a exact purpose in creating the tender texture and golden appearance that makes buttermilk donuts irresistible.
Instructions

Creating perfect buttermilk donuts requires attention to timing and temperature. We’ll guide you through each step to ensure your donuts achieve that signature tender texture and golden color.
Prep the Dough
We start by combining our wet ingredients in a large mixing bowl. Mix the buttermilk, eggs, granulated sugar, and melted butter until well blended.
In a separate bowl, we whisk together the all-purpose flour, baking powder, baking soda, salt, cinnamon, and nutmeg. Gradually add these dry ingredients to our wet mixture, stirring until a sticky dough forms. Avoid overmixing as this can result in tough donuts.
Cover the dough and chill it in the refrigerator for at least one hour or overnight. This resting period allows the flour to fully hydrate and makes the dough easier to handle.
Shape the Donuts
Remove the chilled dough from the refrigerator and place it on a lightly floured surface. Roll out the dough to approximately 1/2 inch thickness using a rolling pin.
Cut out the donuts using a donut cutter or two round biscuit cutters of different sizes. We recommend cutting all donuts at once to maintain consistent thickness. Save the donut holes for frying as well.
Heat the Oil
Fill a Dutch oven or heavy-bottomed pot with oil to a depth of about 3 inches. Heat the oil to exactly 375°F using a candy thermometer for accurate temperature monitoring.
Maintain this temperature throughout the frying process. Oil that’s too hot will brown the exterior before cooking the interior, while oil that’s too cool will result in greasy donuts.
Fry the Donuts
Carefully lower several donuts into the hot oil using a fish turner or slotted spoon. Fry in small batches to avoid overcrowding and temperature drops.
Cook each donut for approximately 1-2 minutes per side until golden brown. Flip them halfway through using your fish turner for even browning. The donuts should puff up and develop a beautiful golden color.
Remove the fried donuts and place them on a wire cooling rack positioned over a baking sheet to catch drips. This allows excess oil to drain while keeping the donuts crisp.
Make the Glaze
Whisk together the powdered sugar, milk, melted butter, and vanilla extract in a medium bowl until completely smooth. The mixture should coat the back of a spoon without being too thick.
Adjust the consistency by adding more powdered sugar for a thicker glaze or more milk for a thinner coating. We want the glaze to flow smoothly but not run off the donuts completely.
Glaze and Serve
Dip each warm donut face-down into the glaze while they’re still slightly warm. Allow excess glaze to drip back into the bowl before placing the donuts on the cooling rack.
Serve the glazed buttermilk donuts immediately while they’re fresh and the glaze is still slightly wet. The combination of warm donuts and sweet glaze creates an irresistible treat that pairs perfectly with your morning coffee.
Pro Tips for Perfect Buttermilk Donuts

Mastering buttermilk donuts requires attention to detail and proper technique. We’ve gathered essential tips to help you create consistently perfect results every time you make these delicious treats.
Preparation and Handling
Keep the Dough Chilled when it becomes too soft or sticky during preparation. Refrigerate the mixture for 10-15 minutes to make handling much easier and prevent the dough from becoming unmanageable.
Use the Right Mixing Method by combining dry ingredients like flour, sugar, baking powder, and baking soda in one bowl. Mix wet ingredients including buttermilk, eggs, and melted butter in another bowl before combining them together for optimal texture.
Knead the Dough a few times after mixing to ensure all ingredients are well combined. This gentle kneading develops slight elasticity that contributes to the donuts’ tender final texture.
Frying and Glazing
Temperature Control makes the difference between perfect donuts and disappointing results. Fry the donuts at 375°F to achieve that golden crust while maintaining a soft interior that buttermilk donuts are famous for.
Work in Small Batches to prevent overcrowding your frying vessel. This technique ensures each donut fries evenly and maintains consistent temperature throughout the cooking process.
Glaze While Warm for the best coating results. Dip the donuts in glaze while they’re still warm to achieve an even coating that sets beautifully and creates that perfect glossy finish.
Serving Suggestions
Pair with Beverages to enhance the overall experience. Serve buttermilk donuts with freshly brewed coffee, cold milk, or a scoop of vanilla ice cream for a delightful treat that pleases every palate.
Customize with Toppings by setting up a DIY donut bar with various options. Offer chocolate glaze, caramel drizzle, colorful sprinkles, or crushed nuts for a fun twist that lets everyone create their perfect donut combination.
Storage Instructions

After creating these irresistible buttermilk donuts, we want to preserve their tender texture and delicious flavor for as long as possible. Understanding proper storage methods ensures our homemade treats maintain their quality whether we plan to enjoy them today or save them for later.
Room Temperature Storage
We recommend storing our buttermilk donuts in an airtight container at room temperature for optimal freshness. This method keeps the donuts at their best for up to 2 days without requiring refrigeration.
When arranging the donuts for storage, we place them in a single layer or separate multiple layers with parchment paper. This technique prevents the donuts from sticking together and maintains their beautiful golden appearance.
Refrigeration Options
Extended storage becomes necessary when we need to keep our donuts fresh beyond two days. Refrigeration allows us to store buttermilk donuts in an airtight container for up to 4-5 days.
Before serving refrigerated donuts, we bring them to room temperature or gently reheat them to restore their ideal texture. Cold donuts lose some of their tender quality, so this warming step ensures the best eating experience.
Freezing for Long-Term Storage
Freezing provides our best option for long-term donut storage. We arrange the donuts on a baking sheet in a single layer and freeze them until solid before transferring to a freezer-safe bag.
| Storage Method | Duration | Container Type |
|---|---|---|
| Room Temperature | Up to 2 days | Airtight container |
| Refrigeration | 4-5 days | Airtight container |
| Freezing (Baked) | Up to 3 months | Freezer-safe bag |
| Freezing (Fried/Bars) | Up to 2 months | Freezer-safe bag |
We achieve the freshest results by freezing unfrosted donuts. After thawing at room temperature, we apply fresh glaze before serving to maintain that bakery-quality taste and appearance.
Reheating Methods
Proper reheating restores the warm, tender texture that makes our buttermilk donuts so appealing. We use two primary methods depending on our preference and available time.
For oven reheating, we warm the donuts in a 300°F oven for 5-7 minutes until heated through and slightly crisp. This method provides even heating and helps restore the exterior texture.
Microwave reheating offers a quicker option, requiring only 10-15 seconds of heating. We exercise caution to avoid overheating, which can soften glazes and create an undesirable texture.
Variations and Flavor Ideas

We love how versatile buttermilk donuts can be with just a few simple ingredient swaps. These variations transform our basic recipe into exciting new flavors that keep everyone coming back for more.
Warm Spice Variations
Gingerbread Spice Donuts bring cozy bakery vibes to your kitchen. We add 1/2 teaspoon ground cinnamon, 1/2 teaspoon ground ginger, and 1/8 teaspoon each of ground cloves and allspice directly to our dry ingredients. The glaze gets a boost with 1/8 teaspoon cinnamon mixed in for extra warmth.
Cinnamon Sugar Donuts offer a classic twist that never goes out of style. We fold 1/2 teaspoon ground cinnamon into the dough before chilling. Instead of our usual glaze, we roll the warm donuts in a mixture of 1/2 cup granulated sugar and 1/2 teaspoon cinnamon for that nostalgic sugar-coated finish.
Citrus and Floral Options
Meyer Lemon Donuts brighten up any morning with their sunny flavor profile. We swap the nutmeg for 1/8 teaspoon ground cardamom and incorporate 1 tablespoon Meyer lemon zest into our dough. The glaze becomes extra special when we use Meyer lemon juice instead of regular milk and add a pinch of ground cardamom.
Rich and Indulgent Glazes
Brown Butter and Maple Glaze creates an irresistible combination that elevates our donuts to gourmet status. We brown butter until it develops a nutty aroma, then whisk it with maple syrup and vanilla bean paste for a glaze that adds deep, complex flavors.
Buttermilk and Vanilla Bean Glaze provides an elegant finishing touch that complements the donuts’ natural tang. We combine buttermilk with vanilla bean paste to create a glaze where the buttermilk’s acidity perfectly balances the sweetness while adding visual appeal with those beautiful vanilla specks.
| Variation | Key Ingredient | Amount | Special Notes |
|---|---|---|---|
| Gingerbread Spice | Mixed spices | 1/2 tsp each cinnamon/ginger | Add 1/8 tsp cloves and allspice |
| Cinnamon Sugar | Ground cinnamon | 1/2 tsp in dough | Roll in sugar mixture instead of glazing |
| Meyer Lemon | Lemon zest | 1 tbsp | Replace nutmeg with cardamom |
| Brown Butter Maple | Brown butter | As needed | Combine with maple syrup |
| Buttermilk Vanilla | Vanilla bean paste | To taste | Use buttermilk as glaze base |
Each variation maintains the tender texture and golden appearance that makes our buttermilk donuts special while offering unique flavor experiences. These options work perfectly whether you’re hosting a brunch or want to surprise your family with something different from the usual glazed variety.
Conclusion
We’ve shown you everything you need to create bakery-quality buttermilk donuts right in your own kitchen. From the essential ingredients to the perfect frying technique these homemade treats offer that irresistible combination of tender texture and subtle tang that makes them so special.
The beauty of this recipe lies in its simplicity and versatility. Whether you stick with the classic version or experiment with our suggested variations you’ll have a foolproof method for creating donuts that rival any bakery.
There’s something magical about the aroma of freshly fried donuts filling your kitchen. These buttermilk donuts aren’t just a treat – they’re an experience that brings families together and creates lasting memories. So grab your apron heat up that oil and let’s make some donut magic happen.
Frequently Asked Questions
What makes buttermilk donuts different from regular donuts?
Buttermilk donuts have a unique tender texture and subtle tang that sets them apart from regular donuts. The buttermilk’s acidity creates a more moist and flavorful donut with a perfectly balanced sweetness. This ingredient also contributes to their signature golden appearance and helps achieve that bakery-quality texture at home.
What ingredients do I need to make buttermilk donuts?
You’ll need basic pantry staples: all-purpose flour, granulated sugar, baking powder, buttermilk, eggs, melted butter, and vanilla extract. For the glaze, gather powdered sugar, milk, melted butter, and vanilla. These simple ingredients combine to create tender, flavorful donuts with the perfect balance of sweetness and tang.
What equipment is essential for making homemade buttermilk donuts?
Essential equipment includes large mixing bowls, a candy thermometer for temperature control, and a Dutch oven for frying. You’ll also need a dough scraper, fish turner for flipping donuts, cooling racks, and fine mesh sieves. Alternatively, you can use donut pans or muffin tins for baked versions instead of frying.
How long should I chill the donut dough?
The dough should be chilled to enhance texture and make it easier to handle during shaping. Proper chilling helps develop the donuts’ tender texture and prevents them from becoming tough. The exact timing depends on your recipe, but chilled dough is crucial for achieving that perfect golden appearance and soft interior.
What’s the correct oil temperature for frying buttermilk donuts?
Maintaining proper oil temperature is crucial for achieving a golden brown crust and soft interior. Use a candy thermometer to monitor the temperature consistently. Frying at the correct temperature ensures even cooking and prevents the donuts from becoming greasy or undercooked. Work in small batches to maintain steady temperature.
When should I glaze the donuts for best results?
Glaze the donuts while they’re still warm for the best finish. Warm donuts allow the glaze to adhere properly and create a smooth, even coating. This timing ensures the glaze complements the donuts’ flavor perfectly, creating that irresistible combination of sweetness and the buttermilk’s subtle tang.
How should I store leftover buttermilk donuts?
Store donuts in an airtight container at room temperature for up to 2 days, or refrigerate for 4-5 days. For long-term storage, freeze unfrosted donuts for best results. When ready to serve, reheat in an oven or microwave to restore their tender texture before adding fresh glaze if desired.
Can I make different flavored variations of buttermilk donuts?
Yes! Simple ingredient swaps create exciting flavor variations while maintaining the signature tender texture. Try warm spice options like Gingerbread Spice or Cinnamon Sugar, citrus variations like Meyer Lemon, or rich glazes such as Brown Butter Maple and Buttermilk Vanilla Bean for unique taste experiences perfect for any occasion.


