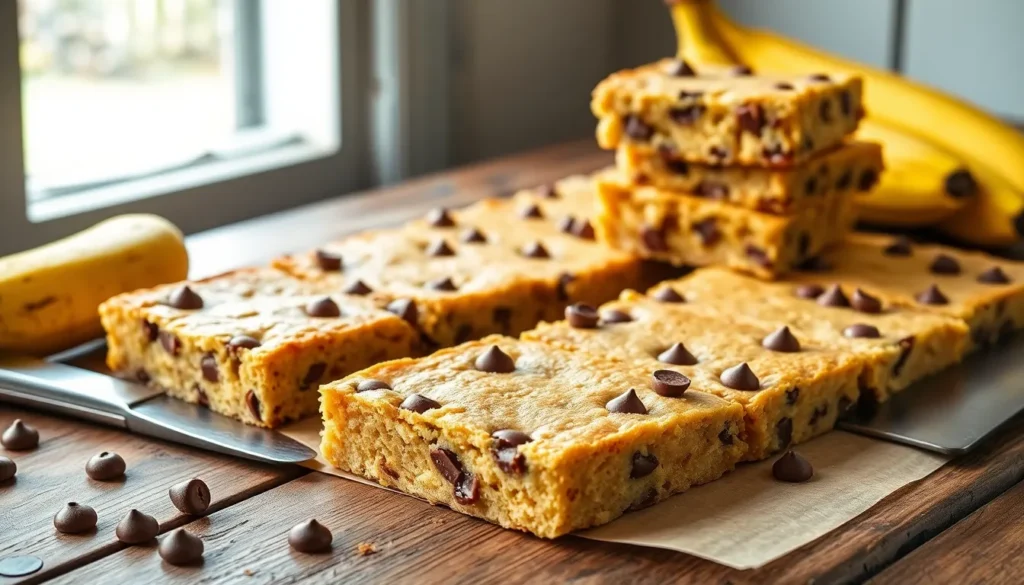
We’ve all been there – staring at a bunch of overripe bananas on our counter wondering what to do with them. Instead of letting them go to waste we’re sharing our favorite solution that transforms those spotted bananas into something absolutely irresistible: chocolate chip banana bars.
These bars combine the natural sweetness of ripe bananas with rich chocolate chips creating a treat that’s both comforting and indulgent. They’re incredibly versatile too – perfect for breakfast with your morning coffee afternoon snacking or even dessert after dinner. Unlike traditional banana bread these bars bake up with a delightfully chewy texture that’ll have everyone asking for the recipe.
What we love most about this recipe is how simple it is to make. With just one bowl and basic pantry ingredients you’ll have these golden bars ready in under an hour. They’re also naturally moist thanks to those perfectly ripe bananas which means they stay fresh for days.
Ingredients
These chocolate chip banana bars require simple pantry staples that you likely already have on hand. We’ve organized the ingredients into two categories to make your baking process smooth and efficient.
For the Bars
- 3 large ripe bananas, mashed (about 1½ cups)
- ⅓ cup melted butter or vegetable oil
- ¾ cup packed light brown sugar
- 1 large egg, beaten
- 1 teaspoon vanilla extract
- 1½ cups all-purpose flour
- 1 teaspoon baking soda
- ½ teaspoon salt
- 1 cup semi-sweet chocolate chips
- ½ cup chopped walnuts (optional)
For the Optional Glaze
- 1 cup powdered sugar
- 2-3 tablespoons milk or heavy cream
- ½ teaspoon vanilla extract
- Pinch of salt
Equipment Needed
 1")
Making these chocolate chip banana bars requires minimal equipment that most home bakers already have in their kitchens. We recommend using an 8×8-inch or 9×13-inch metal baking pan for optimal results. Metal pans conduct heat more efficiently than other materials and help create evenly baked bars with consistent texture throughout.
Parchment paper becomes essential for lining your baking pan. This simple step prevents the bars from sticking and makes removal effortless once they’ve cooled. We always line our pans completely with parchment paper extending over the edges for easy lifting.
A stand mixer or hand mixer streamlines the mixing process significantly. These tools excel at creaming butter and sugar together until light and fluffy. They also ensure wet ingredients blend thoroughly and help incorporate dry ingredients without overmixing the batter.
Glass baking pans work as an alternative to metal pans but require timing adjustments. Glass retains heat longer than metal so we typically reduce the baking time by 5 to 10 minutes when using glass cookware. Monitor the bars closely during the final minutes of baking to prevent overcooking.
Basic mixing tools round out our equipment list perfectly. A whisk helps combine dry ingredients before adding them to the wet mixture. A flexible spatula proves invaluable for scraping down bowl sides and folding in chocolate chips without crushing them. These simple tools ensure every ingredient gets properly incorporated into our batter.
Instructions
 2")
These simple steps will guide you through creating perfectly moist and chewy chocolate chip banana bars. We’ll walk you through each stage from preparation to the final cutting process.
Prep
We start by preheating our oven to 350°F (175°C) to ensure even baking throughout. Next, we prepare our baking pan by spraying an 8×8-inch or 15×10.5-inch pan with non-stick spray and lining it with parchment paper for effortless removal later.
Make the Batter
We begin by creaming together 1/2 cup unsalted butter and 1 cup brown sugar until well combined. Our next step involves adding 1 large egg, 1 1/2 teaspoons vanilla extract, and 1/2 teaspoon fine salt to the mixture. We mix these ingredients until they’re fully incorporated before adding 1 cup all-purpose flour and mixing just until combined.
Finally, we fold in 1 cup mashed banana and 3/4 cup chocolate chips, being careful not to overmix the batter. The key is gentle folding to maintain the bars’ tender texture.
Bake
We transfer our batter to the prepared pan and spread it evenly using a spatula. The bars need to bake for 33-37 minutes, or until the edges turn golden brown and the center is completely baked through. We check for doneness by inserting a toothpick into the center—it should come out with just a few moist crumbs attached.
Cool and Cut
Patience is essential at this stage as we let the bars cool completely in the pan or transfer them to a wire rack. Once they’ve reached room temperature, we cut them into squares using a sharp knife. We clean the knife between cuts to ensure neat, professional-looking edges that showcase the chocolate chips beautifully.
Storage Instructions
 3")
Once our chocolate chip banana bars have cooled completely we need to store them properly to maintain their moist texture and fresh flavor. We recommend using an airtight container to prevent the bars from drying out and losing their signature chewy consistency.
For short term storage we can keep the bars at room temperature in a sealed container for up to 3-4 days. This method works perfectly when we plan to enjoy the bars within a few days of baking. The natural moisture from the bananas helps keep the bars fresh during this timeframe.
When we want to extend the shelf life we should refrigerate the bars in an airtight container where they will stay fresh for up to a week. Refrigeration slows down any potential spoilage while maintaining the bars’ quality and taste. We should allow refrigerated bars to come to room temperature before serving for the best texture.
For longer storage periods we can freeze the bars for up to 3 months. Before freezing we must ensure the bars are completely cooled to prevent condensation buildup. We should wrap them tightly in plastic wrap or aluminum foil then place them in a freezer safe bag or container to prevent freezer burn.
| Storage Method | Duration | Container Type |
|---|---|---|
| Room Temperature | 3-4 days | Airtight container |
| Refrigerated | Up to 1 week | Sealed airtight container |
| Frozen | Up to 3 months | Wrapped in plastic/foil + freezer bag |
For added convenience we can cut the bars into individual squares before freezing. This allows us to thaw only the portions we need without defrosting the entire batch. When we’re ready to enjoy frozen bars we can thaw them at room temperature or warm them briefly in the microwave for that fresh baked taste.
Recipe Variations
 4")
These chocolate chip banana bars adapt beautifully to different tastes and dietary needs. We can transform this basic recipe into countless delicious variations using simple ingredient swaps and creative additions.
Add-In Options
We love experimenting with different mix-ins to create unique flavor combinations. Mini chocolate chips work wonderfully for even distribution throughout the bars, while regular-sized chips provide more pronounced chocolate bursts. Dark chocolate chips offer rich intensity, milk chocolate delivers classic sweetness, and white chocolate chips create elegant contrast against the banana base.
Chopped nuts add delightful crunch and complement the banana flavor perfectly. Walnuts bring earthy richness, while pecans contribute buttery sweetness. We recommend toasting nuts lightly before adding them to enhance their flavor and maintain their crunch during baking.
Peanut butter chips create an irresistible combination with banana, mimicking the classic peanut butter and banana pairing. Butterscotch chips introduce caramel notes that pair beautifully with brown sugar in the base recipe. We suggest using up to 1 cup of total mix-ins for optimal flavor and texture balance.
| Mix-In Type | Recommended Amount | Flavor Profile |
|---|---|---|
| Chocolate chips (any variety) | 3/4 to 1 cup | Sweet, rich |
| Chopped nuts | 1/2 to 3/4 cup | Crunchy, nutty |
| Peanut butter chips | 1/2 to 3/4 cup | Creamy, nutty |
| Butterscotch chips | 1/2 to 3/4 cup | Caramel, sweet |
Frosting Alternatives
We can serve these bars plain for a simple treat, but adding frosting transforms them into an elegant dessert. Cream cheese frosting provides tangy richness that balances the sweet banana flavor perfectly. We recommend letting the bars cool completely before applying any frosting to prevent melting.
Chocolate ganache creates an indulgent finish that chocolate lovers adore. Simply heat equal parts heavy cream and chopped chocolate until smooth, then drizzle or spread over cooled bars. Brown sugar glaze offers caramel notes that enhance the banana flavor without overpowering it.
For lighter options, we suggest dusting the bars with powdered sugar for simple elegance. Caramel drizzle adds restaurant-quality presentation and complements the banana base beautifully. A thin layer of vanilla buttercream provides classic sweetness that appeals to all ages.
| Frosting Type | Application Method | Flavor Impact |
|---|---|---|
| Cream cheese frosting | Spread when bars are cool | Tangy, rich |
| Chocolate ganache | Drizzle or spread | Intense chocolate |
| Brown sugar glaze | Drizzle while warm | Caramel notes |
| Powdered sugar | Dust before serving | Light sweetness |
Tips for Perfect Chocolate Chip Banana Bars
 5")
Creating flawless chocolate chip banana bars requires attention to exact techniques that ensure optimal texture and flavor. We’ve gathered essential tips from our extensive testing to help you achieve bakery-quality results every time.
Ingredient Temperature and Preparation
Room temperature ingredients mix more evenly and create a smoother batter. We recommend removing eggs and any dairy from the refrigerator 30 minutes before baking. This simple step prevents lumps and ensures proper incorporation of all components.
Proper Flour Measuring Technique
Accurate flour measurement prevents dense, heavy bars that lack the desired tender crumb. We always spoon flour directly into our measuring cup and level it off with a knife rather than scooping. This method prevents packing too much flour into the cup, which can result in dry, tough bars.
Mixing Method Mastery
Overmixing develops gluten strands that create a tough texture in your finished bars. We mix our batter just until the dry ingredients disappear into the wet mixture. Visible flour streaks should barely remain when you stop mixing for the most tender results.
Baking Time and Temperature Guidelines
| Pan Size | Baking Time | Temperature |
|---|---|---|
| 8×8 inch | 28-35 minutes | 350°F (175°C) |
| 9×13 inch | 18-25 minutes | 350°F (175°C) |
Monitor your bars closely during the final minutes of baking. We check for doneness when the edges feel firm to the touch and a toothpick inserted in the center emerges clean or with just a few moist crumbs.
Cooling for Clean Cuts
Complete cooling prevents crumbling and ensures neat, professional-looking squares. We allow our bars to cool entirely in the pan before cutting, which typically takes 2-3 hours at room temperature. Rushing this step results in messy, uneven pieces that fall apart.
Gluten-Free Adaptations
Gluten-free flour blends require a brief resting period to fully hydrate. We let our gluten-free batter sit for 10 minutes before spreading it in the pan. This technique allows the alternative flours to absorb moisture properly and creates a better final texture.
Banana Ripeness Optimization
Overripe bananas with brown spots provide the most intense flavor and natural sweetness. We use bananas that feel soft to the touch and have developed a strong banana aroma. These bananas mash easily and distribute evenly throughout the batter without creating lumps.
Conclusion
These chocolate chip banana bars offer the perfect way to transform overripe bananas into a crowd-pleasing treat that’s both simple and satisfying. We’ve shown you how easy it is to create bakery-quality bars with just basic ingredients and minimal equipment.
The versatility of this recipe means you can customize it to suit any taste preference or dietary need. Whether you stick with the classic version or experiment with different mix-ins and toppings the results will always be deliciously moist and flavorful.
With proper storage techniques your bars will stay fresh for days making them an excellent make-ahead option for busy schedules. We’re confident these chocolate chip banana bars will become a go-to recipe in your baking repertoire.
Frequently Asked Questions
What makes these banana bars different from banana bread?
These chocolate chip banana bars have a chewy texture rather than the cake-like consistency of banana bread. They’re made in one bowl, bake faster than traditional banana bread, and are easier to portion into neat squares. The bars are also more versatile, working well for breakfast, snacks, or dessert.
How ripe should the bananas be for this recipe?
Use overripe bananas with brown spots or completely brown peels for the best results. These very ripe bananas provide maximum sweetness and moisture, ensuring your bars stay soft and flavorful. The riper the bananas, the more natural sweetness they’ll add to your bars.
Can I use a different pan size for baking?
Yes, you can use either an 8×8-inch or 9×13-inch metal baking pan. Metal pans conduct heat better than glass. If using a larger pan, your bars will be thinner and may bake faster, so check for doneness a few minutes earlier than the recipe suggests.
How long do these banana bars stay fresh?
Store the bars in an airtight container at room temperature for 3-4 days, refrigerate for up to one week, or freeze for up to 3 months. For best results, cut into squares before freezing and thaw at room temperature or warm briefly in the microwave.
What chocolate chip variations can I use?
You can substitute mini chocolate chips, dark chocolate chips, milk chocolate chips, or white chocolate chips. Other tasty alternatives include chopped nuts like walnuts or pecans, peanut butter chips, or butterscotch chips. Mix and match different add-ins to create your preferred flavor combination.
Do I need special equipment to make these bars?
You only need basic kitchen equipment: a mixing bowl, whisk, flexible spatula, and measuring cups. A stand or hand mixer can help with mixing but isn’t required. Line your baking pan with parchment paper for easy removal of the finished bars.
Can I make these bars gluten-free?
Yes, you can substitute gluten-free flour for regular all-purpose flour. When using gluten-free flour, let the batter rest for 10-15 minutes before baking to allow the flour to hydrate properly. This helps achieve better texture in the finished bars.
Should I add frosting or glaze to these bars?
Frosting is optional but adds extra sweetness. Popular options include cream cheese frosting, chocolate ganache, brown sugar glaze, or simply dusting with powdered sugar. The bars are delicious on their own, so frosting is purely a matter of personal preference.


