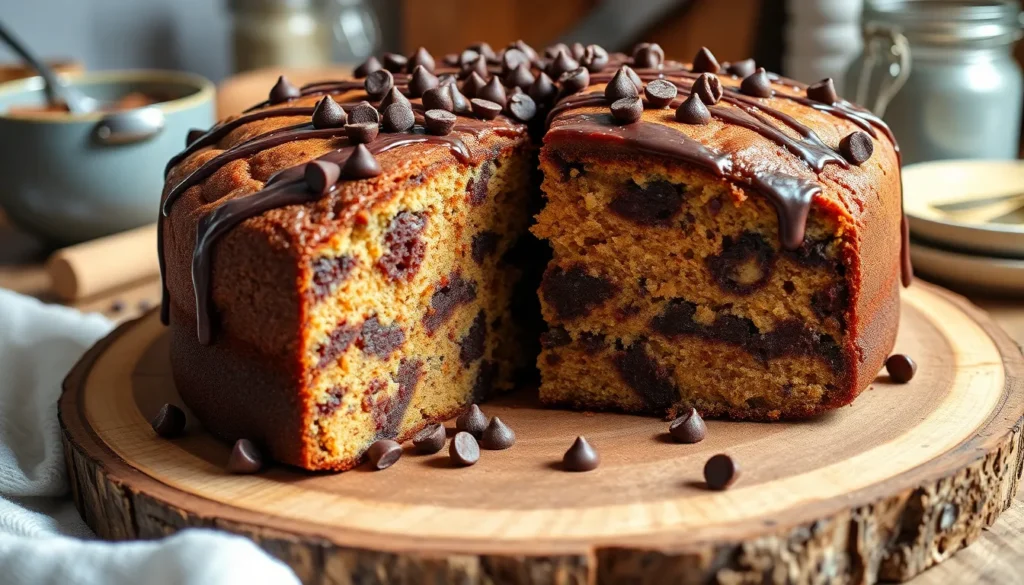
We’ve all been there – craving something sweet that bridges the gap between a classic chocolate chip cookie and a rich, fluffy cake. That’s exactly where our chocolate chip cake comes to the rescue! This delightful dessert combines the best of both worlds with tender, moist cake layers studded with melty chocolate chips throughout.
What makes this recipe truly special is how it transforms the beloved flavors we grew up with into an impressive cake that’s perfect for birthdays, family gatherings, or those moments when you simply can’t decide between cookies and cake. The chocolate chips create pockets of gooey sweetness in every bite while maintaining that classic vanilla cake base we all love.
We’ve perfected this recipe to ensure you get that bakery-quality texture at home – fluffy, light, and absolutely irresistible. Whether you’re baking for a crowd or treating yourself to a slice with your morning coffee, this chocolate chip cake delivers comfort and satisfaction in every forkful.
Ingredients
Our chocolate chip cake requires simple pantry staples that work together to create bakery-quality results. We’ve organized these ingredients by component to make your baking process seamless and efficient.
For the Cake
- 2 cups all-purpose flour
- 1¾ cups granulated sugar
- ¾ cup unsalted butter, softened to room temperature
- 3 large eggs, room temperature
- 1 cup whole milk
- 2 teaspoons vanilla extract
- 2 teaspoons baking powder
- ½ teaspoon salt
- 1 cup semi-sweet chocolate chips
- 2 tablespoons all-purpose flour (for coating chocolate chips)
For the Chocolate Chip Topping
- ½ cup semi-sweet chocolate chips
- 2 tablespoons unsalted butter, melted
- 1 tablespoon brown sugar
- Pinch of sea salt
Equipment Needed
 1")
We have carefully selected the essential tools that will help you create this bakery-quality chocolate chip cake with ease. Having the right equipment ensures your cake turns out perfectly fluffy and moist every time.
Baking Pans
Our recipe works beautifully in either a 9×9 inch square pan or a 9×13 inch rectangular pan. The square pan creates a thicker cake perfect for intimate gatherings, while the rectangular pan yields more servings for larger celebrations.
Oven and Preparation Tools
A reliable oven is crucial for achieving that perfect golden-brown finish. We recommend lining your chosen pan with parchment paper to guarantee easy removal without sticking or breaking.
Mixing Equipment
Large mixing bowls are essential for properly combining our dry and wet ingredients without overflow. An electric mixer, whether a stand mixer or handheld electric model, creates the ideal batter consistency that makes our cake so irresistibly fluffy.
Measuring and Mixing Tools
Accurate measuring cups and spoons ensure consistent results every time you bake this recipe. A good spatula becomes your best friend for scraping bowl sides clean and spreading the batter evenly across your prepared pan.
Pro Equipment Tips
We suggest using multiple mixing bowls if you prefer keeping wet and dry ingredients separate initially. This approach gives you better control over the mixing process and helps prevent overmixing, which can lead to a dense cake texture.
Instructions
 2")
We’ll guide you through creating this bakery-quality chocolate chip cake with precise steps that guarantee perfect results every time. Each stage builds upon the last to create our signature fluffy texture loaded with melty chocolate chips.
Prep the Pan and Oven
Set your oven to 350°F (175°C) for metal pans or reduce to 325°F when using glass cookware. Line your chosen pan with parchment paper and generously grease all surfaces for effortless cake removal later.
| Pan Size | Temperature | Adjustment Needed |
|---|---|---|
| 9×9 inch (metal) | 350°F | Standard temperature |
| 9×13 inch (metal) | 350°F | Standard temperature |
| Glass pans | 325°F | Reduce by 25°F |
Make the Cake Batter
Combine 2 cups all-purpose flour with 1½ teaspoons baking powder, ½ teaspoon baking soda, and ½ teaspoon salt in your large mixing bowl. Add 1½ cups granulated sugar, 10 tablespoons softened butter, 3 large eggs, 1 teaspoon vanilla extract, and 1⅓ cups sour cream to the dry ingredients. Mix all components together until well combined, ensuring no flour streaks remain visible.
Add the Chocolate Chips
Measure 2 cups of chocolate chips and gently fold them into the prepared batter. Avoid overmixing at this stage to maintain the cake’s tender crumb structure and prevent the chocolate chips from breaking apart.
Bake the Cake
Pour the batter into your prepared pan and spread evenly to the corners. Bake for 32-40 minutes in a 9×9 inch pan or 30-35 minutes in a 9×13 inch pan until the surface appears golden brown.
| Pan Size | Baking Time | Doneness Test |
|---|---|---|
| 9×9 inch | 32-40 minutes | Toothpick with few moist crumbs |
| 9×13 inch | 30-35 minutes | Toothpick with few moist crumbs |
Insert a toothpick into the center to check for doneness—it should emerge dry or with just a few moist crumbs clinging to it. Remove from oven when the test confirms the cake is fully baked through.
Directions for Serving
 3")
Our chocolate chip cake delivers maximum flavor and texture when served properly at room temperature. We recommend following these essential steps to ensure your cake maintains its signature fluffy texture and melty chocolate chips.
Cooling the Cake
We always allow our freshly baked chocolate chip cake to cool in the pan on a wire rack for approximately 10 minutes after removing it from the oven. This crucial cooling period helps the cake set properly and prevents crumbling during removal from the pan.
After the initial cooling phase, we carefully transfer the cake from the pan to a wire rack to cool completely. The complete cooling process typically takes about an hour at room temperature. We never rush this step because proper cooling ensures the cake maintains its structure and prevents any toppings from melting.
For cakes with ganache topping, we ensure the cake reaches complete coolness before applying the ganache. This prevents the chocolate from melting and guarantees a smooth, professional finish that enhances both appearance and taste.
Slicing and Presentation
We use a sharp knife to slice our completely cooled chocolate chip cake into desired portions. Between each cut, we wipe the knife clean to maintain neat, professional-looking edges that showcase the cake’s interior texture and chocolate chip distribution.
For optimal presentation, we arrange the slices on a serving platter, allowing the golden color and chocolate chips to create visual appeal. When working with ganache-topped cakes, we allow the ganache to set completely before slicing to preserve the decorative drip details.
We enhance the cake’s presentation by sprinkling extra chocolate chips on top or adding a light drizzle of ganache for visual impact. These finishing touches elevate the cake from homemade to bakery-quality appearance while maintaining the authentic chocolate chip cake experience our readers expect.
Storage Instructions
 4")
Proper storage ensures our chocolate chip cake maintains its moist texture and delicious flavor for days after baking. We recommend several storage methods depending on how long you plan to keep the cake.
Room Temperature Storage
We can store the cake at room temperature in an airtight container for 2 to 4 days. The container should be placed away from direct sunlight and heat sources to prevent the chocolate chips from melting and the cake from drying out.
Refrigerated Storage
For extended freshness, we store the cake in the refrigerator for up to 3 to 5 days. Before serving refrigerated cake, we bring it to room temperature for optimal taste and texture. Cold cake can taste muted and feel dense compared to room temperature cake.
Freezer Storage
Long term storage requires freezing the cake for up to 3 months. We wrap whole cakes or individual slices tightly in plastic wrap and aluminum foil to prevent freezer burn. Frozen cakes should be thawed at room temperature before serving.
| Storage Method | Duration | Container/Wrapping | Temperature Notes |
|---|---|---|---|
| Room Temperature | 2-4 days | Airtight container | Away from heat and sunlight |
| Refrigerated | 3-5 days | Covered container | Bring to room temp before serving |
| Frozen | Up to 3 months | Plastic wrap + aluminum foil | Thaw at room temperature |
Freezing Unfrosted Layers
We can freeze unfrosted cake layers by wrapping them in plastic wrap and aluminum foil for up to 3 months. These layers accept frosting beautifully after thawing, making them perfect for advance preparation.
Ganache Application
When using ganache topping, we prepare it separately and apply it only after the cake cools completely. The ganache thickens naturally at room temperature or can be chilled in the refrigerator for faster setting.
Thawing Guidelines
Frozen cake slices thaw at room temperature within a few hours. Once thawed, we consume the cake promptly to maintain its best quality and prevent moisture loss.
Make-Ahead Tips
 5")
Planning ahead makes hosting special occasions significantly easier with our chocolate chip cake. We recommend several proven methods to prepare this dessert in advance while maintaining its signature moist texture and rich flavor.
Freezing for Long-Term Storage
Our cake freezes beautifully for extended periods. We can store the unfrosted cake layers in the freezer for up to one month without compromising quality. Some baking experts suggest properly wrapped chocolate chip cake remains suitable for consumption for several months when frozen correctly.
To freeze effectively we wrap each cooled layer tightly in plastic wrap followed by aluminum foil. This double wrapping prevents freezer burn and preserves the cake’s moisture. Label each package with the date to track storage time.
Thawing and Finishing
When ready to serve we remove the frozen cake from the freezer and allow it to thaw completely at room temperature. This process typically takes 2 to 3 hours depending on the cake’s thickness. Once thawed we proceed with frosting and decorating as desired.
Never attempt to frost a partially frozen cake as condensation will form and affect the frosting’s texture and appearance.
Short-Term Refrigeration Strategy
For events requiring precise timing we can assemble and frost the cake up to 8 hours before serving. Store the completed cake in the refrigerator during this period. This method works particularly well when planning to add final decorations like chocolate ganache drip or additional chocolate chips just before presentation.
Storage Timeline Reference
| Storage Method | Duration | Best Practices |
|---|---|---|
| Room Temperature | Up to 3 days | Airtight container |
| Refrigerated (frosted) | Up to 8 hours | Before final decorations |
| Frozen (unfrosted) | Up to 1 month | Double wrapped |
| Frozen (extended) | Several months | Proper wrapping essential |
Maintaining Quality
We find that proper storage timing ensures the best results for our chocolate chip cake. The cake retains its moisture and structure for up to three days when stored in an airtight container at room temperature. This flexibility allows us to bake the cake layers one day and complete the assembly the next day without sacrificing quality.
For sheet pan variations we can store the baked cake at room temperature for up to three days following the same storage principles as our traditional layered version.
Variations and Substitutions
 6")
We can easily customize this chocolate chip cake recipe to suit different dietary needs and flavor preferences. These modifications allow us to create the perfect version for any occasion or requirement.
Different Chocolate Options
Semi-Sweet Chocolate Chips deliver a more intense chocolate flavor compared to milk chocolate varieties. We recommend this option when you want a richer taste that balances perfectly with the sweet cake base.
Mini Chocolate Chips distribute more evenly throughout the batter and create a delightful texture contrast in every bite. These smaller chips provide consistent chocolate flavor without overwhelming any single slice.
Dark Chocolate Chips offer the deepest chocolate experience for those who prefer bold flavors. We suggest using these when you want to create a more sophisticated dessert profile.
| Chocolate Type | Flavor Profile | Best Use Case |
|---|---|---|
| Semi-Sweet | More intense than milk chocolate | Balanced sweetness |
| Mini Chips | Even distribution | Consistent texture |
| Dark Chocolate | Rich and bold | Sophisticated flavor |
Gluten-Free Version
Gluten-Free Flour Substitution requires replacing our standard 1.5 cups of all-purpose flour with an equal amount of gluten-free flour blend. We find that cup-for-cup substitution works best for maintaining the cake’s structure.
Vegan Modifications can be incorporated alongside gluten-free changes by using vegan baking sticks instead of butter and non-dairy milk in place of regular milk. We ensure all chocolate chips are vegan-friendly when making these substitutions.
Additional Ingredient Considerations include checking that baking powder and vanilla extract are certified gluten-free. We maintain the same measurements for all other ingredients to preserve the cake’s signature texture and flavor profile.
Conclusion
We’ve shown you how to create a chocolate chip cake that delivers bakery-quality results in your own kitchen. This recipe combines the best of both worlds – the beloved flavor of chocolate chip cookies with the satisfying texture of a perfectly fluffy cake.
The beauty of this dessert lies in its versatility. Whether you’re planning ahead for a special celebration or need a comforting treat for tonight you’ll find this cake adapts to your schedule perfectly. The make-ahead options and storage flexibility mean you can always have this crowd-pleaser ready when you need it.
With endless customization possibilities – from different chocolate chip varieties to dietary modifications – this recipe becomes your foundation for countless delicious variations. We’re confident this chocolate chip cake will become a treasured recipe in your baking collection bringing joy to every occasion where it’s served.
Frequently Asked Questions
What makes this chocolate chip cake different from regular chocolate cake?
This chocolate chip cake combines the best of both worlds – the familiar comfort of chocolate chip cookies with the fluffy, moist texture of cake. Unlike traditional chocolate cake, this recipe features chocolate chips throughout the batter, creating pockets of melty chocolate in every bite while maintaining a light, airy crumb structure.
Can I use different types of chocolate chips in this recipe?
Yes! You can customize the flavor by using semi-sweet, mini, or dark chocolate chips. Semi-sweet chips provide classic sweetness, mini chips distribute more evenly throughout the batter, and dark chocolate chips offer a richer, more intense chocolate flavor. The measurements remain the same regardless of which type you choose.
How should I store this chocolate chip cake?
Store the cake at room temperature in an airtight container for 2-4 days, or refrigerate for 3-5 days. For longer storage, wrap the cake in plastic wrap and aluminum foil, then freeze for up to 3 months. Bring refrigerated cake to room temperature before serving for the best texture and flavor.
Can I make this cake ahead of time for special occasions?
Absolutely! You can freeze unfrosted cake layers for up to one month when double-wrapped to prevent freezer burn. For shorter planning, assemble and frost the cake up to 8 hours before serving and store it in the refrigerator. Thaw frozen layers completely at room temperature before frosting.
What pan size should I use for this chocolate chip cake?
Use a 9×9 inch square pan for a thicker cake or a 9×13 inch rectangular pan for larger servings. The baking time will vary depending on your pan choice, so adjust accordingly. Always line your pan with parchment paper and grease it properly for easy removal.
Can I make this recipe gluten-free or vegan?
Yes! For gluten-free versions, substitute all-purpose flour with a cup-for-cup gluten-free flour blend. For vegan modifications, replace butter with vegan baking sticks and use non-dairy milk. Ensure all ingredients, including baking powder and vanilla extract, are certified gluten-free when making substitutions.
How do I know when the cake is properly baked?
Test for doneness by inserting a toothpick into the center of the cake. It should come out with just a few moist crumbs attached – not completely clean, as this indicates the cake is overbaked. The cake should also spring back lightly when touched and have a golden-brown color.
Why is proper cooling important for this cake?
Proper cooling maintains the cake’s structure and prevents toppings from melting. Cool the cake in the pan for 10 minutes, then transfer to a wire rack for about an hour until completely cool. This process helps preserve the fluffy texture and ensures clean slicing.


