We’ve discovered the perfect marriage between classic pound cake and everyone’s favorite chocolate chips. This chocolate chip pound cake transforms the traditional dense and buttery pound cake into an irresistible treat that’ll have your kitchen smelling like pure heaven.
What makes this recipe special isn’t just the generous handful of chocolate chips we fold into the batter. It’s the way they melt slightly during baking, creating pockets of gooey chocolate throughout the tender crumb. The result? A cake that’s sophisticated enough for special occasions yet comforting enough for everyday indulgence.
Whether you’re serving it with morning coffee, afternoon tea, or as a simple dessert, this chocolate chip pound cake delivers that perfect balance of rich vanilla flavor and chocolate satisfaction. We’ll show you exactly how to achieve that signature pound cake texture while ensuring every slice is loaded with chocolate goodness.
Ingredients
Creating the perfect chocolate chip pound cake requires carefully selected ingredients that work together to achieve that signature dense yet tender texture. We’ve organized our ingredient list to make your baking process smooth and efficient.
For the Pound Cake
- 1 cup (2 sticks) unsalted butter, softened to room temperature
- 1¾ cups granulated sugar
- 4 large eggs, room temperature
- 2 teaspoons pure vanilla extract
- 3 cups all-purpose flour
- ½ teaspoon baking powder
- ½ teaspoon salt
- 1 cup whole milk, room temperature
- ¼ cup sour cream
For the Chocolate Chips
- 1½ cups semi-sweet chocolate chips
- 2 tablespoons all-purpose flour (for coating chips)
For the Glaze (Optional)
- 1 cup powdered sugar
- 3-4 tablespoons heavy cream or whole milk
- 1 teaspoon vanilla extract
- Pinch of salt
Equipment Needed
 1")
Creating our chocolate chip pound cake requires exact tools that ensure proper mixing and baking results. We recommend gathering all equipment before starting the recipe to streamline the baking process.
Essential Mixing Equipment
Electric Hand Mixer or Whisk serves as our primary mixing tool for combining ingredients effectively. While we can use a manual whisk for this recipe, an electric mixer provides more thorough aeration and efficient mixing throughout the process. This equipment proves crucial for achieving the proper pound cake texture.
Mixing Bowls made from glass or stainless steel work best for separating dry and wet ingredients during preparation. We suggest using at least two medium-sized bowls to keep ingredients organized.
Rubber Spatula becomes essential for scraping bowl sides and folding ingredients together without overmixing. This tool helps us incorporate chocolate chips evenly throughout the batter.
Measuring and Baking Tools
Kitchen Scale or Measuring Cups and Spoons ensure accurate ingredient proportions for consistent results. We prefer using a kitchen scale for precision, though standard measuring tools work effectively when used properly.
6 Cup Loaf Pan or Bundt Cake Pan provides the ideal baking vessel for our pound cake. Metal loaf pans deliver excellent heat distribution, while Bundt pans create an elegant presentation for special occasions.
Cooling Rack allows proper air circulation around the finished cake for even cooling. We transfer our baked pound cake to this rack immediately after the initial cooling period.
Additional Helpful Tools
Sifter helps aerate flour before mixing, contributing to our cake’s tender texture. This step ensures smooth batter consistency without lumps.
Toothpicks serve as our primary doneness test by inserting into the cake center. When the toothpick emerges clean, our chocolate chip pound cake has finished baking properly.
Pan Variations
9×13-inch Pan offers an alternative baking option for sheet cake presentation. This larger pan works particularly well for parties and pairs beautifully with hot fudge frosting applications.
Instructions
 2")
Follow these detailed steps to create our perfectly textured chocolate chip pound cake with evenly distributed chocolate throughout every slice.
Prep Work
We begin by preheating our oven to 350°F (180°C) to ensure consistent baking temperature. Generously grease our 9×5-inch loaf pan or 10-inch tube pan with butter or cooking spray to prevent sticking.
Position the oven rack in the center position for optimal heat circulation. Room temperature ingredients blend more easily so we recommend removing butter and eggs from the refrigerator 30 minutes before mixing.
Making the Batter
We start by beating the softened butter and granulated sugar together until the mixture becomes light and fluffy, approximately 3-4 minutes with an electric mixer. Add eggs one at a time, beating well after each addition to maintain proper emulsification.
Pour in the vanilla extract and mix until fully incorporated. In a separate bowl, we whisk together the flour, baking powder, and salt. Alternately add the dry ingredients and milk to our butter mixture, beginning and ending with the flour mixture. Beat just until combined to avoid overmixing, which can result in a tough cake.
Adding the Chocolate Chips
We toss the chocolate chips with a tablespoon of flour to prevent them from sinking during baking. Gently fold the flour-coated chocolate chips into our batter using a rubber spatula, distributing them evenly throughout the mixture.
Avoid overmixing at this stage as we want to maintain the tender crumb structure while ensuring chocolate chips are well distributed.
Baking the Cake
Transfer our batter to the prepared pan and smooth the top with a spatula for even baking. Bake for 45-60 minutes for a loaf cake or approximately 1 hour for a Bundt cake, depending on our chosen pan size.
We test for doneness by inserting a toothpick into the center of the cake. The toothpick should come out clean or with just a few moist crumbs attached, indicating our cake is perfectly baked.
Cooling and Finishing
Allow the cake to cool in the pan for 10 minutes before carefully turning it out onto a wire rack. Complete cooling takes approximately 1-2 hours, which prevents the cake from breaking when sliced.
Once fully cooled, we can dust with confectioners’ sugar for an elegant presentation or drizzle with our optional glaze for added sweetness and visual appeal.
Directions for Serving
 3")
Once our chocolate chip pound cake has cooled completely, we can transform it into an impressive dessert presentation. The cooling process takes approximately 30 minutes in the pan followed by complete cooling on a wire rack to prevent cracking and ensure optimal texture.
Proper Cooling and Temperature
We recommend serving our chocolate chip pound cake at room temperature for the best flavor and texture experience. Room temperature allows the buttery richness to shine while keeping the chocolate chips perfectly soft. The cake maintains its ideal consistency when served within this temperature range, creating the perfect balance between the dense pound cake texture and the melted chocolate pockets.
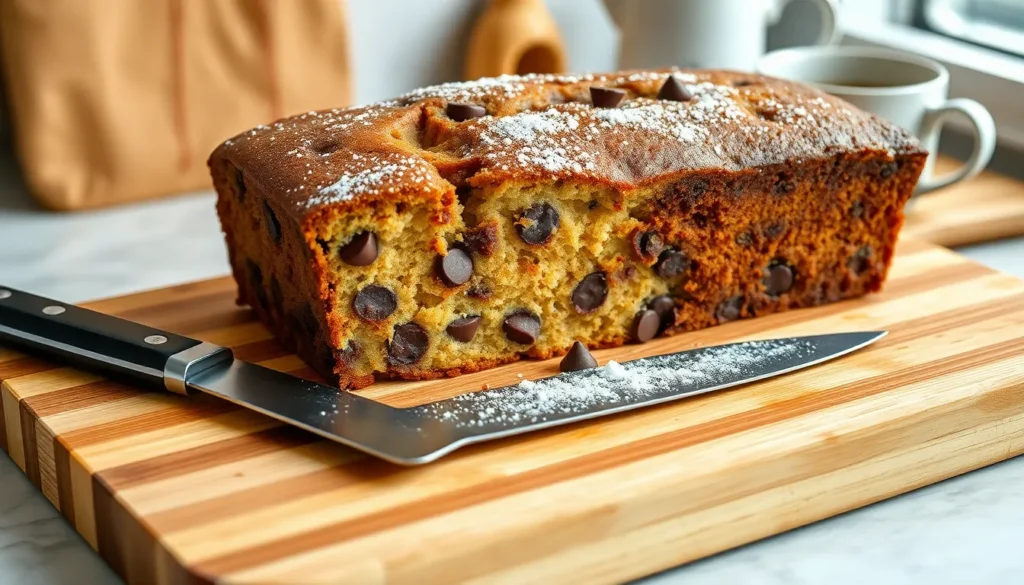
Slicing and Presentation
Sharp, clean cuts showcase our cake’s beautiful chocolate chip distribution throughout each slice. We suggest using a serrated knife for clean edges, wiping the blade between cuts to maintain neat presentation. Each slice reveals the generous chocolate chips embedded within the golden pound cake crumb, creating an appealing visual contrast.
Perfect Pairings
Our chocolate chip pound cake pairs exceptionally well with hot beverages. Coffee enhances the chocolate flavors while tea provides a lighter complement to the rich, buttery cake. For those who prefer cold beverages, a glass of milk creates a classic combination that balances the cake’s sweetness.
Enhancement Options
We can elevate our serving presentation with several simple additions. A light dusting of powdered sugar adds elegance and a touch of extra sweetness. Drizzling chocolate sauce over individual slices intensifies the chocolate experience. Adding a scoop of vanilla ice cream transforms our pound cake into a restaurant quality dessert perfect for special occasions.
Storage and Serving Timeline
| Storage Method | Duration | Serving Quality |
|---|---|---|
| Room temperature (airtight container) | Up to 3 days | Optimal texture and flavor |
| Refrigerated (covered) | Up to 1 week | Slightly firmer texture |
| Frozen (wrapped) | Up to 3 months | Best when thawed to room temperature |
We maintain peak serving quality by storing our cake in an airtight container at room temperature for up to three days. Refrigeration extends shelf life but may firm the texture slightly. For longer storage, freezing preserves the cake for up to three months, though we recommend thawing completely before serving for the best eating experience.
Storage Instructions
 4")
We recommend keeping your chocolate chip pound cake fresh and delicious by following proper storage methods that maintain its rich texture and flavor.
Room Temperature Storage
We suggest storing the cake at room temperature for everyday serving. Place your completely cooled cake in an airtight container or under a cake dome for 3 to 5 days to maintain optimal freshness. We emphasize allowing the cake to cool completely before storing to prevent moisture buildup that could make the texture soggy.
Refrigeration
We find that refrigerating chocolate chip pound cake extends its shelf life beyond room temperature storage. Wrap the cake tightly in plastic wrap or store it in an airtight container to prevent the cake from drying out in the cold environment. We typically reserve refrigeration for longer storage periods when we won’t consume the cake within the standard room temperature timeframe.
Freezing for Long-Term Storage
We recommend freezing as the best method for long-term preservation. Your chocolate chip pound cake maintains its quality for up to three months when properly wrapped. We suggest wrapping the cake tightly in plastic wrap first then covering with aluminum foil or placing it in a freezer-safe bag to prevent freezer burn.
| Storage Method | Duration | Container Type |
|---|---|---|
| Room Temperature | 3-5 days | Airtight container or cake dome |
| Refrigeration | Extended beyond room temp | Wrapped tightly in plastic |
| Freezing | Up to 3 months | Plastic wrap + foil or freezer bag |
Thawing Process
We recommend moving your wrapped frozen cake to the refrigerator the day before you plan to serve it. Allow the cake to thaw at room temperature the following day for the best texture and flavor restoration.
Preventing Dryness
We ensure our chocolate chip pound cake stays moist by measuring ingredients accurately to avoid excess flour that leads to dryness. The sour cream in our recipe maintains moisture and tenderness through its natural fat content. We also suggest using mini chocolate chips to prevent them from sinking during baking while maintaining even distribution throughout each slice.
Make-Ahead Tips
 5")
We find that chocolate chip pound cake becomes even more delicious when prepared in advance. Our favorite approach involves baking the cake completely and allowing it to cool to room temperature before wrapping it in plastic wrap followed by aluminum foil. This double wrapping technique prevents freezer burn and maintains the cake’s moist texture for extended storage.
Planning ahead becomes effortless when we freeze our pound cake for up to three months. The cake maintains its quality exceptionally well in the freezer without compromising the tender crumb or chocolate chip distribution. We recommend slicing the cake before freezing if you prefer individual portions that thaw quickly for unexpected guests or afternoon treats.
Thawing requires minimal effort when we move the wrapped cake from freezer to refrigerator 24 hours before serving. Room temperature finishing takes about 2 to 3 hours depending on the cake’s thickness. Our experience shows that gradual thawing preserves the original texture better than rapid defrosting methods.
Glazing works best when applied to completely thawed cake rather than frozen portions. We prepare our glaze fresh on serving day to ensure the smoothest consistency and brightest flavor. The glaze adheres beautifully to the cake’s surface when both components reach room temperature.
Advance preparation extends beyond freezing since we often bake our chocolate chip pound cake two days before serving. Room temperature storage in an airtight container keeps the cake fresh while allowing the flavors to meld together. This resting period actually enhances the overall taste profile as the vanilla and butter notes become more pronounced.
Make ahead scheduling proves invaluable for special occasions when we prefer spending time with guests rather than baking. Our pound cake requires no last minute preparation once it’s baked and stored properly. Simply remove from storage and add any desired finishing touches before presenting this impressive dessert.
Conclusion
We’ve shared everything you need to create this irresistible chocolate chip pound cake that’ll become a staple in your baking repertoire. The combination of buttery pound cake with melted chocolate pockets creates a dessert that’s both comforting and indulgent.
This recipe’s beauty lies in its simplicity and reliability. Whether you’re serving it for a special celebration or enjoying a quiet slice with your morning coffee the results are consistently delicious.
The make-ahead friendly nature of this cake makes it perfect for busy schedules and entertaining. We’re confident that once you try this recipe you’ll find yourself returning to it again and again. Happy baking!
Frequently Asked Questions
What makes chocolate chip pound cake different from regular pound cake?
Chocolate chip pound cake combines the classic dense, buttery texture of traditional pound cake with melted chocolate chips that create gooey pockets throughout. The chocolate chips add bursts of rich flavor while maintaining the signature tender crumb that pound cake is known for.
How do I prevent chocolate chips from sinking to the bottom of the cake?
Coat the chocolate chips in a light dusting of flour before folding them into the batter. This helps them stay suspended throughout the cake during baking. Mini chocolate chips also work better than regular-sized chips for preventing sinking.
What temperature should I bake chocolate chip pound cake?
Bake the cake at 350°F (180°C) for 45-60 minutes, depending on your pan size. A loaf pan typically takes 55-60 minutes, while a Bundt pan may take 45-50 minutes. Test doneness with a toothpick inserted in the center.
How long does chocolate chip pound cake stay fresh?
At room temperature in an airtight container, the cake stays fresh for 3-5 days. Refrigerated and properly wrapped, it lasts up to one week. For longer storage, freeze the cake for up to three months while maintaining quality.
Can I make chocolate chip pound cake ahead of time?
Yes, this cake actually improves with time as flavors meld together. Bake it completely, cool, then wrap tightly in plastic wrap and aluminum foil. It can be made 2-3 days ahead or frozen for up to three months.
What’s the best way to serve chocolate chip pound cake?
Serve at room temperature using a serrated knife for clean slices. It pairs wonderfully with coffee, tea, or cold milk. For special occasions, dust with powdered sugar, drizzle with chocolate sauce, or serve with vanilla ice cream.
Why is sour cream included in the recipe?
Sour cream adds moisture and tenderness to the pound cake while contributing to its rich, dense texture. It helps create the perfect crumb structure and keeps the cake from being too heavy or dry.
What size pan should I use for chocolate chip pound cake?
A 6-cup loaf pan or Bundt cake pan works best for traditional pound cake texture. For larger gatherings, you can use a 9×13-inch pan to make a sheet cake variation, though baking time will need adjustment.


