We’ve all been there – craving something sweet but lacking the energy for complicated baking. That’s where chocolate dump cake comes to the rescue! This ridiculously easy dessert gets its name from the simple method: you literally dump all the ingredients into a pan and let the oven work its magic.
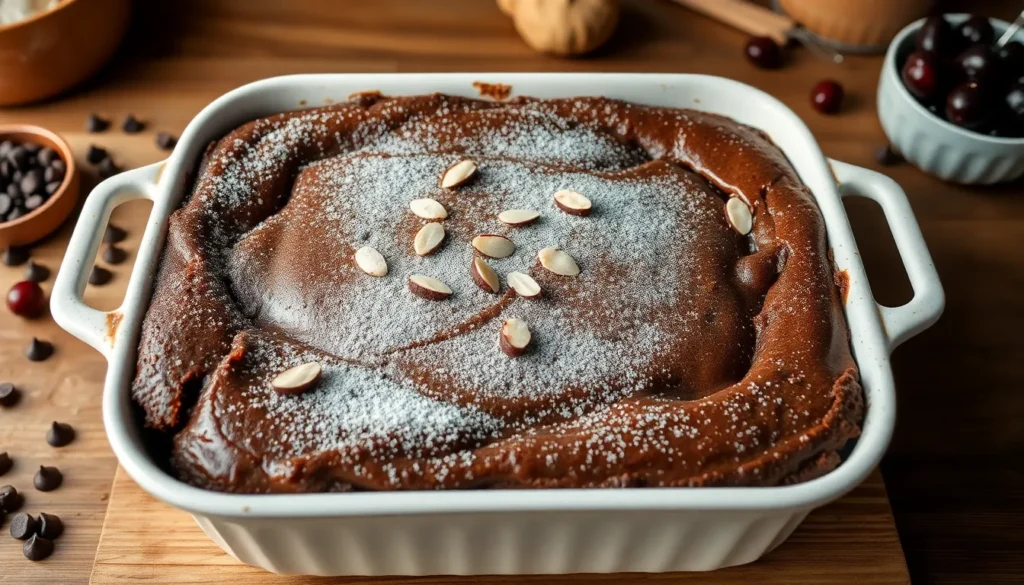
Chocolate dump cake transforms basic pantry staples into a rich, gooey dessert that’ll have everyone asking for seconds. The beauty lies in its simplicity – no mixing bowls, no fancy techniques, just layer and bake. The result? A cake with crispy edges and a molten chocolate center that’s pure comfort food perfection.
We love how this recipe delivers maximum flavor with minimal effort. Whether you’re feeding a crowd or satisfying a last-minute dessert craving, this chocolate dump cake proves that sometimes the best treats come from the simplest methods.
Ingredients
We’ve carefully selected each ingredient to create layers of rich chocolate flavor that meld together beautifully during baking. Our simple ingredient list proves that exceptional desserts don’t require complicated shopping lists.
For the Cake Base
- 1 box (15.25 oz) chocolate cake mix
- 1 can (21 oz) cherry pie filling
- 2 large eggs
- 1/2 cup vegetable oil
- 1/4 cup water
For the Chocolate Layer
- 1 cup semi-sweet chocolate chips
- 1/2 cup mini marshmallows
- 1/4 cup cocoa powder
- 2 tablespoons brown sugar
- 1/4 teaspoon vanilla extract
For the Topping
- 1/2 cup sliced almonds
- 1/4 cup powdered sugar for dusting
- 2 tablespoons butter, cut into small pieces
- 1/4 cup additional chocolate chips for sprinkling
Equipment Needed

Creating our chocolate dump cake requires just a few essential tools that most home bakers already have in their kitchen. We’ve streamlined the equipment list to ensure you can focus on the delicious results rather than hunting for specialty items.
9×13-inch Baking Dish serves as our foundation for this recipe. This standard size provides the perfect depth for even baking while accommodating all our carefully selected ingredients. We recommend using either glass or metal pans for optimal heat distribution.
Nonstick Spray or Butter becomes crucial for preventing our gooey masterpiece from sticking to the pan. We apply a generous coating to ensure easy serving and cleanup after baking.
Rubber Spatula or Fork handles the minimal mixing required for dump cake success. These tools help us combine ingredients without overworking the batter, maintaining that perfect texture we’re after.
Standard Oven completes our simple setup, preheated to 350°F for consistent baking results. Most home ovens will deliver the crispy edges and molten center that make this dessert so irresistible.
| Equipment Item | Purpose | Size/Type |
|---|---|---|
| Baking Dish | Main cooking vessel | 9×13-inch |
| Nonstick Spray/Butter | Pan preparation | As needed |
| Mixing Tool | Ingredient combining | Rubber spatula or fork |
| Oven | Baking | Standard home oven at 350°F |
Our equipment choices reflect the dump cake philosophy: maximum flavor with minimum fuss. Each item serves a exact purpose in creating layers of chocolate goodness while keeping preparation time to an absolute minimum.
Instructions

We’ll walk you through the simple steps to create this decadent chocolate dump cake. These straightforward instructions ensure perfect results every time.
Prep the Pan
Spray your 9×13-inch baking dish thoroughly with nonstick spray to prevent sticking. We recommend coating all corners and sides evenly for easy removal later. Preheating your oven to 350°F at this stage saves time during the baking process.
Layer the Ingredients
Pour the entire box of chocolate cake mix into your prepared baking dish. Add the instant chocolate pudding mix directly on top of the cake mix. Stir these dry ingredients together using a fork or rubber spatula until well combined. Pour 1.5 to 2 cups of milk evenly over the dry mixture. Add the melted butter and mix all ingredients until the batter comes together smoothly.
Add the Chocolate Components
Sprinkle the entire bag of chocolate chips evenly across the surface of your batter. The chips will create pockets of melted chocolate throughout the cake as it bakes. Press them gently into the batter surface to ensure they stay in place during baking.
Create the Final Layer
Spread the mixture evenly throughout the pan using your spatula. Make sure the chocolate chips remain distributed across the top surface. The batter should reach all corners of the dish for uniform baking. Place the pan in your preheated 350°F oven and bake for 30 to 45 minutes until the edges pull away from the sides and a toothpick inserted in the center comes out clean.
Baking Directions

Now we move to the actual baking process that transforms our layered ingredients into a perfectly indulgent chocolate dump cake. These precise directions ensure consistent results every time you make this delightful dessert.
Temperature and Timing
We bake our chocolate dump cake at 350°F (175°C) for optimal results. This moderate temperature allows the cake to cook evenly throughout while developing those signature crispy edges. Our baking time ranges from 35-45 minutes depending on your oven’s performance and the desired texture.
| Baking Parameter | Specification |
|---|---|
| Temperature | 350°F (175°C) |
| Baking Time | 35-45 minutes |
| Pan Size | 9×13-inch |
The longer baking time within this range produces a firmer texture with more pronounced crispy edges. Shorter baking times result in a gooier center with softer overall consistency. We recommend starting your timer at 35 minutes and checking for doneness before extending the baking time.
Checking for Doneness
We determine doneness using two reliable methods that work every time. The first method involves inserting a toothpick into the center of the cake. When the toothpick comes out clean or with just a few moist crumbs clinging to it the cake is ready.
Our second method focuses on visual cues that are equally dependable. We look for edges that begin pulling away from the sides of the pan. The surface should appear set rather than jiggly when you gently shake the pan. The top develops a slightly golden brown color while maintaining that rich chocolate appearance.
Both methods work together to ensure perfect results. We often use the toothpick test first then confirm with the visual inspection. This double checking approach prevents overbaking while ensuring the cake is properly cooked throughout.
Serving Suggestions

We recommend serving this chocolate dump cake warm to maximize its rich flavor and achieve the perfect texture contrast between the gooey center and crispy edges. The warmth enhances the chocolate’s intensity while creating an irresistible dessert experience that guests will remember.
Temperature and Timing
Allow the cake to cool for just 10-15 minutes after removing it from the oven. This brief cooling period prevents burns while maintaining that coveted warm temperature that makes each bite melt in your mouth.
Classic Topping Combinations
Vanilla ice cream pairs beautifully with warm chocolate dump cake, creating a temperature contrast that elevates both flavors. We suggest generous scoops placed directly on individual servings to let the ice cream slowly melt into the warm cake.
Whipped cream offers a lighter alternative that doesn’t compete with the cake’s richness. Fresh whipped cream works best, though store-bought varieties provide convenience without sacrificing taste.
Caramel syrup drizzled over each serving adds another layer of sweetness and creates an attractive presentation. The syrup seeps into the cake’s crevices, intensifying the overall dessert experience.
Enhanced Serving Options
Fresh berries bring bright acidity that cuts through the chocolate’s richness. Strawberries, raspberries, or blackberries work exceptionally well and add visual appeal with their vibrant colors.
Chopped nuts provide textural contrast and complement the cake’s soft interior. Toasted almonds, pecans, or walnuts enhance both flavor and presentation while adding satisfying crunch.
Extra chocolate sauce creates an indulgent treat for serious chocolate lovers. We recommend warming the sauce slightly before drizzling to ensure smooth application and optimal flavor release.
Occasion-Appropriate Presentation
| Serving Context | Recommended Portion | Best Toppings |
|---|---|---|
| Family dinner | Large squares | Vanilla ice cream |
| Casual gathering | Medium rectangles | Whipped cream, berries |
| Formal event | Small elegant portions | Caramel drizzle, nuts |
This dessert adapts perfectly to various occasions due to its crowd-pleasing taste and simple preparation method. The versatility allows us to dress it up for special events or keep it casual for everyday family treats.
Storage Instructions

We understand that chocolate dump cake tastes best when properly stored to maintain its rich texture and decadent flavor. Our storage recommendations ensure your leftover cake remains fresh and delicious for future enjoyment.
Room Temperature Storage
For short-term storage we recommend keeping leftover chocolate dump cake at room temperature in an airtight container or covered baking dish. This method preserves the cake’s moisture and texture for up to 2 to 3 days. We find that covering the cake tightly prevents it from drying out while maintaining that perfect balance of gooey center and slightly crispy edges.
Refrigeration Method
When we need to extend the storage time we place the cake in the refrigerator where it stays fresh for up to 4 days. Refrigeration works particularly well for chocolate dump cake because the cooler temperature helps set the chocolate layers while keeping the overall texture intact. We always ensure the cake is completely covered to prevent it from absorbing other flavors from the refrigerator.
Freezer Storage
For long-term storage we wrap portions of the cake tightly and store them in the freezer for up to 3 months. This method allows us to enjoy chocolate dump cake weeks after baking without compromising quality. We recommend wrapping individual portions in plastic wrap followed by aluminum foil to prevent freezer burn and maintain optimal flavor.
Reheating Instructions
We always warm refrigerated or frozen chocolate dump cake before serving to restore its original texture and enhance the chocolate flavors. For refrigerated cake we microwave individual portions for about 30 seconds until warmed through. Frozen portions require slightly longer heating time but the same gentle approach ensures the cake doesn’t become tough or dry.
| Storage Method | Duration | Temperature | Container Type |
|---|---|---|---|
| Room Temperature | 2-3 days | 68-72°F | Airtight container or covered dish |
| Refrigeration | 4 days | 35-40°F | Covered container |
| Freezer | 3 months | 0°F or below | Tightly wrapped |
| Reheating Time | 30 seconds | Microwave | Individual portions |
Recipe Variations

We can transform our basic chocolate dump cake into exciting new flavors with simple ingredient swaps and creative additions. These variations allow us to customize the dessert for different tastes and occasions.
Different Chocolate Options
Dark Chocolate Chips deliver intense chocolate flavor that creates a sophisticated dessert perfect for adult gatherings. We recommend using these when we want to balance the sweetness of the cake mix with deeper cocoa notes.
Milk Chocolate Chips provide the classic creamy sweetness that appeals to all ages. These chips melt beautifully during baking and create that familiar comfort food taste we all love.
White Chocolate Chips add vanilla undertones and visual contrast against the dark cake base. We find these work exceptionally well when paired with fresh berries or nuts for a more elegant presentation.
Semi-Sweet Chocolate Chips offer the perfect middle ground between dark and milk chocolate. These chips maintain their shape well during baking while still providing rich chocolate flavor throughout every bite.
Add-In Ideas
Chopped Walnuts or Pecans introduce satisfying crunch and nutty richness that complements the soft cake texture. We scatter about 1/2 cup of nuts over the chocolate chips before baking for the best distribution.
Shredded Coconut Flakes bring tropical sweetness and chewy texture that transforms our chocolate dump cake into something special. These work particularly well in our German Chocolate variation.
Mini Marshmallows create pockets of gooey sweetness that make each bite a delightful surprise. We add these during the last 10 minutes of baking to prevent them from completely melting away.
Caramel Bits provide bursts of buttery sweetness that pair beautifully with chocolate. These add-ins create a salted caramel effect when we sprinkle a pinch of sea salt on top before serving.
Strong Brewed Coffee can replace the water in our recipe for a mocha twist that enhances the chocolate flavor. We use the same amount of cooled coffee as we would water for this sophisticated variation.
Make-Ahead Tips

We love that chocolate dump cake becomes even more convenient when prepared ahead of time. This dessert actually improves as it sits, allowing the flavors to meld beautifully together.
Advance Preparation Timeline
| Storage Method | Duration | Temperature |
|---|---|---|
| Room Temperature | Up to 3 days | 70°F |
| Deep Freezer | Several weeks | 0°F |
Our favorite make-ahead strategy involves preparing the entire cake up to 3 days before serving. Once baked and cooled completely, we wrap the cake tightly with plastic wrap directly in the baking dish. Room temperature storage works perfectly for this timeframe without compromising texture or flavor.
Assembly Strategy
We recommend mixing all ingredients and assembling the cake in your baking dish the night before if you prefer fresh-baked results. Cover the unbaked mixture with plastic wrap and refrigerate overnight. This approach allows you to simply pop the dish into a preheated oven when ready to serve.
Reheating Methods
When serving previously baked cake, we suggest gentle reheating to restore that just-baked warmth. The microwave works well for individual portions, heating in 30-second intervals until warmed through. For whole cake reheating, we prefer using the oven at 300°F for 10-15 minutes, covering with foil to prevent over-browning of the surface.
Extended Storage Answers
For longer storage needs, we use the deep freezer as an excellent alternative to refrigeration. Wrap cooled cake portions individually in plastic wrap, then place in freezer bags for optimal freshness. This method preserves the cake’s rich chocolate flavor and moist texture for weeks.
Serving Temperature Optimization
We find that cake stored at room temperature requires minimal warming, while refrigerated portions benefit from a brief heating period to enhance the chocolate flavors. The key lies in achieving that perfect serving temperature where the chocolate elements become rich and the texture remains pleasantly moist.
Conclusion
This chocolate dump cake proves that we don’t need complicated techniques to create an impressive dessert that’ll have everyone asking for seconds. We’ve shown you how simple ingredients and basic equipment can transform into something truly special with minimal effort.
The beauty of this recipe lies in its flexibility – whether you’re preparing for a crowd or satisfying a midnight craving we’ve got you covered. From storage tips to creative variations there’s no wrong way to enjoy this indulgent treat.
We encourage you to make this recipe your own by experimenting with different add-ins and serving suggestions. Once you experience how effortless and delicious this chocolate dump cake can be you’ll understand why it’s become our go-to dessert solution.
Frequently Asked Questions
What is a chocolate dump cake?
A chocolate dump cake is a quick and easy dessert made by “dumping” all ingredients into a baking pan without complicated mixing or preparation. It creates a rich, gooey cake with crispy edges and a molten center, delivering maximum chocolate flavor with minimal effort.
What ingredients do I need for chocolate dump cake?
The basic ingredients include chocolate cake mix, cherry pie filling, eggs, vegetable oil, water, semi-sweet chocolate chips, mini marshmallows, cocoa powder, brown sugar, vanilla extract, sliced almonds, powdered sugar, and butter. Most items are pantry staples.
What equipment is needed to make this cake?
You’ll need a 9×13-inch baking dish, nonstick spray or butter, a rubber spatula or fork for minimal mixing, and a standard oven preheated to 350°F. Most home bakers already have these basic items on hand.
How long do I bake a chocolate dump cake?
Bake at 350°F for 35-45 minutes. Longer baking times create a firmer texture, while shorter times result in a gooier center. The cake is done when edges pull away from the pan and a toothpick inserted in the center comes out clean.
How should I serve chocolate dump cake?
Serve warm for the best flavor and texture contrast. Popular toppings include vanilla ice cream, whipped cream, caramel syrup, fresh berries, chopped nuts, or extra chocolate sauce. The cake works for both casual family dinners and formal events.
How do I store leftover chocolate dump cake?
Store at room temperature in an airtight container for 2-3 days, refrigerate for up to 4 days, or freeze tightly wrapped portions for up to 3 months. Reheat refrigerated portions in the microwave for 30 seconds to restore texture.
Can I customize the chocolate dump cake recipe?
Yes! Try different chocolate types (dark, milk, white, or semi-sweet chips), add chopped nuts, shredded coconut, mini marshmallows, caramel bits, or strong brewed coffee. These variations create exciting new flavors for different tastes and occasions.
Can I make chocolate dump cake ahead of time?
Absolutely! The cake actually improves in flavor when prepared 1-3 days in advance. Store at room temperature or assemble ingredients the night before and refrigerate. For extended storage, freeze portions for several weeks while maintaining quality.


