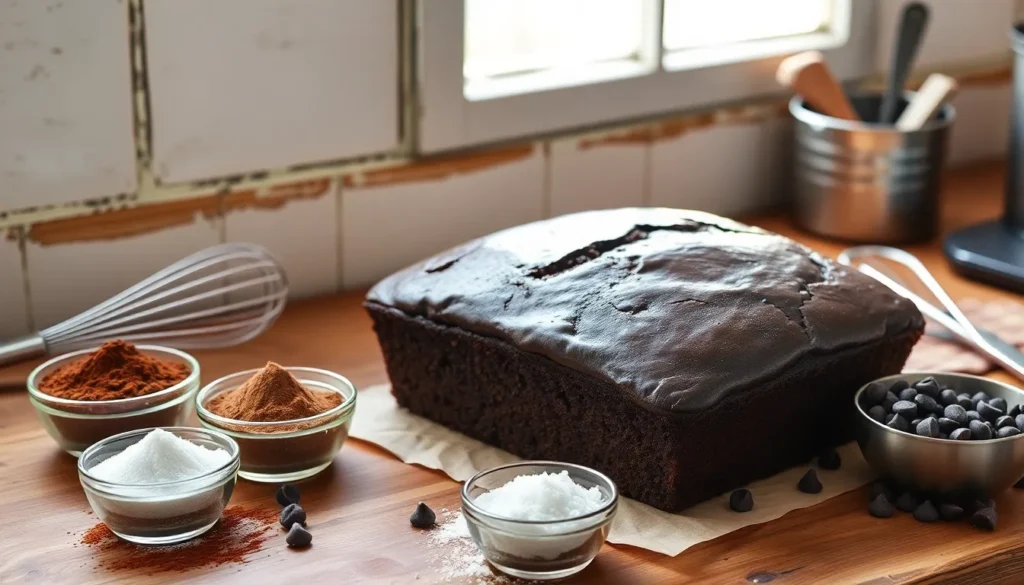
There’s something magical about the aroma of chocolate loaf cake baking in your oven. This rich and decadent treat transforms simple pantry staples into a moist, fudgy masterpiece that’ll have your family gathering in the kitchen before it’s even finished cooling.
We’ve perfected this foolproof recipe that delivers bakery-quality results every single time. Unlike complicated layer cakes that require special techniques, our chocolate loaf cake comes together in one bowl with ingredients you likely already have on hand. The secret lies in the perfect balance of cocoa powder and melted chocolate, creating an intensely chocolatey flavor that’s neither too sweet nor too bitter.
Whether you’re craving a weekend baking project or need a last-minute dessert for unexpected guests, this chocolate loaf cake delivers impressive results with minimal effort. It’s the kind of recipe that’ll become your go-to chocolate fix – simple enough for beginners yet sophisticated enough to serve at dinner parties.
Ingredients
We’ve carefully selected each ingredient in our chocolate loaf cake recipe to create the perfect balance of rich chocolate flavor and tender crumb. These pantry staples come together effortlessly to deliver a bakery-quality result every time.
Dry Ingredients
- 1¾ cups all-purpose flour
- ¾ cup unsweetened cocoa powder
- 1½ cups granulated sugar
- 1½ teaspoons baking powder
- 1 teaspoon baking soda
- 1 teaspoon salt
Wet Ingredients
- 2 large eggs, room temperature
- 1 cup buttermilk, room temperature
- ¾ cup vegetable oil
- 2 teaspoons vanilla extract
- 1 cup hot coffee or hot water
Chocolate Components
- 4 oz dark chocolate (70% cocoa), melted and cooled slightly
- ½ cup mini chocolate chips (optional, for extra chocolate bursts)


Equipment Needed

Baking our chocolate loaf cake requires essential kitchen tools that ensure perfect results every time. We recommend gathering all equipment before starting to streamline the baking process.
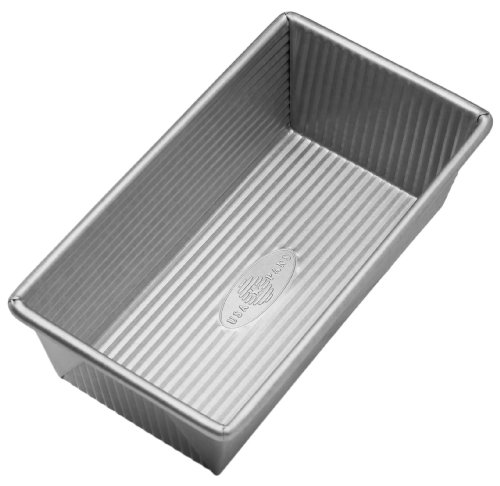
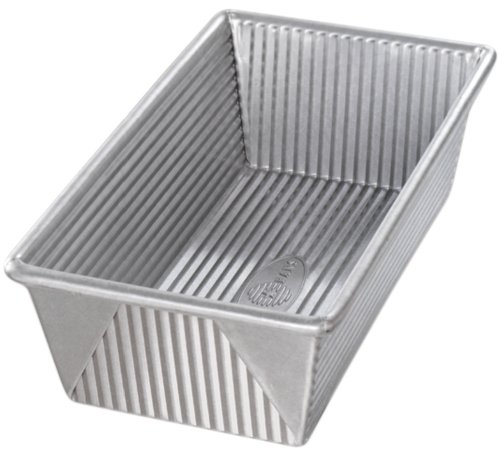
Our oven serves as the foundation for proper baking and should be preheated to the temperature specified in your recipe. A 9×5-inch loaf pan provides the ideal dimensions for achieving the perfect loaf shape and even cooking throughout. For those seeking professional results, a Pullman pan offers excellent heat distribution and creates beautifully straight edges.
Accurate measuring becomes crucial for consistent outcomes. Dry ingredient measuring cups help us portion flour, sugar, and cocoa powder precisely, while a liquid measuring cup ensures proper ratios for buttermilk, oil, and hot coffee. Measuring spoons deliver exact amounts of vanilla extract, baking powder, and salt that make all the difference in flavor balance.
Sifting creates the light texture we desire in our chocolate loaf. A sifter or fine-mesh sieve removes lumps from cocoa powder and flour, preventing dense spots in the finished cake. This step proves especially important when working with cocoa powder, which tends to clump.
Mixing equipment varies depending on your preference and recipe requirements. A large mixing bowl accommodates all ingredients comfortably, while a whisk or electric mixer incorporates everything smoothly. Many chocolate loaf recipes work beautifully with simple hand whisking, making this an accessible treat for any skill level.
Parchment paper transforms cake removal from stressful to effortless. Lining our loaf pan with parchment creates easy release and prevents sticking, especially important given the tender crumb of chocolate cake. A rubber spatula helps us scrape every bit of batter from the bowl and ensures even distribution in the pan.
Having these tools ready before we begin mixing guarantees smooth preparation and professional results in our homemade chocolate loaf cake.


Instructions

Now we’ll walk through the step-by-step process to create our chocolate loaf cake. These instructions will guide you through each stage to ensure perfect results.
Prep the Pan and Oven
We start by preheating our oven to 350°F (175°C) to ensure even baking throughout the cake. Grease our 9×5-inch loaf pan thoroughly with butter or cooking spray and dust it with cocoa powder to prevent sticking. Line the pan with parchment paper leaving some overhang for easy removal later. This preparation step ensures our cake releases cleanly from the pan without breaking.
Mix the Dry Ingredients
In a large mixing bowl we combine the all-purpose flour unsweetened cocoa powder granulated sugar baking powder baking soda and salt. Whisk these ingredients together until they’re evenly distributed and no lumps remain. Sifting the cocoa powder beforehand creates a lighter texture and prevents clumping. We want to ensure our dry ingredients are completely uniform before adding any wet components.
Combine Wet Ingredients
In a separate bowl we whisk together the eggs buttermilk vegetable oil and vanilla extract until smooth and well combined. Add the hot coffee or water to this mixture and stir gently to incorporate. The hot liquid helps bloom the cocoa powder and intensifies the chocolate flavor. Make sure all wet ingredients are at room temperature for better mixing and a more cohesive batter.
Create the Batter
We gradually add the dry ingredient mixture to the wet ingredients stirring gently with a rubber spatula or wooden spoon. Mix just until the ingredients are combined and no dry flour streaks remain. Fold in the melted dark chocolate and mini chocolate chips if using being careful not to overmix the batter. Overmixing can result in a tough dense cake so we stop as soon as everything is incorporated.
Bake the Loaf
Pour the batter into our prepared loaf pan and smooth the top with a spatula for even distribution. Bake for 50-60 minutes or until a toothpick inserted into the center comes out with just a few moist crumbs attached. The cake should spring back lightly when touched and pull slightly away from the sides of the pan. Allow the cake to cool in the pan for 10 minutes before transferring to a wire rack to cool completely.


Directions for Cooling and Storage

Proper cooling and storage techniques ensure our chocolate loaf cake maintains its rich texture and decadent flavor for days to come. Following these essential steps will help preserve the cake’s quality and extend its shelf life.
Cooling Process
We must allow our chocolate loaf cake to cool in the pan for at least 10 minutes before attempting to remove it. This crucial step prevents the cake from breaking apart and helps maintain its structural integrity.
After the initial cooling period, we carefully transfer the cake to a wire rack to cool completely to room temperature. This process prevents the cake from becoming soggy by allowing air to circulate around all surfaces of the loaf.
Never attempt to wrap or store the cake while it’s still warm, as trapped moisture will compromise the texture and create an undesirable soggy bottom.
Storage Tips
Room Temperature Storage
We store our completely cooled chocolate loaf cake in an airtight container at room temperature for optimal freshness. The cake maintains its best quality for 3 to 5 days when stored this way.
For cakes without refrigeration-requiring frosting, we can keep them covered with a cake dome or wrapped tightly in plastic wrap at room temperature.
Refrigeration Requirements
When our chocolate loaf cake features cream cheese frosting or other dairy-based toppings, we must store it in the refrigerator. Refrigerated storage extends the cake’s life to up to 7 days while maintaining food safety standards.
Freezing for Extended Storage
We wrap our cooled cake tightly in plastic wrap, then cover with aluminum foil or place in a freezer-safe bag for long-term storage. This double-wrapping method prevents freezer burn and maintains the cake’s moisture.
Our chocolate loaf cake freezes beautifully for up to 2 to 3 months without losing its rich flavor or tender crumb. We recommend slicing the cake before freezing for easier individual serving portions.
| Storage Method | Duration | Temperature | Container Type |
|---|---|---|---|
| Room Temperature | 3-5 days | 68-72°F | Airtight container or cake dome |
| Refrigerated | Up to 7 days | 35-40°F | Covered container |
| Frozen | 2-3 months | 0°F | Plastic wrap + foil or freezer bag |
Make-Ahead Instructions

Planning ahead becomes effortless when we make this chocolate loaf cake in advance. Our testing shows that this cake actually improves in flavor and texture when given time to rest.
Room Temperature Storage
We recommend storing the completely cooled cake at room temperature for optimal results. Wrap the cake tightly in plastic wrap or aluminum foil to prevent moisture loss. Store the wrapped cake in an airtight container for up to 3 days at room temperature. Our experience shows the cake maintains its moist crumb and rich chocolate flavor throughout this period.
Freezing for Extended Storage
Freezing transforms this cake into a convenient make-ahead dessert option. We wrap the completely cooled cake in two layers of plastic wrap followed by aluminum foil for maximum protection. The wrapped cake stores beautifully in the freezer for 2 to 3 months without losing quality.
Slice the cake before freezing to create individual portions for easier thawing. We place parchment paper between slices to prevent sticking. Individual slices thaw much faster than a whole cake and allow us to serve exactly the amount needed.
Thawing Instructions
Proper thawing ensures the cake retains its original texture and moisture. Transfer the frozen cake to the refrigerator and allow it to thaw overnight. We never recommend thawing at room temperature as this can create condensation that makes the cake soggy.
Individual frozen slices thaw at room temperature in 30 to 45 minutes. This method works perfectly when we need a quick dessert or single serving.
| Storage Method | Duration | Temperature | Container Type |
|---|---|---|---|
| Room Temperature | 3 days | 68-72°F | Airtight container |
| Refrigerated | 7 days | 35-40°F | Covered container |
| Frozen (whole) | 2-3 months | 0°F | Double wrapped |
| Frozen (sliced) | 2-3 months | 0°F | Parchment separated |
Pro Tips for Make-Ahead Success
We always cool the cake completely before wrapping to prevent condensation buildup. Room temperature ingredients blend more easily when we decide to add frosting later. The cake actually tastes better the day after baking as the flavors meld and develop complexity.
Serving Suggestions

Our chocolate loaf cake transforms into an elegant dessert with the right accompaniments and presentation touches. We recommend serving this rich cake at room temperature to allow its deep chocolate flavors to fully develop and create the perfect texture contrast.
Chocolate Glaze Enhancement
A simple chocolate glaze elevates our loaf cake from homemade treat to bakery-worthy dessert. We prepare this glaze by whisking together powdered sugar, cocoa powder, and milk until smooth. The glaze should coat the back of a spoon without being too thick or runny. Pour this glossy mixture over the completely cooled cake and allow it to set for 15 minutes before slicing.
Creative Topping Options
Mini chocolate chips scattered across the glazed surface add delightful texture bursts with each bite. We also love sprinkling chocolate sprinkles for a festive appearance that appeals to both children and adults. Toasted sweetened coconut provides a tropical twist that complements the rich chocolate beautifully. Chopped nuts such as toasted pecans or walnuts introduce a satisfying crunch that balances the cake’s tender crumb. Chocolate curls created with a vegetable peeler transform our simple loaf into an impressive centerpiece.
Fresh Fruit Pairings
Fresh raspberries offer a tart contrast that cuts through the cake’s richness while adding vibrant color to the plate. We find that sweet cherries complement the chocolate flavor profile perfectly and create an elegant presentation. Strawberries sliced and fanned alongside each slice provide both visual appeal and a refreshing finish to this indulgent dessert.
Special Occasion Variations
Cherry frosting creates a unique flavor combination that transforms our chocolate loaf into a celebration worthy treat. We prepare this frosting by incorporating cherry preserves into cream cheese frosting for a tangy sweetness. Garnishing with festive hearts or seasonal decorations makes this cake perfect for holidays and special occasions.
Espresso Infusion for Adults
Adding espresso powder to our serving presentation enhances the chocolate flavor intensity without overwhelming the palate. We dust individual slices lightly with espresso powder or serve alongside a small cup of strong coffee to create a sophisticated dessert experience that appeals to adult tastes.


Variations and Substitutions

Transform our classic chocolate loaf cake recipe to suit your taste preferences and dietary needs. We’ve discovered many ways to customize this versatile dessert while maintaining its rich chocolate foundation.
Flavor Variations
We love experimenting with different flavor profiles to create unique chocolate experiences. Adding espresso powder or hot coffee instead of water intensifies the chocolate taste significantly, creating a sophisticated mocha flavor that adults especially enjoy. Dried cranberries or cherries provide delightful fruity bursts that complement the rich chocolate base beautifully.
Warm spices like cinnamon or nutmeg introduce aromatic complexity that transforms the cake into a comforting treat. We recommend starting with 1/2 teaspoon of either spice to avoid overwhelming the chocolate flavor. Toasted nuts such as walnuts or pecans add textural contrast and nutty depth to each slice.
Different chocolate types create varying flavor intensities throughout the cake. Bittersweet chocolate delivers bold, sophisticated notes while semi-sweet chocolate provides balanced sweetness. We suggest blooming cocoa powder with hot liquid for deeper chocolate flavor development.
Dietary Modifications
We’ve successfully adapted this recipe for various dietary restrictions without compromising taste or texture. Gluten-free flour blends work exceptionally well as direct substitutions for all-purpose flour, creating tender crumb structure that rivals the original recipe.
Vegan adaptations require simple ingredient swaps that maintain moisture and binding properties. Replace eggs with flaxseed meal mixed with water or unsweetened applesauce for similar results. Vegan chocolate and plant-based milk complete the dairy-free transformation seamlessly.
Sugar reduction becomes manageable through natural sweetener alternatives like honey or maple syrup. We recommend reducing liquid ingredients slightly when using these liquid sweeteners to maintain proper batter consistency. Greek yogurt or sour cream additions help retain moisture when reducing sugar content.
| Dietary Need | Ingredient Substitution | Ratio | Notes |
|---|---|---|---|
| Gluten-Free | All-purpose flour → GF flour blend | 1:1 | Use xanthan gum blend |
| Vegan | Eggs → Flax eggs | 1 egg = 1 tbsp flax + 3 tbsp water | Let sit 5 minutes |
| Low Sugar | Sugar → Honey | 3/4 cup honey per 1 cup sugar | Reduce liquid by 1/4 cup |
| High Altitude | Baking powder increase | Add 1/8 tsp per 1 tsp | Reduce sugar by 2 tbsp |
Troubleshooting Tips

Even the most experienced bakers encounter challenges when making chocolate loaf cake. We’ve compiled answers to the most common issues you might face during the baking process.
Dense Cake Texture
Overmixing the batter creates a dense and heavy loaf due to excessive gluten development. We recommend mixing the wet and dry ingredients until just combined to maintain the cake’s tender crumb. Stop mixing as soon as you no longer see streaks of flour in the batter.
Cake Sticking to the Pan
Insufficient greasing or lining causes the cake to stick stubbornly to the pan. We always line our loaf pan with parchment paper and ensure the sides overhang for easy removal. This simple step prevents frustrating breakage when turning out the finished cake.
Sunken Center
Cakes naturally sink slightly as they cool but excessive sinking indicates problems with oven temperature or batter preparation. We suggest checking your oven temperature with a thermometer to ensure accuracy and avoiding overmixing which can destabilize the cake’s structure.
Crumbling When Removed
Removing the cake too early or overbaking causes crumbling and breakage. We let our cake cool in the pan for at least 10 minutes before attempting removal. This cooling period allows the structure to set properly and prevents the cake from falling apart.
Glaze Running Off
Applying glaze to a warm cake creates a messy situation as the glaze melts and runs off completely. We always cool our cake completely before glazing to ensure the glaze sets properly and creates an attractive finish.
| Issue | Cause | Solution |
|---|---|---|
| Dense texture | Overmixing batter | Mix until just combined |
| Sticking to pan | Poor preparation | Line with parchment paper |
| Sunken center | Temperature/overmixing | Check oven accuracy, gentle mixing |
| Crumbling | Early removal/overbaking | Cool 10 minutes in pan |
| Glaze issues | Warm cake surface | Cool completely before glazing |
Success Tips for Perfect Results
We store our finished cake in an airtight container in the refrigerator for up to 5 days or freeze it for up to 3 months without glaze. Proper storage maintains the cake’s moisture and prevents it from drying out. Allow frozen cake to thaw completely at room temperature before serving for the best texture and flavor.


Conclusion
We’ve shared everything you need to create a stunning chocolate loaf cake that’ll become your go-to dessert recipe. This foolproof approach delivers bakery-quality results with minimal effort and maximum flavor.
Whether you’re serving it plain or dressed up with glazes and toppings this chocolate loaf cake adapts beautifully to any occasion. The make-ahead friendly nature and storage flexibility make it perfect for busy schedules.
With our detailed guidance on variations troubleshooting and serving suggestions you’re equipped to customize this recipe to your heart’s content. We’re confident this rich decadent cake will earn a permanent spot in your baking repertoire and become a favorite among family and friends.
Frequently Asked Questions
What makes this chocolate loaf cake recipe foolproof?
This recipe uses simple one-bowl mixing and basic pantry ingredients, making it perfect for beginners. The key is the balanced combination of cocoa powder and melted dark chocolate, plus hot coffee or water to intensify the chocolate flavor. No complex layering or special techniques required.
How long does it take to bake the chocolate loaf cake?
The chocolate loaf cake bakes at 350°F (175°C) for 50-60 minutes. Check for doneness by inserting a toothpick into the center – it should come out with just a few moist crumbs. Allow 10 minutes cooling in the pan before transferring to a wire rack.
Can I make this chocolate cake ahead of time?
Yes! This cake actually improves in flavor and texture when allowed to rest. Store the completely cooled cake wrapped tightly at room temperature for up to 5 days, or freeze for 2-3 months. Individual slices can be wrapped for quicker thawing.
What ingredients do I need for this chocolate loaf cake?
You’ll need all-purpose flour, unsweetened cocoa powder, granulated sugar, baking powder, baking soda, salt, eggs, buttermilk, vegetable oil, vanilla extract, hot coffee or water, melted dark chocolate, and optional mini chocolate chips. All basic pantry staples!
How should I store the chocolate loaf cake?
Store the cooled cake in an airtight container at room temperature for 3-5 days, or refrigerate for up to 7 days if frosted. For long-term storage, wrap properly and freeze for 2-3 months. Always cool completely before wrapping to prevent moisture loss.
Can I customize this chocolate cake recipe?
Absolutely! Add espresso powder for deeper flavor, dried fruits, warm spices, or different chocolate types. The recipe adapts well to dietary needs with gluten-free flour, vegan substitutes, or sugar alternatives. Refer to the substitution ratios for best results.
What equipment do I need to make this cake?
Essential items include a 9×5-inch loaf pan, measuring cups and spoons, large mixing bowl, whisk or electric mixer, sifter, rubber spatula, and parchment paper. Having all tools ready beforehand streamlines the baking process for consistent results.
How do I prevent common baking problems with this cake?
Use proper mixing techniques (don’t overmix), ensure accurate oven temperature, and follow cooling instructions. Line your pan with parchment paper to prevent sticking. Avoid opening the oven door frequently, and test doneness with a toothpick for perfect texture.


