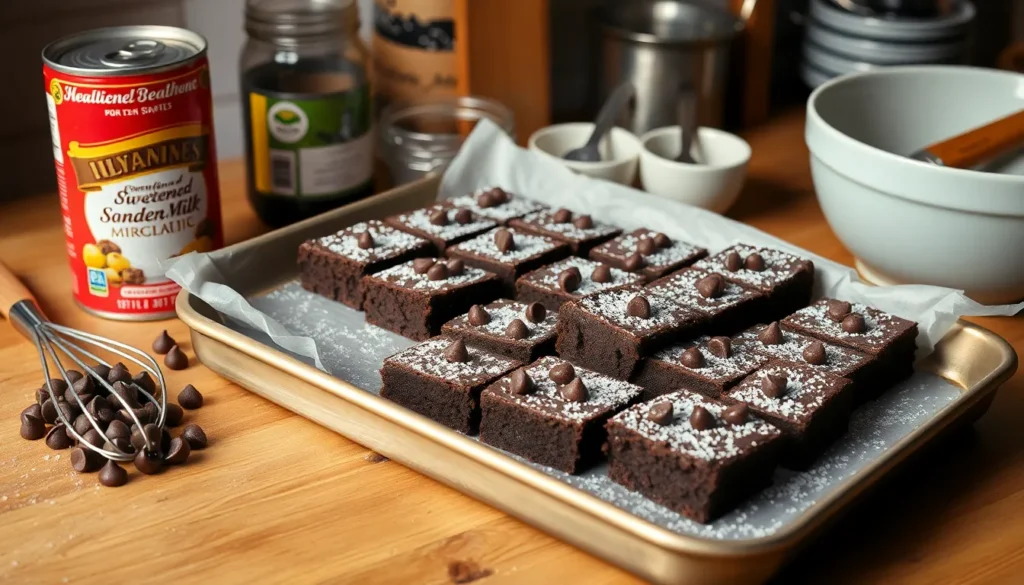
We’ve discovered the secret to creating the most decadently fudgy brownies you’ll ever taste – and it all comes down to one magical ingredient: sweetened condensed milk. These condensed milk brownies transform the classic chocolate treat into something extraordinary with their incredibly rich texture and deep chocolate flavor that melts in your mouth.
What makes these brownies so special is how the condensed milk creates an almost truffle-like consistency that’s impossible to achieve with traditional recipes. The thick sweetened milk adds moisture and richness while reducing the need for multiple ingredients – making this one of the simplest yet most impressive brownie recipes we’ve ever made.
Whether you’re a baking novice or a seasoned pro these brownies deliver bakery-quality results every single time. They’re perfect for potlucks special occasions or those moments when you need an indulgent chocolate fix that’ll have everyone asking for your secret ingredient.
Ingredients
We’ve carefully selected each ingredient to create the perfect balance of fudgy richness and sweet indulgence. Our condensed milk brownies require just a few simple pantry staples to achieve bakery-quality results.
For the Brownies
- 1 can (14 oz) sweetened condensed milk
- 1/2 cup unsalted butter, melted
- 1/2 cup unsweetened cocoa powder
- 1/2 cup all-purpose flour
- 2 large eggs, room temperature
- 1 teaspoon vanilla extract
- 1/2 teaspoon salt
- 1/2 cup semi-sweet chocolate chips
- 1/2 cup chopped walnuts (optional)
For the Topping (Optional)
- 1/4 cup mini chocolate chips
- 2 tablespoons chopped walnuts or pecans
- 1 tablespoon powdered sugar for dusting
- 2 tablespoons melted chocolate for drizzling
Equipment Needed

We need exact tools to create these delectable condensed milk brownies successfully. The right equipment ensures even baking and makes the preparation process smooth and efficient.
Essential Baking Equipment
Baking Pan serves as our foundation for perfect brownies. Metal pans deliver superior heat distribution compared to glass alternatives. We recommend these standard sizes based on your serving needs:
| Pan Size | Serving Yield | Brownie Thickness |
|---|---|---|
| 8×8 inches | 16 squares | Extra thick |
| 9×9 inches | 16 squares | Thick |
| 9×13 inches | 24 rectangles | Standard |
Mixing Tools streamline our ingredient combination process. A large mixing bowl accommodates all ingredients without overflow. We prefer using a whisk for initial mixing and a rubber spatula for folding in chocolate chips and nuts. An electric hand mixer becomes invaluable when we want effortless blending and smoother batter consistency.
Preparation Essentials
Parchment Paper creates a nonstick surface that prevents our brownies from adhering to the pan. We line the entire pan bottom and extend paper up the sides for easy removal. This technique eliminates the frustration of broken brownies during serving.
Nonstick Cooking Spray provides additional insurance against sticking. We apply a light coating to our pan before adding parchment paper. This double protection method guarantees clean release every time.
Optional Enhancement Tools
Kitchen Scale offers precision when measuring ingredients. We achieve consistent results by weighing flour and cocoa powder rather than using volume measurements. Professional bakers rely on weight measurements for reproducible outcomes.
Offset Spatula helps spread batter evenly across our prepared pan. This tool ensures uniform thickness and prevents thin spots that might overbake. We can also use the back of a spoon for similar results.
Instructions

Now that we have our ingredients ready and equipment prepared, let’s walk through the step-by-step process to create these incredibly fudgy condensed milk brownies. Following these detailed instructions will ensure perfect results every time.
Prep the Pan and Oven
Preheat your oven to 350°F (175°C) to ensure even baking temperature throughout the cooking process. Line your 8×8-inch baking pan with parchment paper, allowing some overhang for easy removal later. Spray the parchment paper with nonstick cooking spray to prevent any sticking issues. This preparation step creates the foundation for perfectly baked brownies that release cleanly from the pan.
Mix the Wet Ingredients
Combine the sweetened condensed milk and eggs in a large mixing bowl, whisking until smooth and well incorporated. Add the melted unsalted butter to this mixture, stirring gently to maintain the creamy consistency. Pour in the vanilla extract and mix thoroughly to distribute the flavor evenly. This wet ingredient combination provides the moisture and richness that makes our condensed milk brownies exceptionally fudgy.
Combine Dry Ingredients
Sift together the cocoa powder, all-purpose flour, and salt in a separate medium bowl to eliminate any lumps. Whisk these dry ingredients thoroughly to ensure even distribution throughout the mixture. This step prevents pockets of flour or cocoa that could create uneven texture in the finished brownies.
Create the Brownie Batter
Pour the wet ingredients into the bowl containing the dry ingredients, stirring gently with a rubber spatula until just combined. Fold in the semi-sweet chocolate chips and chopped walnuts if using, distributing them evenly throughout the batter. Avoid overmixing at this stage, as this can result in tough brownies rather than the desired fudgy texture.
Bake the Brownies
Transfer the brownie batter to your prepared pan, spreading it evenly with an offset spatula if available. Bake for 30-35 minutes or until a toothpick inserted in the center comes out with just a few moist crumbs attached. Remove from the oven and allow the brownies to cool completely in the pan before lifting them out using the parchment paper overhang. Cut into squares once fully cooled for the cleanest slices.
Directions for Cooling and Serving

Proper cooling and serving techniques ensure your condensed milk brownies achieve the perfect texture and presentation. Following these essential steps will transform your warm brownies into bakery-quality treats ready to impress.
Cooling Process
Allow the brownies to cool completely in the pan at room temperature before attempting to cut them. This cooling period takes approximately one hour and serves a crucial purpose in developing the ideal texture. The condensed milk continues to set during this time, firming up the brownies and preventing them from falling apart when sliced.
We recommend resisting the temptation to cut into warm brownies, as they will be too soft and may crumble. Room temperature cooling allows the fudgy interior to stabilize while maintaining that coveted chewy consistency. The brownies will naturally pull away slightly from the edges of the pan as they cool, indicating they’re ready for the next step.
For faster cooling, you can place the pan near an open window or in a cool area of your kitchen. But, avoid refrigerating the brownies during this initial cooling phase, as this can affect their texture.
Cutting and Serving
Once completely cooled, lift the brownies from the pan using the parchment paper edges for easy removal. Place them on a cutting board and use a sharp knife to cut clean, even squares. Wipe the knife blade between cuts to maintain neat edges and prevent the brownies from sticking to the blade.
Cut the brownies into your desired size, whether you prefer generous bakery-style squares or smaller bite-sized pieces. For the cleanest cuts, we suggest using a gentle sawing motion rather than pressing straight down.
Serve the brownies immediately after cutting for the best texture and flavor. These condensed milk brownies taste incredible fresh and maintain their fudgy consistency at room temperature. Store any remaining brownies in an airtight container to preserve their moisture and rich chocolate flavor for future enjoyment.
Consider dusting the tops with powdered sugar or drizzling with melted chocolate before serving for an extra special presentation. A pinch of sea salt sprinkled on top can also enhance the chocolate flavor and add a gourmet touch to your homemade treats.
Storage Instructions

We recommend storing your condensed milk brownies properly to maintain their rich fudgy texture and intense chocolate flavor. Room temperature storage works best for these decadent treats.
Room Temperature Storage
Store your brownies in an airtight container at room temperature for up to 4 days. We suggest keeping them uncut until you’re ready to serve for optimal freshness and texture retention. The brownies will maintain their bakery-quality consistency when stored this way.
To help preserve moisture we recommend placing a slice of bread in the storage container with your brownies. This simple trick prevents them from drying out and keeps that perfect fudgy bite we all love.
Refrigeration Options
Refrigerating your brownies extends their shelf life to 4-5 days though it may slightly affect their texture. We advise bringing refrigerated brownies back to room temperature before serving to restore their ideal consistency. The condensed milk in these brownies handles refrigeration well but they taste best when served at room temperature.
Freezing for Long-Term Storage
Your condensed milk brownies freeze beautifully for up to 3 months. Wrap them tightly in plastic wrap and place in an airtight container or freezer bag to prevent freezer burn. We recommend cutting them into individual squares before freezing for easy portion control.
Thaw frozen brownies at room temperature or in the refrigerator before serving. The condensed milk helps maintain their fudgy texture even after freezing making them taste nearly as good as fresh baked.
| Storage Method | Duration | Best Practices |
|---|---|---|
| Room Temperature | Up to 4 days | Airtight container, keep uncut |
| Refrigeration | 4-5 days | Return to room temperature before serving |
| Freezing | Up to 3 months | Wrap tightly, use airtight container |
Maintaining Peak Quality
We always use a digital kitchen scale for precise measurements when baking these brownies as accuracy ensures consistent results every time. Remember that avoiding overmixing during preparation and using a light-colored metal pan contributes to the final texture that makes proper storage so important.
Tips for Perfect Condensed Milk Brownies

Achieving bakery-quality condensed milk brownies requires attention to exact details that make all the difference. We’ve gathered proven techniques that ensure your brownies turn out perfectly fudgy and delicious every time.
Temperature Control
Room temperature ingredients create the foundation for smooth mixing. We recommend bringing eggs to room temperature for easier incorporation into your batter. Softened butter blends more effectively with the sweetened condensed milk, creating that signature smooth texture we’re after.
Oven precision matters significantly for consistent results. Preheating to exactly 350°F ensures even baking throughout the brownie layer. We suggest using an oven thermometer to verify accuracy since temperature variations can affect the final texture.
Mixing Techniques
Proper creaming of sweetened condensed milk, butter, and sugar creates the base for exceptional brownies. We combine these ingredients until completely smooth before adding other components. This step prevents lumps and ensures uniform sweetness distribution.
Gentle folding preserves the fudgy texture we desire. After adding flour, cocoa powder, and salt, we mix just until no clumps remain. Overmixing develops gluten and creates tough brownies rather than the tender texture condensed milk provides.
Baking Timing
| Baking Time | Texture Indicator | Visual Cue |
|---|---|---|
| 35-45 minutes | Center wobbles slightly | Edges are set |
| Too short | Liquid center | Edges not firm |
| Too long | Dry texture | Center completely firm |
Visual cues guide us better than strict timing. We look for edges that appear set while the center still has a slight wobble when gently shaken. This ensures the brownies continue cooking from residual heat without becoming overdone.
Pan Preparation
Parchment paper serves as our insurance policy for easy removal. We line the baking dish completely, leaving overhang for lifting the finished brownies out cleanly. This technique prevents sticking and maintains the perfect square edges.
Proper sizing affects thickness and baking time. An 8×8-inch pan creates extra thick brownies, while a 9×13-inch pan produces standard rectangles. We adjust baking time accordingly for different pan sizes.
Cooling Process
Complete cooling prevents crumbling during cutting. We allow brownies to cool entirely in the pan at room temperature, which takes about one hour. This patience pays off with clean cuts and maintained shape.
Refrigeration enhancement improves slicing precision. We chill the cooled brownies for 15 minutes before cutting, which firms the texture and creates neater squares. Sharp knives work best for clean edges.
Texture Optimization
Warming technique restores that fresh-baked experience. We microwave individual pieces for 20-30 seconds to achieve that warm, gooey texture that makes condensed milk brownies irresistible.
Dutch processed cocoa deepens the chocolate flavor significantly. We prefer this over regular cocoa powder for its smoother taste and richer color that complements the sweetness of condensed milk perfectly.
Recipe Variations

Our condensed milk brownies serve as the perfect foundation for countless delicious variations. Each adaptation builds upon the rich, fudgy base while introducing new flavors and textures that transform the classic recipe.
Chocolate Chip Addition
We love incorporating chocolate chips to create layers of chocolate indulgence throughout our brownies. Dark chocolate chips provide an intense, sophisticated flavor that balances beautifully with the sweetness of condensed milk. Semi-sweet chocolate chips offer a classic taste that appeals to all ages while maintaining the perfect level of sweetness.
The addition of these chocolate morsels creates pockets of melted chocolate that enhance both flavor and texture. We recommend folding in ¾ cup of chocolate chips just before pouring the batter into our prepared pan. For ultimate chocolate lovers, we suggest using a combination of both dark and semi-sweet chips to create depth and complexity in every bite.
Nutty Brownies
Chopped nuts transform our fudgy brownies by adding delightful textural contrast and rich, earthy flavors. Walnuts provide a classic pairing with chocolate, offering a slightly bitter note that complements the sweet condensed milk base perfectly. Pecans bring a buttery richness that melts beautifully into the brownie matrix.
We recommend toasting the nuts lightly before incorporating them into our batter to enhance their natural flavors and create a more pronounced crunch. About ½ cup of chopped nuts works ideally, distributed evenly throughout the batter. The nuts maintain their texture during baking while the surrounding brownie stays perfectly fudgy.
Swirl Variations
Creative swirls elevate our condensed milk brownies into gourmet treats that look as impressive as they taste. An espresso swirl incorporates coffee flavor by mixing espresso powder into a portion of the batter before creating elegant marble patterns throughout the pan.
Peppermint swirls offer a refreshing twist by adding peppermint extract to a small amount of batter and swirling it through the base mixture. This creates cool, minty pockets that provide surprising flavor bursts with each bite.
Salted caramel swirls represent the ultimate indulgence, combining sweet and salty elements that enhance the chocolate flavor. We drizzle warm salted caramel sauce over the brownie batter and use a knife to create beautiful swirl patterns before baking. The caramel maintains its distinct flavor while complementing the rich condensed milk base perfectly.
Conclusion
We’ve shown you how condensed milk transforms ordinary brownies into extraordinary treats that rival any bakery creation. This simple ingredient swap creates that coveted fudgy texture while simplifying your baking process.
Whether you’re making these for a special occasion or just because you’re craving something decadent these brownies deliver every time. The versatility we’ve covered means you can customize them to suit any taste preference or dietary need.
Now it’s time to grab that can of condensed milk and experience the difference for yourself. We’re confident these will become your new go-to brownie recipe once you taste that incredible fudgy perfection.
Frequently Asked Questions
What makes condensed milk brownies different from regular brownies?
Condensed milk creates an incredibly fudgy, truffle-like texture that traditional recipes can’t achieve. It simplifies the recipe by reducing ingredients needed while producing bakery-quality results with a rich, moist consistency that’s perfect for both novice and experienced bakers.
What ingredients do I need for condensed milk brownies?
You’ll need sweetened condensed milk, unsalted butter, cocoa powder, all-purpose flour, eggs, vanilla extract, salt, and semi-sweet chocolate chips. Optional ingredients include walnuts for texture and toppings like mini chocolate chips, powdered sugar, or melted chocolate for decoration.
What’s the best pan size for these brownies?
Use an 8×8-inch pan for extra thick brownies, a 9×9-inch pan for thick brownies, or a 9×13-inch pan for standard rectangles. The pan size affects thickness and baking time, so choose based on your preferred brownie texture.
How long do I bake condensed milk brownies?
Bake at 350°F (175°C) for 30-35 minutes. Look for visual cues like set edges and a slightly firm center. The condensed milk helps maintain moisture, so avoid overbaking to preserve the fudgy texture.
How should I store leftover condensed milk brownies?
Store in an airtight container at room temperature for up to 4 days, or refrigerate for 4-5 days. For longer storage, freeze for up to 3 months wrapped tightly. The condensed milk helps maintain their fudgy texture even after freezing.
Can I customize condensed milk brownies with different flavors?
Yes! Add chocolate chips, chopped nuts like walnuts or pecans, or create swirls with espresso, peppermint, or salted caramel. These variations build upon the rich, fudgy base while allowing you to customize for different preferences and occasions.
Why is proper cooling important for condensed milk brownies?
Cooling completely at room temperature for about an hour helps firm up the brownies and prevents crumbling when cutting. This ensures clean edges and the perfect fudgy texture. Refrigerating briefly can make cutting even easier.
What equipment do I need to make perfect condensed milk brownies?
Essential tools include a baking pan, large mixing bowl, whisk, rubber spatula, parchment paper, and nonstick spray. Optional tools like a kitchen scale for precise measurements and offset spatula for even distribution can enhance your results.


