We’ve discovered the secret to creating the most incredibly moist and decadent cake with just one magical ingredient – condensed milk! This beloved dessert has been winning hearts across kitchens worldwide for decades, transforming simple pantry staples into pure indulgence.
Condensed milk cake isn’t just another dessert – it’s a game-changer that delivers rich, caramel-like sweetness and an irresistibly tender crumb that melts in your mouth. The beauty of this recipe lies in its simplicity and the way condensed milk works as both a sweetener and moisture powerhouse.
Ingredients
We’ve carefully selected each ingredient to maximize the rich flavor and tender texture that makes this condensed milk cake extraordinary. Our ingredient list combines pantry staples with condensed milk to create a dessert that delivers consistent results every time.
For the Cake
- 2 cups all-purpose flour
- 1½ teaspoons baking powder
- ½ teaspoon salt
- ½ cup unsalted butter, softened to room temperature
- ¾ cup granulated sugar
- 3 large eggs, at room temperature
- 1 (14-ounce) can sweetened condensed milk
- ½ cup whole milk
- 2 teaspoons vanilla extract
For the Frosting (Optional)
- 8 ounces cream cheese, softened to room temperature
- ½ cup unsalted butter, softened to room temperature
- ½ cup sweetened condensed milk (reserved from cake preparation or additional can)
- 2 cups powdered sugar, sifted
- 1 teaspoon vanilla extract
- Pinch of salt
Equipment Needed

Creating our perfect condensed milk cake requires the right tools to achieve that signature moist texture and even baking we’ve been discussing. We recommend gathering these essential pieces of equipment before starting our baking process.
Our primary baking vessel should be either a 9-inch or 10-inch springform pan, which allows for easy removal of our delicate cake without breaking its tender crumb. The springform design eliminates the need to flip or wrestle our finished cake from a traditional pan.
Parchment paper becomes crucial for lining our pan and ensuring our cake releases cleanly. We suggest cutting a circle for the bottom and strips for the sides to create a foolproof barrier between our batter and the pan surface.
For mixing our ingredients properly, we need either a stand mixer with paddle attachment or electric hand mixer. The paddle attachment works best for combining our condensed milk mixture without overbeating, while a hand mixer offers more control for smaller batches. Both options will incorporate our ingredients effectively while maintaining the proper texture.
Measuring cups and spoons ensure accuracy in our recipe, particularly when working with the precise ratios that make condensed milk cake so successful. We recommend having both dry and liquid measuring cups available since our recipe includes both types of ingredients.
Additional helpful tools include mixing bowls of various sizes, a rubber spatula for scraping down bowl sides, and a wire cooling rack for proper cake cooling. These supplementary items streamline our baking process and contribute to our final results.
Instructions

Follow these step-by-step instructions to create our perfectly moist condensed milk cake. We’ll guide you through each stage to ensure bakery-quality results.
Prep the Pan and Oven
We start by preheating our oven to 350°F (177°C) for optimal baking temperature. Grease our 9-inch or 10-inch springform pan thoroughly with butter or cooking spray. Line the bottom with parchment paper to guarantee easy cake removal later. Position the oven rack in the center to ensure even heat distribution throughout the baking process.
Mix the Wet Ingredients
We begin by bringing our eggs to room temperature for better mixing. Cream the softened unsalted butter with granulated sugar in our stand mixer until light and fluffy, about 3-4 minutes. Add eggs one at a time, beating well after each addition. Pour in the sweetened condensed milk, whole milk, and vanilla extract. Mix on medium speed until all wet ingredients are completely smooth and well incorporated.
Combine Dry Ingredients
We sift together the all-purpose flour, baking powder, and salt in a separate bowl. This ensures our dry ingredients are evenly distributed and lump-free. Sifting creates a lighter texture in our finished cake. Set this mixture aside until we’re ready to combine it with our wet ingredients.
Create the Batter
We gradually add our sifted dry ingredients to the wet mixture in three additions. Mix on low speed just until the flour disappears after each addition. Avoid overmixing to prevent a tough cake texture. Our batter should be smooth and pourable with no visible flour streaks remaining.
Bake the Cake
We pour the batter into our prepared pan and spread it evenly with a spatula. Bake for 45-55 minutes until the top is golden brown and a toothpick inserted in the center comes out clean or with just a few moist crumbs. The cake will start pulling slightly away from the pan edges when done. Allow the cake to cool in the pan for 10 minutes before transferring to a wire rack to cool completely.
Directions for Frosting

Russian buttercream frosting elevates our condensed milk cake with its silky texture and rich flavor. We start by ensuring our butter reaches room temperature for optimal emulsification and smooth results.
Step 1: Prepare the Butter Base
We place 1 cup of softened unsalted butter in our mixing bowl and begin whipping on medium-high speed. The butter transforms as we continue beating for 8-13 minutes until it becomes pale and nearly triples in volume. This extended whipping time creates the foundation for our perfectly smooth frosting.
Step 2: Incorporate the Condensed Milk
We gradually add 5-14 oz of sweetened condensed milk in small portions while our mixer runs on medium speed. Adding the condensed milk slowly prevents the mixture from breaking and ensures proper incorporation. We mix well between each addition to maintain the smooth consistency.
Step 3: Achieve Perfect Consistency
We continue whipping the mixture until it reaches a smooth and creamy texture. The frosting should hold its shape when piped yet spread easily across our cake surface. We can adjust the sweetness and flavor by adding vanilla extract to taste.
Step 4: Final Adjustments
Temperature control becomes crucial at this stage. We chill our Russian buttercream briefly in the refrigerator if we plan to pipe decorative elements. This short cooling period improves the frosting’s stability and makes it easier to work with for detailed decorating.
Professional Tips for Success
Gel food coloring works best when we want to add vibrant colors without introducing extra liquid that could affect our frosting consistency. We add coloring gradually until we achieve our desired shade while maintaining the proper texture for spreading and piping.
Make-Ahead Instructions

Planning ahead for special occasions or busy weekends becomes effortless with our condensed milk cake’s flexible preparation timeline. We recommend mixing the batter immediately before baking since the leavening agents work most effectively when fresh.
Batter Preparation Timing
Our cake batter requires minimal resting time unlike traditional recipes. The sweetened condensed milk and other wet ingredients blend seamlessly without extended mixing periods. We suggest preparing all ingredients at room temperature first then combining them just before transferring to the oven.
Storage Guidelines After Baking
Once our condensed milk cake finishes cooling completely we can store it strategically for optimal freshness. Room temperature storage works perfectly for up to 3 days when wrapped in an airtight container. The cake’s natural moisture from condensed milk helps maintain its tender crumb during this period.
Refrigerated storage extends our cake’s lifespan significantly beyond the standard timeframe. We place the cooled cake in airtight containers then refrigerate for longer preservation. Cold storage maintains both texture and flavor while preventing spoilage.
Russian Buttercream Frosting Advance Preparation
Our Russian buttercream frosting offers excellent make ahead potential for busy bakers. We can prepare the frosting up to 24 hours in advance then store it covered in the refrigerator. Temperature control remains crucial for maintaining the frosting’s silky consistency.
Before using refrigerated frosting we bring it to room temperature then re whip briefly. This process restores the original texture and ensures smooth application. The sweetened condensed milk base maintains stability better than traditional buttercream recipes.
Storage Tips

We can maximize the lifespan of our condensed milk cake with proper storage techniques that preserve its rich flavor and tender texture. Room temperature storage works perfectly for this delicious dessert when we follow the right guidelines.
Room Temperature Storage
Our condensed milk cake stays fresh at room temperature for up to 4-5 days when stored properly in an airtight container. This storage method works best for plain cakes or those topped with powdered sugar or traditional buttercream frosting. We recommend choosing room temperature storage when our cake features simple toppings that don’t require refrigeration.
| Storage Method | Duration | Best For |
|---|---|---|
| Room Temperature | 4-5 days | Plain cake, powdered sugar, buttercream |
| Refrigeration | Extended time | Fruit toppings, cream cheese frosting |
| Freezer | Up to 2 months | Long-term storage |
Refrigeration Guidelines
We should refrigerate our condensed milk cake when it features fruit toppings or cream cheese frosting. These ingredients require cooler temperatures to maintain their quality and prevent spoilage. The cake maintains its moisture and flavor beautifully under refrigeration.
Freezing Instructions
We can extend our cake’s life significantly through proper freezing techniques. First we must ensure the cake cools completely to room temperature before beginning the freezing process. Next we wrap the entire cake or individual slices tightly in plastic wrap to prevent freezer burn and maintain freshness.
After wrapping we place the cake in a ziplock bag or another airtight freezer-proof container for additional protection. Our condensed milk cake stays delicious in the freezer for up to 2 months when stored using this method.
Thawing Process
We achieve the best results by thawing our frozen cake at room temperature. This gentle thawing method preserves the cake’s tender crumb and rich flavor profile that makes condensed milk cake so special.
Professional Storage Tips
We recommend freezing cakes made with sweetened condensed milk without frosting whenever possible. Adding frosting after thawing maintains the freshest taste and best texture. This approach works particularly well with our Russian buttercream frosting which can be prepared separately and applied once the cake reaches room temperature.
Serving Suggestions

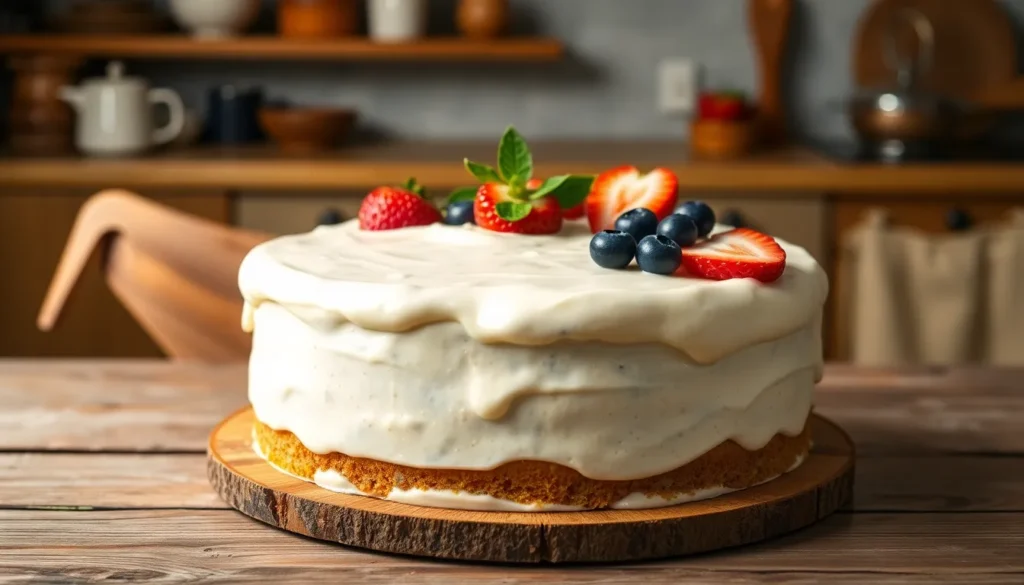
The rich sweetness and tender crumb of our condensed milk cake pairs beautifully with various accompaniments that enhance its indulgent flavor profile. Fresh berries create an excellent contrast with their natural acidity cutting through the cake’s dense sweetness. We recommend strawberries, raspberries, or blueberries as they provide both visual appeal and a refreshing balance to each bite.
Berry sauce elevates the dessert experience by adding moisture and complementary flavors. We drizzle homemade strawberry or mixed berry sauce over individual slices to create restaurant-quality presentation. The sauce’s tartness enhances the cake’s caramel-like notes from the condensed milk.
Whipped cream offers another delightful topping option that adds lightness and textural contrast. We serve dollops of freshly whipped cream alongside cake slices or pipe decorative rosettes on top for special occasions. The cream’s airy texture balances the cake’s density perfectly.
A simple glaze made from condensed milk and powdered sugar creates an elegant finishing touch. We combine these ingredients until smooth and pour the glaze over the cooled cake, allowing it to cascade down the sides. This technique intensifies the condensed milk flavor throughout the dessert.
For casual presentations, we dust the cake with powdered sugar or ground cinnamon just before serving. These simple garnishes add visual interest without overwhelming the cake’s natural sweetness. Cinnamon particularly complements the cake’s rich flavor profile.
We slice the cake into generous squares or traditional wedges depending on the serving style. Room temperature serving allows the cake’s flavors to shine, though slightly warmed slices create an extra comforting experience. Additional sauces or fresh fruit can be offered as optional sides to accommodate different preferences.
| Serving Style | Best Pairings | Temperature | Presentation Tips |
|---|---|---|---|
| Casual | Powdered sugar, cinnamon dust | Room temperature | Square slices, simple garnish |
| Elegant | Berry sauce, whipped cream | Room temperature | Wedge slices, decorative plating |
| Special occasion | Glaze, fresh berries | Slightly warmed | Individual plates, multiple toppings |
Recipe Variations

The beauty of condensed milk cake lies in its versatility as a foundation for endless flavor possibilities. We can transform this basic recipe into exciting variations that cater to different taste preferences and dietary needs.
Chocolate Condensed Milk Cake
This decadent variation delivers the perfect balance of rich chocolate flavor with the signature moist texture of condensed milk cake. We incorporate unsweetened cocoa powder directly into our base recipe to create a gooey chocolate center topped with a distinctive crackly surface that chocolate enthusiasts adore.
Key Ingredients:
- 3/4 cup unsweetened cocoa powder
- Standard condensed milk cake base ingredients
- Additional 2 tablespoons butter for richness
The chocolate version works exceptionally well for potlucks and casual gatherings where we want to impress without extensive preparation. We simply substitute 3/4 cup of flour with cocoa powder and add an extra 2 tablespoons of melted butter to maintain the proper moisture balance.
Coconut Condensed Milk Cake
Our coconut variation offers a tropical twist that’s both dairy-free and egg-free, making it accessible to guests with dietary restrictions. This version produces an incredibly moist and fluffy texture that rivals traditional recipes while simplifying the ingredient list for beginner bakers.
Essential Components:
- Coconut condensed milk (instead of regular)
- 2 cups self-rising flour
- 1 cup plain yogurt
- 2 teaspoons vanilla extract
We love this variation because it eliminates the need for separate eggs and dairy butter while maintaining the signature tender crumb. The coconut condensed milk provides natural sweetness and moisture, creating a cake that’s both foolproof and delicious.
Lemon Condensed Milk Cake
Bright citrus notes transform our base cake into a refreshing dessert perfect for spring and summer entertaining. We add lemon zest and fresh juice to create a vibrant flavor profile that cuts through the richness of condensed milk beautifully.
Citrus Enhancement:
- Zest of 3 large lemons
- 1/4 cup fresh lemon juice
- 1 teaspoon lemon extract (optional)
The lemon variation requires slight adjustments to liquid ratios since we’re adding acidic citrus juice. We recommend reducing the milk by 2 tablespoons and incorporating the lemon juice gradually to prevent curdling. This version pairs wonderfully with cream cheese frosting or a simple lemon glaze for an elegant finish.
Troubleshooting Tips

Even experienced bakers encounter challenges when making condensed milk cake. We’ve compiled the most common issues and their answers to help you achieve perfect results every time.
Overmixing Creates Dense Texture
Stop mixing once you incorporate the dry ingredients to prevent a tough cake. Our testing shows that folding the flour mixture gently into the wet ingredients preserves the cake’s tender crumb. When you see no streaks of flour remaining, immediately stop mixing to maintain the light texture.
Temperature Control Prevents Uneven Baking
Avoid opening the oven door during the first 30 minutes to ensure even baking throughout your cake. Temperature fluctuations cause the cake to sink in the center or develop an uneven rise. We recommend using an oven thermometer to verify your oven maintains consistent heat.
Quick Browning Requires Immediate Action
Cover your cake with aluminum foil if the top browns too quickly during baking. This technique allows the interior to finish cooking while protecting the surface from over-browning. Monitor the cake closely after 25 minutes of baking time.
Proper Cooling Prevents Gummy Texture
Allow the cake to cool completely before removing it from the pan to prevent a gummy texture. Rushing this step traps moisture and creates an undesirable consistency. We suggest cooling the cake on a wire rack for at least 2 hours before handling.
Air Bubbles Affect Final Appearance
Gently tap the filled pan on your counter to release trapped air bubbles before baking. This simple step prevents large holes from forming in your finished cake. Two or three firm taps usually eliminate most air pockets from the batter.
Freezing Strategy Maintains Quality
Condensed milk cakes freeze well for up to 2 months, but we recommend adding frosting after thawing for best results. Wrap the cooled cake tightly in plastic wrap followed by aluminum foil to prevent freezer burn. Thaw frozen cakes at room temperature for 4-6 hours before serving.
Conclusion
We’ve shown you how this simple yet elegant cake transforms everyday ingredients into something truly special. The beauty of condensed milk cake lies in its foolproof nature – even beginner bakers can achieve bakery-quality results with our detailed guidance.
Whether you’re planning a family gathering or simply treating yourself to homemade goodness this versatile dessert delivers every time. The make-ahead options and storage tips ensure you’ll always have a delicious treat ready when cravings strike.
Don’t wait to try this recipe – your kitchen will smell incredible and your taste buds will thank you. We’re confident this condensed milk cake will become a staple in your baking repertoire just as it has in ours.
Frequently Asked Questions
What makes condensed milk cake so moist and flavorful?
Condensed milk serves a dual purpose in this cake – it acts as both a sweetener and a moisture source. The concentrated milk proteins and sugars create a tender, melt-in-your-mouth crumb while adding a rich, caramel-like sweetness that transforms basic ingredients into an indulgent dessert.
What equipment do I need to make condensed milk cake?
You’ll need a 9-10 inch springform pan, parchment paper for lining, a stand or electric hand mixer, measuring cups and spoons, mixing bowls, a rubber spatula, and a wire cooling rack. These tools ensure proper mixing, accurate measurements, and easy cake removal for optimal results.
Can I make condensed milk cake ahead of time?
The cake batter should be mixed and baked immediately for best results. However, the finished cake can be stored at room temperature for up to 3 days or refrigerated for longer storage. The Russian buttercream frosting can be made 24 hours in advance and refrigerated.
How should I store leftover condensed milk cake?
Store unfrosted cake at room temperature for 4-5 days in an airtight container. Cakes with cream cheese frosting or fruit toppings should be refrigerated. For longer storage, wrap the cake properly and freeze for up to 2 months. Always thaw at room temperature for best texture.
What are the best toppings for condensed milk cake?
Fresh berries like strawberries, raspberries, or blueberries provide a refreshing contrast. Other excellent options include berry sauce, whipped cream, a simple condensed milk glaze, or a light dusting of powdered sugar or cinnamon for casual presentations.
Can I make variations of the basic condensed milk cake recipe?
Yes! Popular variations include chocolate (adding cocoa powder), coconut (dairy-free and egg-free option), and lemon (with bright citrus notes). Each variation maintains the signature moist texture while catering to different taste preferences and dietary needs.
What are common mistakes to avoid when making this cake?
Avoid overmixing the batter to prevent density, ensure proper oven temperature for even baking, and cover with foil if browning too quickly. Allow proper cooling time to avoid gummy texture, tap out air bubbles before baking, and consider freezing unfrosted for best quality.


