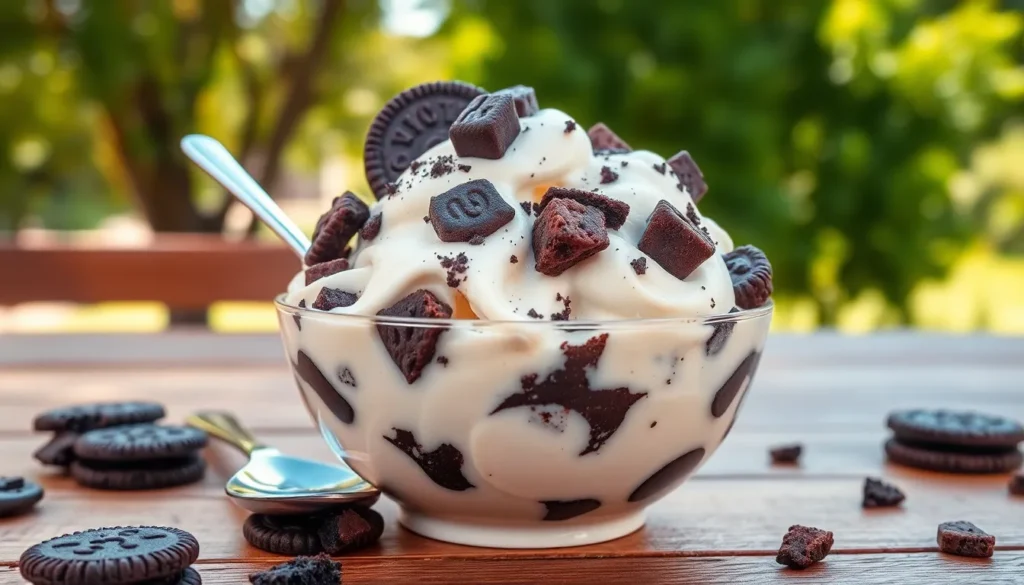
Nothing beats the nostalgic bliss of cookies and cream ice cream – that perfect marriage of rich vanilla custard and chunky chocolate cookie pieces that’s captured hearts since the 1980s. We’ve all experienced that moment of pure joy when our spoon hits a generous chunk of cookie, creating the ultimate texture contrast that makes this flavor absolutely irresistible.
What started as a simple concept has become one of America’s most beloved ice cream flavors, and for good reason. The combination of smooth, creamy vanilla ice cream studded with crushed chocolate sandwich cookies creates a symphony of flavors and textures that’s impossible to resist.
We’re excited to share our homemade cookies and cream ice cream recipe that’ll rival any store-bought version. With just a few simple ingredients and our foolproof technique, you’ll create a dessert that’s guaranteed to become your new go-to treat for any occasion.
Ingredients
We’ve carefully selected premium ingredients that create the perfect balance of creamy vanilla base and crunchy chocolate cookie pieces. Our homemade version delivers exceptional flavor and texture that surpasses store-bought alternatives.
For the Ice Cream Base
- 2 cups heavy cream
- 1 cup whole milk
- 3/4 cup granulated sugar
- 6 large egg yolks
- 2 teaspoons pure vanilla extract
- 1/4 teaspoon kosher salt
For the Cookies and Cream Mix-ins
- 20 chocolate sandwich cookies (such as Oreos)
- 2 tablespoons additional cookie crumbs for extra texture
- 1/4 cup mini chocolate chips (optional for extra chocolate flavor)
Equipment Needed

Creating homemade cookies and cream ice cream requires exact tools to achieve the perfect creamy texture and proper incorporation of cookie pieces. We recommend gathering these essential items before starting your ice cream making adventure.
Electric Ice Cream Maker serves as the cornerstone of our homemade ice cream operation. Popular models like the Ninja Swirl or KitchenAid attachments deliver consistent churning action that transforms our custard base into silky smooth ice cream. The churning process incorporates air while freezing the mixture, creating that signature creamy texture we love.
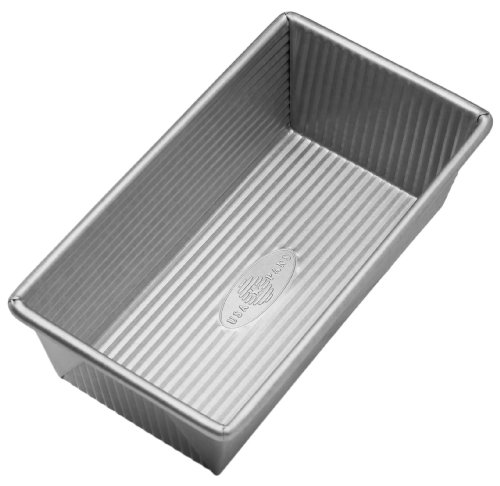
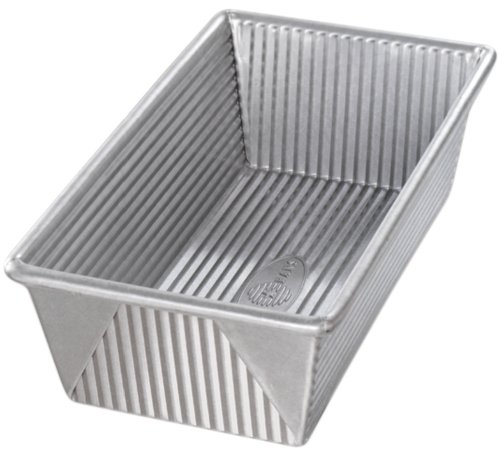
Freezer Safe Container becomes crucial for storing our finished ice cream once churning completes. We prefer containers with tight fitting lids to prevent ice crystals from forming during the freezing process. A 1.5 quart capacity works perfectly for our recipe batch size.
Metal Mixing Bowl and Whisk help us prepare the ice cream base effectively. Metal conducts temperature efficiently, allowing our mixture to cool faster when needed. The whisk ensures sugar dissolves completely and ingredients blend uniformly before churning begins.
Fine Mesh Strainer proves invaluable when working with custard based ice creams. We use it to remove any lumps or cooked egg pieces that might form during the heating process, guaranteeing our final product maintains a smooth consistency.
Heavy Bottomed Saucepan provides even heat distribution when preparing the custard base. This prevents hot spots that could scramble our egg yolks and ensures gentle cooking throughout the mixture.
Digital Thermometer takes the guesswork out of custard preparation. We monitor temperature precisely to achieve proper thickening without overcooking the delicate egg mixture.


Instructions

Now we’ll walk through the step-by-step process to create our homemade cookies and cream ice cream. These instructions will guide you through each phase to achieve that perfect creamy texture with delightful cookie chunks.
Prep the Ice Cream Base
We begin by whisking together the granulated sugar and whole milk in our metal mixing bowl until the sugar completely dissolves. This process typically takes 2-3 minutes of steady whisking. Heavy cream gets added next along with vanilla extract and kosher salt. Stir the mixture thoroughly to ensure all ingredients combine evenly. The base should appear smooth and uniform without any sugar granules remaining at the bottom of the bowl.
Chill the Mixture
We cover our prepared mixture and refrigerate it overnight when using an electric ice cream maker. This chilling period allows the flavors to meld together while ensuring the base reaches the optimal temperature for churning. The mixture should be completely cold to the touch before proceeding to the next step. Proper chilling prevents ice crystals from forming during the churning process and guarantees a smoother final texture.
Prepare the Cookie Pieces
We use regular Oreos rather than Double Stuf varieties for the best texture balance in our ice cream. Break each cookie into coarse pieces by hand or place them in a sealed plastic bag and gently crush with a rolling pin. Aim for pieces roughly the size of small pebbles. Too fine and they’ll dissolve into the ice cream. Too large and they’ll be difficult to scoop and eat.
Churn the Ice Cream
We pour our chilled mixture into the electric ice cream maker and begin churning according to the manufacturer’s instructions. Most ice cream makers require approximately 20 minutes of churning time. The mixture will gradually thicken and increase in volume as air gets incorporated. Watch for the consistency to become thick enough to coat the back of a spoon while still maintaining a soft serve texture.
Add the Mix-ins
We add our prepared cookie pieces during the final 5-10 minutes of churning. This timing prevents the cookies from breaking down too much while ensuring even distribution throughout the ice cream. The churning action will naturally fold the cookie pieces into the base. Avoid adding them too early as excessive churning can cause the cookies to disintegrate.
Freeze Until Set
We transfer our churned ice cream to a freezer-safe container immediately after churning completes. Press parchment paper directly onto the surface of the ice cream to prevent ice crystals from forming. Freeze for at least 2-4 hours until the ice cream reaches a firm scoopable consistency. The ice cream will continue to harden during this time and develop its final texture.


Make-Ahead Tips

Creating exceptional cookies and cream ice cream becomes effortless when we prepare components in advance. Strategic planning transforms this delightful dessert into a stress-free treat for any occasion.
Chill the Base Properly
We recommend chilling the ice cream base in the refrigerator for at least 1 hour before churning to ensure proper freezing consistency. This crucial step prevents ice crystals from forming and guarantees a smooth, creamy texture throughout the churning process.
Prepare Cookie Pieces in Advance
Chocolate sandwich cookies benefit from advance preparation to maintain their ideal texture. We suggest coarsely chopping or crushing the cookies ahead of time and storing them in an airtight zipper bag in the freezer until ready to use. This method preserves their crunch while preventing them from becoming soggy during the churning process.
Pre-Freeze Essential Equipment
Cold equipment significantly improves churning success. We place our mixing bowls and whisks in the freezer for several minutes before combining ingredients to keep everything at optimal temperature. This technique aids in successful churning and prevents premature melting of the ice cream base.
Master Storage Techniques
Proper storage extends the life and quality of our homemade ice cream. We transfer the finished product to an airtight, freezer-safe container and cover it tightly before freezing for 2 to 6 hours until it reaches the perfect serving consistency.
| Storage Timeline | Quality Level | Notes |
|---|---|---|
| 1 week | Optimal | Best texture and flavor |
| 1-2 weeks | Good | Acceptable with proper storage |
| Beyond 2 weeks | Declining | Ice crystals may form |
Enhance Visual Appeal
We reserve a handful of cookie chunks to sprinkle on top before the final freeze. This presentation technique adds visual appeal and provides extra texture contrast in each serving. The reserved pieces create an appetizing appearance that showcases the cookies and cream combination perfectly.


Storage Instructions

Proper storage keeps our homemade cookies and cream ice cream fresh and delicious for weeks. We recommend transferring the churned ice cream to a tightly sealed freezer-safe container for optimal preservation. Press parchment paper or plastic wrap directly onto the surface of the ice cream to minimize ice crystal formation during extended storage.
Our homemade ice cream maintains peak quality for up to one week when stored in a loaf pan covered with two layers of plastic wrap. For longer storage periods extending up to one month, we suggest using an airtight freezer-safe container that prevents freezer burn and maintains the creamy texture we worked so hard to achieve.
| Storage Method | Duration | Temperature | Container Type |
|---|---|---|---|
| Homemade (short-term) | 1 week | -5°F to 0°F | Loaf pan with plastic wrap |
| Homemade (long-term) | 1 month | -5°F to 0°F | Airtight freezer container |
| Store-bought | 3-4 weeks | -5°F to 0°F | Original sealed package |
Store-bought cookies and cream ice cream requires similar care but comes with its own guidelines. We should keep these products at temperatures between -5°F and 0°F in our home freezers. Always check that the package feels firm and remains securely closed before purchasing and after each serving session.
Return the ice cream to the freezer immediately after scooping to maintain quality and prevent melting. We find that store-bought varieties taste best when consumed within 3 to 4 weeks of purchase. The cookies maintain their texture better when the ice cream stays consistently frozen at proper temperatures.
Specialty products like Dippin’ Dots cookies and cream ice cream present unique storage challenges. These products require ultra-low temperatures at -40°F and cannot survive in typical home freezers. We must consume these specialty items on the day of receipt or keep them with replenished dry ice for temporary storage.


Serving Suggestions

Our homemade cookies and cream ice cream shines in countless delicious presentations that showcase its perfect balance of creamy vanilla and crunchy cookie pieces. We recommend serving this versatile dessert in ways that highlight both its smooth texture and delightful cookie chunks.
Classic Bowl and Cone Service
We love presenting cookies and cream ice cream in its simplest form—generous scoops in chilled bowls or crispy waffle cones. This traditional approach allows the full flavor profile to shine while giving everyone the perfect bite of vanilla custard and chocolate cookies. For easier scooping of firm ice cream, we warm our ice cream scoop with hot water between servings.
Ice Cream Cake Creations
Our cookies and cream ice cream transforms beautifully into stunning layered cakes. We layer it with additional cookie crumbs and sometimes alternate with complementary flavors like chocolate or vanilla. Adding chocolate shell coating or ganache between layers creates extra texture that guests absolutely adore. When serving ice cream cakes, we let them sit at room temperature for about 5 minutes to make slicing easier.
Rich Milkshakes and Floats
Blending our cookies and cream ice cream with cold milk creates incredibly indulgent milkshakes that capture the essence of this beloved flavor combination. We typically use a 3:1 ratio of ice cream to milk for the perfect consistency. Adding a dollop of whipped cream and extra cookie crumbs on top makes these treats even more spectacular.
Gourmet Sundae Toppings
We elevate our cookies and cream ice cream with carefully chosen toppings that complement its flavors. Hot fudge sauce pairs beautifully with the chocolate cookies, while caramel syrup adds rich sweetness. Fresh whipped cream provides lightness, and we often sprinkle additional crushed cookies for extra crunch and visual appeal.
Special Serving Tips
| Serving Method | Temperature Tip | Tool Preparation |
|---|---|---|
| Hard-frozen scoops | Room temp 2-3 minutes | Warm knife/scoop with hot water |
| Ice cream cakes | Room temp 5 minutes | Sharp knife warmed between cuts |
| Milkshakes | Slightly softened | Chilled glasses for best results |
We always keep these practical tips in mind when serving our homemade creation to ensure every portion looks and tastes absolutely perfect.


Variations

We can elevate our homemade cookies and cream ice cream by exploring different variations that transform this classic dessert. Each version offers unique flavors and textures that cater to different preferences.
Chocolate Cookie Base
We enhance our cookies and cream ice cream by incorporating dark chocolate or chocolate-flavored cookies instead of traditional vanilla sandwich cookies. Premium versions feature rich chocolate cookie pieces mixed with chocolate swirls or ganache layers that create deeper flavor complexity. Our vanilla ice cream base remains unchanged while we add distinctly chocolate cookie elements including dark chocolate cookies with cream filling. This variation delivers intense chocolate notes that balance beautifully with the smooth vanilla custard.
Oreo Overload Version
We create an indulgent Oreo Overload version by dramatically increasing the amount of Oreo cookie pieces throughout our ice cream. This variation incorporates additional chocolate elements such as chocolate cookie swirls and milk chocolate ganache layers for maximum impact. We pack our ice cream with extra cookies and market this version as “double stuffed” or “extra cookies” to emphasize the abundant cookie content. The result delivers an intensely satisfying experience for those who crave maximum cookie crunch in every bite.
Homemade Cookie Option
We customize our cookies and cream ice cream by selecting alternative cookie brands or types beyond traditional chocolate sandwich cookies. Our homemade approach allows us to adjust cookie quantities according to personal preference while maintaining our base recipe of heavy cream, whole milk, cream cheese, vanilla extract, and crushed cookies. We can experiment with different cookie textures by varying our crushing technique or incorporating chocolate chips alongside cookie pieces for added complexity. This flexibility enables us to create personalized versions that reflect individual taste preferences while maintaining the classic cookies and cream foundation.
Troubleshooting Tips

Making cookies and cream ice cream at home occasionally presents challenges that can affect texture and flavor. We’ve compiled answers to the most common issues that arise during the ice cream making process.
Texture Problems and Answers
Icy Texture often frustrates home ice cream makers. We recommend ensuring your mixture reaches refrigerator temperature before churning begins. Cold temperatures prevent large ice crystals from forming during the freezing process.
Sandy Texture develops when lactose crystallization occurs in the mixture. Reducing skimmed milk powder in your recipe prevents this unpleasant grainy sensation. We suggest using whole milk instead of powdered alternatives when possible.
Overly Hard or Soft Consistency requires adjusting the butterfat content in your base. Using more milk and less cream creates a better balance. Overchurning also contributes to overly firm ice cream that becomes difficult to scoop.
Crumbly Texture results from introducing too much air during churning. We recommend shortening the churning time and transferring the ice cream to the freezer immediately after processing completes.
Storage and Preservation Issues
Freezer Burn damages both flavor and texture over time. Storing ice cream in an airtight shallow container prevents air exposure. We press parchment paper directly onto the ice cream surface before sealing the container.
Cookie Integration Challenges
Uneven Cookie Distribution occurs when cookie pieces sink or clump together. We fold crushed cookies gently after churning completes to maintain even distribution throughout the ice cream.
Cookie Size Problems affect the overall eating experience. Crushing cookies to approximately 1/4 inch pieces provides the ideal texture balance. Pieces that are too large create difficulty when scooping while overly fine pieces disappear into the base.
Flavor Enhancement sometimes requires additional support beyond the cookies themselves. Adding a touch of vanilla extract amplifies the cookies and cream flavor profile without overwhelming the base taste.
| Common Issue | Primary Cause | Solution |
|---|---|---|
| Icy Texture | Mixture too warm before churning | Chill to refrigerator temperature |
| Sandy Texture | Lactose crystallization | Reduce skimmed milk powder |
| Wrong Consistency | Improper butterfat ratio | Adjust milk to cream ratio |
| Crumbly Texture | Overchurning | Reduce churning time |
| Freezer Burn | Air exposure | Use airtight shallow container |
| Uneven Cookies | Poor mixing technique | Fold gently after churning |
These troubleshooting techniques help ensure your homemade cookies and cream ice cream achieves the perfect creamy texture with evenly distributed cookie pieces every time.
Conclusion
We’ve covered everything you need to create exceptional homemade cookies and cream ice cream that’ll impress family and friends. From mastering the custard base to achieving perfect cookie distribution this classic flavor combination never goes out of style.
With our detailed techniques storage methods and creative variations you’re equipped to make ice cream that rivals any premium brand. The beauty lies in customizing each batch to your preferences whether that’s extra cookie chunks or unique flavor twists.
Now it’s time to fire up that ice cream maker and start creating memories one scoop at a time. Your homemade cookies and cream ice cream awaits!
Frequently Asked Questions
What ingredients do I need to make homemade cookies and cream ice cream?
You’ll need heavy cream, whole milk, granulated sugar, egg yolks, vanilla extract, and kosher salt for the base. For mix-ins, use chocolate sandwich cookies (like Oreos) and optional mini chocolate chips. These premium ingredients ensure exceptional flavor and texture that surpasses store-bought alternatives.
What equipment is essential for making cookies and cream ice cream at home?
Essential equipment includes an electric ice cream maker, freezer-safe container, metal mixing bowl, whisk, fine mesh strainer, heavy-bottomed saucepan, and digital thermometer. These tools are vital for achieving perfect creamy texture and proper incorporation of cookie pieces.
How long should I chill the ice cream base before churning?
Chill the base for at least one hour, though overnight is recommended for best results. This prevents ice crystals, ensures smooth texture, and allows flavors to meld properly. Proper chilling temperature is crucial for optimal churning success.
How do I properly store homemade cookies and cream ice cream?
Transfer churned ice cream to a tightly sealed freezer-safe container. Press parchment paper directly onto the surface to minimize ice crystals. It maintains peak quality for one week in short-term storage or up to one month in an airtight container.
What are some creative serving suggestions for cookies and cream ice cream?
Serve in chilled bowls, waffle cones, or create layered ice cream cakes and rich milkshakes. Make gourmet sundaes with complementary toppings. For easier serving, let hard-frozen scoops sit at room temperature for a few minutes before serving.
How can I customize my cookies and cream ice cream recipe?
Try using dark chocolate cookies for richer flavor, create an “Oreo Overload” version with extra pieces and chocolate swirls, or experiment with alternative cookie brands. This flexibility allows personalized versions while maintaining the classic foundation.
What should I do if my ice cream has an icy or sandy texture?
Icy texture usually results from improper chilling or churning temperature. Sandy texture indicates sugar crystallization. Ensure proper base temperature before churning, follow chilling times exactly, and maintain consistent freezer temperature throughout the process.
When should I add cookie pieces during the churning process?
Add broken cookie pieces during the final minutes of churning to maintain their texture and prevent over-mixing. This timing ensures even distribution while preserving the delightful crunch that makes cookies and cream ice cream special.


