Love crepes but think they’re too complicated to make? We’ve got fantastic news for you! You can create perfectly thin and delicate crepes using simple pancake mix that’s probably already sitting in your pantry right now.
We discovered this game-changing shortcut when we were craving authentic French crepes but didn’t want to measure out flour, eggs, and milk separately. By transforming regular pancake mix with a few simple adjustments, we’ve mastered the art of making restaurant-quality crepes in minutes instead of hours.
The secret lies in thinning out the batter to achieve that signature crepe consistency. With just pancake mix, extra liquid, and a hot pan, you’ll be flipping paper-thin crepes like a pro. Whether you’re planning a romantic brunch or need a quick dessert solution, these versatile crepes work beautifully with both sweet and savory fillings.
Ingredients
Making crepes with pancake mix requires just a few simple ingredients that you likely already have in your kitchen. We’ve streamlined this recipe to make it as accessible as possible while maintaining that authentic crepe texture and flavor.
For the Crepe Batter:
- 1 cup pancake mix (any brand works well)
- 1¼ cups whole milk (use 2% if preferred)
- 2 large eggs (room temperature)
- 2 tablespoons melted butter
- 1 tablespoon granulated sugar (optional for sweet crepes)
- ½ teaspoon vanilla extract (for sweet preparations)
- Pinch of salt (if your pancake mix is unsalted)
For Cooking:
- 1-2 tablespoons butter or cooking spray for the pan
- Additional melted butter for brushing between crepes
Optional Flavor Variations:
- 1 tablespoon cocoa powder (for chocolate crepes)
- Zest of 1 lemon (for citrus crepes)
- ¼ teaspoon almond extract (instead of vanilla)
The key to perfect crepes lies in achieving the right batter consistency. We use more liquid than typical pancake batter to create that signature thin and delicate texture. The melted butter adds richness while preventing the crepes from sticking to your pan. Room temperature eggs blend more easily and create a smoother batter without lumps.
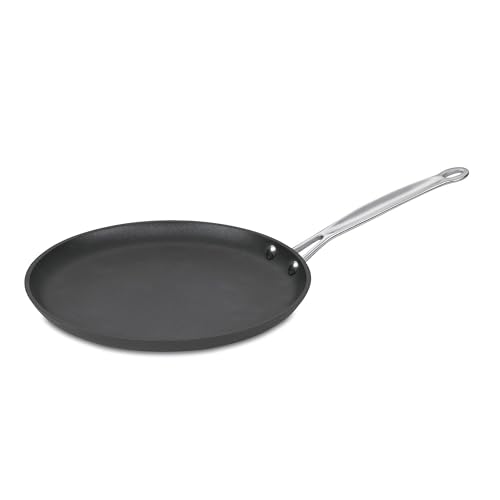
Hard anodized exterior for even heat distribution

[MULTIPURPOSE] - This pan is perfect for crepes, pancakes, French pancakes, but also for frying eggs, bacon, sausages, and more. Whether it is for breakfast or afternoon tea, it is a good helper.

Swiss Non-Stick Coating - Swiss ILAG nonstick granite coating. Free of Intentionally Added PFOA. Smokeless, safe & healthy. Cooking with little oil for healthy diet.
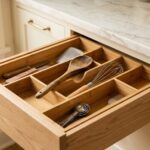
Equipment Needed

Making perfect crepes with pancake mix requires exact tools that ensure smooth preparation and flawless cooking results. We’ve compiled the essential equipment based on our testing to help you achieve restaurant-quality crepes every time.
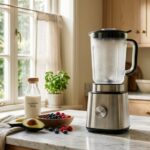
Mixing Bowl or Blender serves as your foundation for creating lump-free batter. A medium-sized mixing bowl works perfectly for whisking ingredients by hand, while a blender delivers ultra-smooth consistency for those who prefer effortless preparation.
Whisk or Spatula becomes crucial for eliminating lumps and achieving the silky texture that makes crepes special. We recommend a wire whisk for manual mixing or a rubber spatula when using a blender to scrape down sides effectively.
Nonstick Skillet or Crepe Pan ranging from 8 to 12 inches provides the ideal cooking surface for thin, delicate crepes. The nonstick coating prevents sticking and ensures easy release, while the size allows for proper batter spreading.
Thin Spatula enables gentle flipping without tearing the delicate crepe surface. A wide, flexible spatula works best for sliding under the entire crepe and turning it smoothly in one motion.
Cooking Spray or Butter keeps your pan properly greased between each crepe. Light coating prevents sticking while maintaining the crepe’s tender texture and golden color.
Measuring Cups and Spoons guarantee accurate ingredient ratios for consistent results. Precise measurements become especially important when adjusting pancake mix consistency for the perfect crepe batter thickness.
| Equipment Type | Size/Specification | Purpose |
|---|---|---|
| Mixing Bowl/Blender | Medium bowl or standard blender | Creates smooth, lump-free batter |
| Nonstick Skillet | 8-12 inches diameter | Provides ideal cooking surface |
| Spatula | Thin, flexible design | Enables safe crepe flipping |
| Measuring Tools | Standard cups and spoons | Ensures accurate ingredient ratios |
Having these tools ready before you start ensures seamless crepe preparation from mixing to serving.
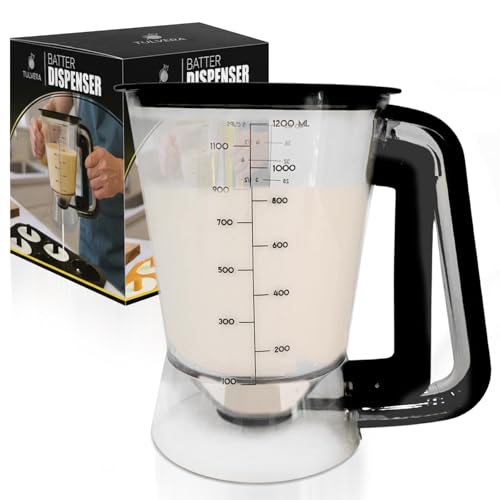
PREMIUM BATTER DISPENSER: Large 5-cup capacity is perfect for families, gatherings, solo baking, and meal prep. Enjoy this batter pourer with pancake mix, waffles, crepes, cupcakes, muffins, and more.

Generous 5-Cup Capacity: Dual measurement markings (cups and milliliters) for versatile use and easy monitoring.

PREMIUM BATTER DISPENSER: Large 5-cup capacity is perfect for families, gatherings, solo baking, and meal prep. Enjoy this batter pourer with pancake mix, waffles, crepes, cupcakes, muffins, and more.
Instructions

Creating perfect crepes with pancake mix requires following these step-by-step instructions to achieve thin, delicate results. We’ll guide you through each stage of the process to ensure your crepes turn out beautifully every time.

The fastest, easiest way to make smooth batters for pancakes, waffles, crepes, and more. Simply add ingredients, toss in the BlenderBall, and shake; Winner of Good Housekeeping's 2021 Kitchen Gear Awards "Sweet Indulgences" - November 2021

【EFFICIENT MIXING & DISPENSING】 Combine ingredients directly inside the bottle, drop in the surgical-grade stainless steel whisk ball, and shake. This all-in-one pancake batter dispenser eliminates the need for extra mixing bowls, messy spoons, or splattered countertops.

Food-Grade Materials – Our pancake batter dispenser is made from PP and silicone, ensuring safety and durability. The reinforced design withstands repeated squeezing without cracking
Prepare the Crepe Batter
We start by combining one cup of pancake mix with 1¼ to 1½ cups milk in a large mixing bowl. Add one egg to the mixture along with any melted butter or vanilla extract if desired. Whisk all ingredients thoroughly until no lumps remain in the batter. For the smoothest texture, we recommend blending the mixture until completely smooth. The consistency should be much thinner than regular pancake batter to create those characteristic delicate crepes.
Rest the Batter
Allowing our batter to rest for at least 30 minutes helps improve the final texture of the crepes. We can refrigerate the mixture for up to overnight, which permits the gluten to relax and ingredients to hydrate properly. This optional step commonly produces better results, though we can skip it if time is limited. Cover the bowl during resting to prevent a skin from forming on the surface.
Heat the Pan
We heat a nonstick skillet or crepe pan over medium heat, choosing a size between 7 to 12 inches depending on our desired crepe dimensions. Lightly grease the pan with butter or cooking spray before adding any batter. The pan should be hot enough that a drop of water sizzles immediately but not so hot that it smokes. Proper temperature control ensures even cooking without burning.
Cook the Crepes
Pour about ⅛ to ¼ cup of batter into the center of the hot pan. Immediately tilt and rotate the pan in a circular motion to spread the batter thinly and evenly across the entire surface. We cook each crepe for 1 to 2 minutes on the first side until the edges begin to lift and the bottom turns golden. Carefully flip using a thin spatula and cook for another minute on the second side. The crepe should be tender and lightly golden when finished.
Stack and Keep Warm
Transfer each completed crepe to a plate, stacking them with parchment or wax paper between each layer to prevent sticking. We keep the finished crepes warm by covering them and placing in a low temperature oven until ready to serve. This method maintains their texture and temperature while we finish cooking the remaining batter.
| Step | Key Instructions |
|---|---|
| Prepare Batter | Combine mix, milk, egg, butter/vanilla, blend smooth |
| Rest Batter | 30 min–overnight in fridge (optional) |
| Heat Pan | Medium heat, lightly grease |
| Cook Crepes | Pour, tilt, cook 1–2 min per side |
| Stack & Keep Warm | Stack with parchment, keep in warm oven |
Serving Suggestions

Now that we’ve mastered the art of making crepes with pancake mix, let’s explore the endless possibilities for filling these delicate pancakes. The beauty of our homemade crepes lies in their versatility, making them perfect for both indulgent sweet treats and satisfying savory meals.

Natural Material - Crepe paddle spreaders are made of 100% natural wood. Easy clean, food-grade safe and biodegradable, so please keey dry after washing to prevent from moldy.

T-shaped Crepe Spreader - Easily spread the batter evenly on the pan, ideal for making crepes, pancakes, omelets, etc. * Assembly required, please insert the rod into the hole

✔ PERFECT EVEN SPREADING Create smooth, thin crepes and pancakes effortlessly with T-shaped tools designed for even batter distribution.
Sweet Fillings
Fresh berries transform our crepes into a vibrant and healthy breakfast option. We love combining strawberries, raspberries, and blueberries for a burst of natural sweetness and color. The juicy berries complement the tender crepe perfectly while adding essential vitamins and antioxidants to our meal.
Chocolate lovers will appreciate the rich decadence of chocolate chips or shavings melted inside warm crepes. We recommend using high-quality dark chocolate for an intense flavor that balances beautifully with the mild pancake mix base. Nutella or peanut butter creates an equally indulgent filling that appeals to both children and adults.
Powdered sugar serves as the classic finishing touch that elevates our crepes to restaurant quality. We dust it generously over the folded crepes just before serving to create an elegant presentation. This simple addition transforms everyday pancake mix crepes into a sophisticated dessert worthy of special occasions.
Savory Fillings
Eggs and bacon create the ultimate breakfast crepe that satisfies hearty appetites. We scramble the eggs to a creamy consistency and pair them with crispy bacon strips for a protein-rich meal that keeps us energized throughout the morning. This combination works exceptionally well for weekend brunch gatherings.
Breakfast potatoes add substance and comfort to our savory crepes. We prefer diced and seasoned potatoes that have been pan-fried until golden brown. The crispy exterior and fluffy interior of the potatoes create a delightful texture contrast against the smooth crepe wrapper.
Country gravy brings Southern comfort food flavors to our crepe table. We ladle the creamy sausage gravy generously over the crepes for a filling meal that’s perfect for cold mornings. Ham or sausage work equally well as standalone fillings, providing the smoky and savory flavors that make these crepes a complete meal.
Storage Instructions

Our freshly made crepes can be stored properly to maintain their delicate texture and delicious flavor for several days. We recommend following these storage guidelines to ensure your crepes remain fresh and ready to enjoy.
Refrigerator Storage
Place leftover crepes in an airtight container and store them in the refrigerator for optimal freshness. Your crepes will stay fresh for up to 5 days when stored properly. We suggest layering parchment paper between each crepe to prevent them from sticking together.
Freezer Storage
For longer storage, we recommend freezing your crepes using this simple method. First, lay the crepes flat on a baking sheet and place them in the freezer for about 20 minutes to flash freeze. Once frozen, transfer the crepes to a freezer-safe container or bag. Your frozen crepes will maintain their quality for approximately 3 months.
Reheating Methods
When you’re ready to enjoy your stored crepes, proper reheating ensures they taste freshly made. For frozen crepes, place them on a microwave-safe plate and heat in 30-second intervals. Flip the crepes as needed to ensure even heating throughout. Refrigerated crepes can be warmed in the microwave for 15-20 seconds or gently reheated in a skillet over low heat.
Best Practices
We find that crepes taste best when served fresh, but they also work well at room temperature for immediate serving. Always allow frozen crepes to thaw slightly before reheating to achieve the best texture. Store sweet and savory crepes separately to prevent flavor transfer between different varieties.

Unique bristle design won’t retain odors or clump during cleaning

[ FOOD GRADE MATERIALS ]: This Silicone Basting Brush Set BPA Free,Non-toxic, lead free Odourless. With Stainless Steel core inside non slip handle! 100% made of premium Food Grade silicone, unlike other bristle brushes, the silicone bristles will not break or shed in your food, more healthy.

100% BPA FREE & FOOD GRADE SILCIONE : This silicone basting brush made of 100% BPA FREE food grade silicone. All bristles of this basting brush set are BPA-free material which are safe and good for your health. whole basting brush body covered by soft silicone material which can offer you perfect using feeling. At the same time, this basting brushes kitchen silicone is non-staining and won't pick up food particles (unlike wooden basting brush).
Tips for Perfect Crepes

Achieving restaurant-quality crepes with pancake mix requires attention to several key details that we’ve learned through experience. The batter consistency makes all the difference in creating those beautifully thin and delicate crepes we’re after.
Temperature control stands as our most critical factor. We always ensure our pan reaches the proper heat level before adding any batter. Medium heat works best for most stovetops, allowing the crepe to cook evenly without burning. Testing with a small drop of batter helps us gauge if the pan is ready.
Non-stick spray becomes essential between each crepe to prevent sticking and tearing. We apply a light coating after every crepe to maintain that smooth release. Even with well-seasoned pans, this step prevents frustrating mishaps.
Batter thickness requires careful attention since pancake mix crepes need a thinner consistency than regular pancakes. We aim for a mixture that flows easily but isn’t too runny. Adding milk gradually helps us achieve the perfect texture.
The first crepe often disappoints, so we don’t let this discourage our efforts. This initial attempt typically helps us adjust our technique and temperature settings. We consider it a practice round rather than a failure.
Refrigerating unused batter helps it settle and improves the texture of subsequent crepes. We store it covered in the refrigerator and give it a gentle stir before using. This resting period allows the flour to fully hydrate.
Keeping finished crepes warm ensures they stay pliable and delicious until serving time. We place them on a plate in a low oven (around 200°F) covered with a kitchen towel. This prevents them from drying out while maintaining their soft texture.
Pan tilting technique determines how evenly our batter spreads. We pour the batter into the center and immediately tilt the pan in a circular motion. Quick movements ensure the batter covers the entire surface before it begins to set.

Compatible with Stoves: The nonstick crepe pan is made of cast aluminum, works well on induction, gas stove, and ceramic stove, which is a perfect replacement solution for your failed cooking equipment.

Natural Ceramic Non-Stick Coating - Nonstick natural ceramic coating. Free of Intentionally Added PFOA, smokeless, safe & healthy. Cooking with little oil for healthy diet.

Swiss Non-Stick Coating - Imported Swiss ILAG nonstick granite coating. Free of Intentionally Added PFOA, smokeless, safe & healthy. Cooking with little oil for healthy diet.
Troubleshooting Common Issues

Even with our simplified pancake mix approach, we sometimes encounter challenges when making crepes. Understanding these common issues and their answers helps us achieve consistently perfect results every time.
Lumpy Batter Problems
We often see lumps forming when mixing pancake mix with liquid ingredients. This happens because the dry mix doesn’t fully incorporate with the wet ingredients. Whisking all ingredients together vigorously until completely smooth eliminates these lumps. Using a blender instead of hand whisking creates an even smoother batter texture. Room temperature ingredients also blend more easily than cold ones.
Batter Consistency Issues
Thick batter creates crepes that tear easily and don’t spread properly in the pan. We add milk gradually until the batter reaches a thin consistency similar to heavy cream. The batter should flow freely when poured and coat the pan evenly. Testing with a small amount first helps us determine if we need additional liquid before cooking the full batch.
Cooking Temperature Problems
Crepes cooking unevenly or burning indicates incorrect heat settings. We maintain medium heat throughout the cooking process to ensure even browning. High heat causes the edges to cook too quickly while leaving the center undercooked. Low heat prevents proper browning and creates soggy textures. Adjusting the heat between crepes maintains consistent results.
Pan Coating Difficulties
Uneven batter distribution results from improper pan tilting or insufficient batter amount. We pour the batter into the center of the pan and immediately tilt in all directions to spread it evenly. Working quickly prevents the batter from setting before it covers the entire surface. Using approximately ¼ cup of batter per crepe provides the right coverage for most standard sized pans.
Folding and Flipping Challenges
Crepes that break during folding haven’t cooked long enough or contain too much moisture. We ensure each crepe cooks for 1 to 2 minutes per side until the edges appear dry and slightly golden. Using a thin spatula prevents tearing when flipping. Allowing crepes to cool slightly before folding makes them more pliable and less likely to break.
Sticking Problems
Crepes sticking to the pan even though using non-stick surfaces indicates insufficient lubrication or overheating. We apply butter or cooking spray before each crepe to maintain proper release. Wiping the pan with a paper towel between crepes removes excess buildup while maintaining the non-stick surface. Using a well-seasoned pan or quality non-stick cookware also prevents sticking issues.

Premium Build for Precision Pouring: Crafted from high-grade, food-safe materials, this cake batter dispenser ensures consistent flow control with a smooth trigger mechanism.

Easily and accurately dispenses most batters, sauces, and frostings, even pizza sauce

【Multi-Functional Pancake Bottle】Ditch messy bowls and lumpy batter with our 2-in-1 mix-and-dispense design! Equipped with a built-in metal whisk ball, just shake the bottle to mix ingredients evenly—no spoons, no blenders, no hassle. In seconds, you’ll pour out perfectly fluffy, delicious pancakes (or waffles, crepes—you name it!) without the mess. 【Note: Not recommended for storage】
Conclusion
Making crepes with pancake mix transforms what many consider a complex French technique into an accessible weeknight treat. We’ve shown you how this simple swap eliminates the guesswork while delivering restaurant-quality results every time.
The beauty of this method lies in its flexibility – whether you’re craving sweet berry-filled crepes for Sunday brunch or savory egg and bacon combinations for dinner we’ve got you covered. With proper storage techniques you can even prep these delicate treats ahead of time.
Now that you’re equipped with all the essential tips troubleshooting answers and serving ideas there’s nothing stopping you from mastering this impressive yet surprisingly simple dish. Your family and friends will be amazed at how effortlessly you can whip up these elegant crepes using ingredients you likely already have in your pantry.

【Multi-Functional Pancake Bottle】: This pancake bottle features a 2-in-1 design that combines mixing and dispensing functions. The bottle come with a metal wire stirring ball. Simply shake to mix the contents thoroughly,and you can create fluffy, delicious pancakes effortlessly.Come with condiment bottles,allows you to place them at will, without fear of leakage,and the discharge port is downward, effectively avoiding dust deposition.

Food-Grade Materials – Our pancake batter dispenser is made from PP and silicone, ensuring safety and durability. The reinforced design withstands repeated squeezing without cracking

【 High Quality Batter Dispenser 】: Please note: The bottle is a container for mixing rather than storing the batter,the pancake Batter Dispenser bottle is made of food-grade PP and silicone materials, healthy, safe and reusable, and can withstand repeated squeezing. can withstand repeated compression and is not easily broken
Frequently Asked Questions

Complete Crepe Set: Includes three T-shaped beech wood scrapers (9cm, 12cm, and 18cm) and one scraper approximately 25cm long and 4cm wide—perfect for making paper-thin crepes and pancakes.

Professional Crepe & Baking Tool Set: This comprehensive kit includes a 10-inch stainless steel spatula and a T-shaped crepe spreader—two essential tools for creating perfect crepes and elegantly finishing baked goods.

[Flat Spatula Turner Wide-Blade]: The included stainless steel spatula turner makes turning crepes a breeze. The thin edges of the flat metal icing spatula turner with long wooden handle stays cool to the touch and crafted to delicately lift crepes, also the one-piece design is even perfect for your largest crepes.
Can I use any pancake mix to make crepes?
Yes, you can use any pancake mix to make crepes. The key is adjusting the liquid ratio to create a thinner batter than traditional pancakes. Most pancake mixes work well, but avoid those with large add-ins like blueberries or chocolate chips for the smoothest texture.
What’s the ideal batter consistency for crepes made with pancake mix?
The batter should be thin and pourable, similar to heavy cream. It should coat the back of a spoon lightly but flow easily when poured. If too thick, gradually add more milk until you achieve the right consistency for thin, delicate crepes.
How long should I let the crepe batter rest?
Allow the batter to rest for at least 30 minutes at room temperature. This resting period helps the flour fully hydrate and creates smoother, more tender crepes. However, if you’re short on time, you can skip this step and cook immediately.
What type of pan is best for making crepes?
A non-stick skillet or dedicated crepe pan works best. Use an 8-10 inch pan for optimal size. The pan should have low sides for easy flipping. Make sure it’s properly heated to medium temperature before adding batter to prevent sticking.
How do I know when to flip the crepe?
Flip the crepe when the edges start to lift slightly and the bottom is lightly golden brown, usually after 1-2 minutes. The surface should look mostly set with no wet batter visible. Use a thin spatula to gently lift and flip in one smooth motion.
Can I make crepes ahead of time?
Yes, crepes can be made ahead and stored. Stack cooled crepes with parchment paper between layers in an airtight container. They’ll keep in the refrigerator for up to 5 days or can be frozen for up to 3 months.
How do I reheat leftover crepes?
Reheat crepes in the microwave for 15-20 seconds or warm them in a dry skillet over low heat for 30 seconds per side. For frozen crepes, thaw first, then reheat. Avoid overheating as this can make them tough or dry.
Why are my crepes turning out thick instead of thin?
Thick crepes usually result from batter that’s too thick or using too much batter per crepe. Add more milk to thin the batter, and use less batter when pouring into the pan. Swirl the pan quickly to spread the batter thinly across the surface.
Can I make both sweet and savory crepes with the same batter?
Yes, the basic pancake mix batter works for both sweet and savory crepes. For sweet versions, add sugar and vanilla. For savory crepes, omit the sugar and add a pinch of salt. You can also make separate batches for different flavor profiles.
What’s the best way to prevent crepes from sticking to the pan?
Use a non-stick pan and lightly grease it with butter or cooking spray between each crepe. Ensure the pan is at the right temperature (medium heat) and well-seasoned. The first crepe often sticks, so consider it a test crepe to adjust heat and lubrication.