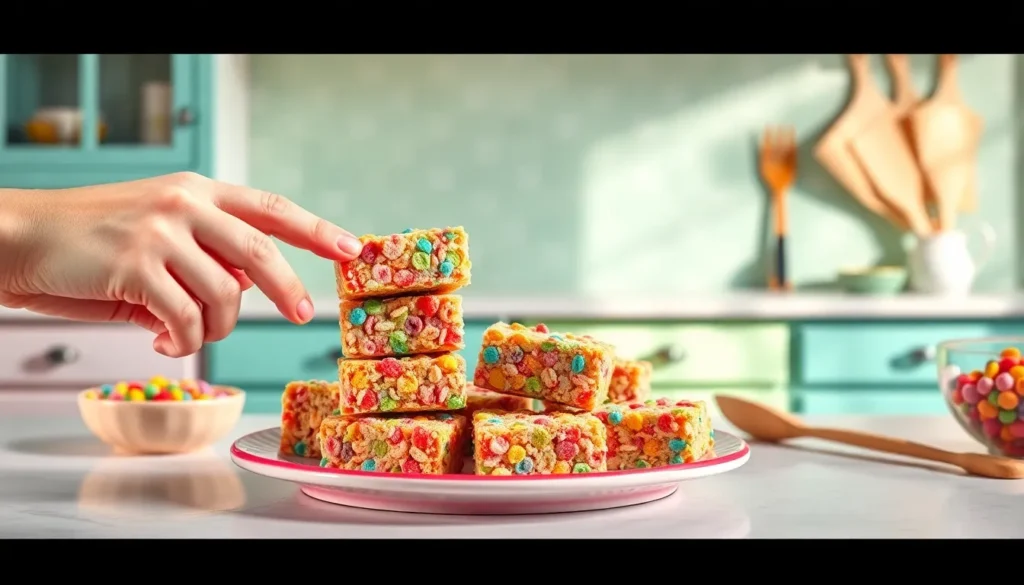
We’ve all grown up loving the rainbow crunch of Fruity Pebbles cereal, but have you ever thought about transforming those colorful loops into an irresistible dessert? Fruity Pebbles treats take everything we adore about the classic breakfast cereal and turn it into a sweet, chewy confection that’ll transport you straight back to Saturday morning cartoons.
These vibrant treats combine the nostalgic flavor of Fruity Pebbles with gooey marshmallows to create bars that are absolutely impossible to resist. They’re incredibly simple to make – requiring just a few pantry staples and about 15 minutes of your time. Whether you’re planning a kids’ party, need a quick dessert for potluck gatherings, or simply want to satisfy your inner child, these colorful squares deliver pure joy in every bite.
Ingredients
We gather simple pantry staples to create these colorful Fruity Pebbles treats. Our recipe requires just five essential ingredients that work together to produce perfectly chewy and vibrant bars.
For the Base:
- 6 cups Fruity Pebbles cereal
- 4 tablespoons unsalted butter
- 1 package (10 oz) mini marshmallows
- 1/4 teaspoon vanilla extract
- Pinch of salt
For Preparation:
- Cooking spray for greasing
- Parchment paper (optional)
We recommend using fresh Fruity Pebbles cereal for the best crunch and color retention. The mini marshmallows melt more evenly than regular-sized ones, creating that perfect gooey texture we want. Unsalted butter gives us better control over the sweetness level while the vanilla extract enhances the overall flavor profile.
Our ingredient list keeps things wonderfully simple while delivering maximum impact. Each component plays a crucial role in achieving the ideal texture and taste that makes these treats so irresistible.
Equipment Needed

Creating these delicious Fruity Pebbles treats requires just a handful of basic kitchen tools that most home cooks already have on hand. We recommend gathering all equipment before starting to ensure a smooth cooking process.
Large Saucepan serves as our primary cooking vessel for melting the butter and marshmallows. Choose a heavy-bottomed pan with at least 3-quart capacity to prevent scorching and provide ample room for stirring. The wide surface area allows for even heat distribution and makes mixing the cereal much easier.
Wooden Spoon or Heat-Resistant Spatula becomes essential for stirring the marshmallow mixture without scratching your cookware. We prefer wooden spoons because they don’t conduct heat and won’t melt if accidentally left in the pan. A large spatula works equally well for folding in the cereal and pressing the mixture into the pan.
8×8 or 9×9 Inch Baking Dish provides the perfect size for setting our treats. Either size works well, though the 8×8 pan creates slightly thicker bars while the 9×9 pan yields thinner pieces. Glass or metal pans both work effectively for this recipe.
Measuring Cups and Spoons ensure accurate ingredient proportions for consistent results every time. We need both dry and liquid measuring tools since our recipe includes both cereal and butter measurements.
Parchment Paper or Cooking Spray makes removal effortless once the treats have set. Parchment paper creates clean edges and prevents sticking, while cooking spray offers a quick alternative. We recommend parchment paper for the cleanest presentation.
Sharp Knife allows for clean cuts through the set treats without crushing the delicate cereal pieces. A chef’s knife or large kitchen knife works best for creating uniform squares or rectangles.
Instructions

Now that we have our ingredients ready and equipment prepared, let’s walk through the simple process of creating these colorful Fruity Pebbles treats. These step by step instructions will guide us to perfect chewy bars every time.
Prep the Pan
We start by preparing our 8×8 inch baking dish to ensure easy removal of our finished treats. Spray the entire interior surface with cooking spray or line with parchment paper, leaving some overhang for lifting. This preparation step prevents sticking and makes cutting clean bars much simpler later.
Melt the Marshmallows
Place 4 tablespoons of unsalted butter in our large saucepan over low heat until completely melted. Add the 10 oz package of mini marshmallows to the melted butter and stir continuously with our wooden spoon. Keep the heat low to prevent burning while stirring until the marshmallows completely melt and combine with the butter. Remove the saucepan from heat once the mixture becomes smooth and creamy, then quickly stir in the vanilla extract and pinch of salt.
Mix in the Fruity Pebbles
Pour all 6 cups of Fruity Pebbles cereal into the warm marshmallow mixture immediately. Stir gently but thoroughly with our wooden spoon until every piece of cereal gets coated with the marshmallow mixture. Work quickly during this step since the mixture begins to set as it cools, making it harder to combine evenly.
Press into Pan
Transfer the cereal mixture into our prepared baking dish while it’s still warm and pliable. Use our hands or the back of a greased spoon to press the mixture firmly and evenly into the pan. Apply consistent pressure across the entire surface to ensure our treats hold together well when cut, but avoid pressing so hard that we crush the cereal pieces.
Cool and Set
Allow the treats to cool completely at room temperature for approximately 60 minutes before cutting. The bars need this full cooling time to set properly and achieve the perfect chewy texture. Once cooled, lift the treats from the pan using parchment paper overhang or carefully turn out onto a cutting board, then cut into uniform squares with a sharp knife.
Directions for Cutting and Serving

After our Fruity Pebbles treats have cooled completely, we need to cut them properly to achieve clean, uniform pieces. Sharp knives work best for this task since they slice through the mixture without crushing the delicate cereal pieces. We recommend using a chef’s knife or serrated knife for the cleanest cuts.
Cutting Techniques
First, we remove the treats from the baking dish using the parchment paper overhang or by gently inverting the pan. Place the entire block on a clean cutting board before beginning the cutting process. For traditional squares, we measure and mark 2-inch intervals along each edge using a ruler or measuring tape.
When making the actual cuts, we use a straight downward motion rather than sawing back and forth. This technique prevents the marshmallow from sticking to the blade and keeps the cereal from scattering. Between each cut, we wipe the knife blade clean with a damp cloth to maintain sharp, precise edges.
For themed events, cookie cutters create fun shapes like Christmas trees or seasonal designs. We press the cutters firmly through the mixture and gently remove excess pieces around the shapes. The leftover scraps make perfect bite-sized snacks that we can enjoy while cleaning up.
Serving Recommendations
Our Fruity Pebbles treats taste best when served at room temperature, allowing the full flavor profile to shine through. We arrange the cut pieces on serving platters or individual dessert plates for presentation. For parties, colorful paper plates complement the vibrant appearance of these treats.
Storage plays a crucial role in maintaining freshness and texture. We store leftover treats in airtight containers at room temperature for up to three days. Refrigeration extends shelf life but may cause the treats to become slightly firmer than desired.
| Storage Method | Duration | Texture Quality |
|---|---|---|
| Room Temperature | 3 days | Optimal chewy texture |
| Refrigerated | 5-7 days | Slightly firmer |
| Frozen | 1 month | Requires thawing |
For special occasions, we dust the treats lightly with powdered sugar or drizzle melted white chocolate over the surface. These finishing touches elevate the presentation and add extra sweetness that guests appreciate.
Storage Tips

Proper storage keeps our colorful Fruity Pebbles treats fresh and delicious for days to come. We recommend several storage methods depending on how long you plan to keep these sweet bars.
Room Temperature Storage
The most convenient option involves storing treats in an airtight container at room temperature. Our treats maintain their chewy texture and vibrant flavor for 3-5 days using this method. We place them in a sealed container or wrap them tightly with plastic wrap to prevent air exposure.
Refrigerated Storage
For extended freshness we store treats in the refrigerator using an airtight container. This method preserves our bars for up to one week while maintaining their soft chewy consistency. Cold storage particularly benefits treats during warmer months when room temperature storage might cause them to become too soft.
Freezer Storage for Long Term
When we need to store treats for extended periods freezing provides the best solution. We wrap cooled treats individually in plastic wrap then cover with aluminum foil before placing them in a freezer-safe container. Our frozen treats maintain quality for 3-4 months using this double-wrap method.
| Storage Method | Duration | Container Type |
|---|---|---|
| Room Temperature | 3-5 days | Airtight container |
| Refrigeration | Up to 1 week | Airtight container |
| Freezing | 3-4 months | Freezer-safe container with double wrap |
Refreshing Stale Treats
Sometimes our treats lose their softness over time. We can quickly refresh them by microwaving for 8 seconds which restores their chewy texture. This technique works particularly well for treats stored at room temperature that have become slightly firm.
Variations and Add-Ins

We can elevate our basic Fruity Pebbles treats with delicious variations that add extra sweetness and visual appeal. These creative add-ins transform our colorful bars into even more indulgent desserts.
Chocolate Drizzle Option
Melted chocolate creates a stunning contrast against the bright colors of our Fruity Pebbles treats. We recommend using semi-sweet or dark chocolate chips melted in 30-second intervals in the microwave, stirring between each interval until smooth. Once our treats have cooled completely, we drizzle the melted chocolate in zigzag patterns across the surface using a spoon or squeeze bottle. This chocolate addition provides a richer flavor profile while maintaining the playful appearance of our colorful cereal bars.
White Chocolate Coating
White chocolate coating offers a sweet contrast that complements the fruity flavors beautifully. We melt white chocolate chips with a small amount of coconut oil to create a smooth, glossy coating that sets perfectly. For enhanced flavor, we can add a few drops of strawberry extract to the melted white chocolate mixture. This coating can be applied by dipping each individual treat or by spreading it evenly across the entire pan before cutting. The white chocolate creates an elegant backdrop that makes the colorful cereal pieces pop visually.
Mini Marshmallow Mix-In
Extra mini marshmallows folded into our mixture create an even gooier texture that marshmallow lovers will adore. We add an additional 1-2 cups of mini marshmallows to our cereal before pressing the mixture into the pan. These extra marshmallows create pockets of sweetness throughout each bite and contribute to a more substantial, chewy texture. The additional marshmallows also help bind the treats together more effectively, making them easier to cut and serve without crumbling.
Make-Ahead Instructions

We love how convenient these Fruity Pebbles treats are for busy schedules and special events. Planning ahead becomes effortless when we follow these simple make-ahead steps.
Preparing for Storage
We recommend preparing our treats in a greased 9×9 or 9×13 inch pan depending on the thickness we desire. After pressing the mixture firmly into our prepared pan, we should let the treats cool completely before covering them. This cooling period ensures the marshmallow mixture sets properly and prevents condensation under our covering.
Optimal Storage Timeline
Our Fruity Pebbles treats maintain their best quality when stored for up to 24 hours before serving. We can extend this timeline to about 3 days if we store them properly in an airtight container. The treats stay fresh and maintain their signature chewy texture throughout this period.
| Storage Method | Duration | Container Type |
|---|---|---|
| Room Temperature | 24 hours | Pan with plastic wrap |
| Airtight Container | 3 days | Sealed container |
| Refrigerated | Up to 1 week | Covered pan or container |
Cutting Strategy
We achieve the cleanest cuts by waiting until just before serving to slice our treats into squares. This timing prevents the edges from drying out and maintains the perfect texture our guests expect. Using wet hands or a greased knife makes cutting easier and prevents sticking.
Cover and Protect
We tightly cover our treats with plastic wrap or aluminum foil while they remain in the pan. This covering method helps maintain freshness and prevents the treats from drying out. Our covering should create a seal around the entire pan to lock in moisture and preserve that signature chewiness.
Quick Cooling Method
We can speed up the cooling process by placing our pan in the refrigerator for 15-20 minutes. This method works perfectly when we need to prepare treats quickly for unexpected guests or last-minute events. The refrigeration helps the marshmallow mixture firm up faster without compromising the final texture.
Troubleshooting Tips

Making perfect Fruity Pebbles treats requires attention to a few key factors that can make or break your results. We’ve identified the most common issues home bakers face and provided answers to ensure your treats turn out perfectly every time.
Why Are Our Fruity Pebbles Treats Hard?
Overcooking Marshmallows creates the most frequent problem we encounter. Melting marshmallows at high heat transforms their texture from gooey to tough and rubbery. We recommend using low heat and removing the marshmallows from heat immediately once they’re melted. Watch carefully during the melting process to prevent overheating.
Stale Marshmallows produce disappointing results in our treats. Fresh marshmallows contain the moisture needed to create that perfect chewy texture we’re after. Check your marshmallow package date and replace them if they’ve been sitting in your pantry for months.
Incorrect Cereal Ratio throws off the balance of our recipe. Adding too much Fruity Pebbles cereal compared to the marshmallow mixture creates treats that are tough and difficult to chew. Stick to our recommended measurements for the best results.
Why Are Our Fruity Pebbles Treats Falling Apart?
Overcooking Marshmallows damages their natural binding properties. When marshmallows get too hot they lose their ability to hold the cereal together effectively. This results in treats that crumble when we try to cut or eat them.
Insufficient Marshmallows leaves us with treats that lack proper cohesion. The marshmallow mixture acts as the glue that binds all the cereal pieces together. Using too few marshmallows means our treats won’t hold their shape properly.
Essential Prevention Tips
Greasing Our Tools prevents frustrating sticking issues during preparation. We spray our spatula and our hands with non-stick cooking spray before mixing and pressing the treats into the pan. This simple step makes the entire process much smoother.
Proper Storage Methods maintain our treats’ perfect texture. We store finished treats in an airtight container at room temperature for 2-3 days maximum. Refrigeration makes them hard and unpleasant to eat. Freezing creates a chewy and hard texture that we want to avoid completely.
| Storage Method | Duration | Texture Result |
|---|---|---|
| Room Temperature | 2-3 days | Optimal chewy texture |
| Refrigeration | Not recommended | Hard and tough |
| Freezing | Not recommended | Chewy and hard |
Conclusion
These Fruity Pebbles treats prove that simple ingredients can create extraordinary desserts. We’ve shown you how easy it is to transform your favorite childhood cereal into a crowd-pleasing confection that brings smiles to faces of all ages.
The beauty of this recipe lies in its versatility and foolproof nature. Whether you’re hosting a party or satisfying a sudden sweet craving you’ll have delicious results every time. The colorful bars store beautifully and travel well making them perfect for any occasion.
Now it’s time to head to your kitchen and create these delightful treats. Your family and friends will thank you for bringing back those nostalgic flavors in such a fun and memorable way.
Frequently Asked Questions
What ingredients do I need to make Fruity Pebbles bars?
You only need five simple ingredients: 6 cups of Fruity Pebbles cereal, 4 tablespoons of unsalted butter, one 10 oz package of mini marshmallows, 1/4 teaspoon of vanilla extract, and a pinch of salt. You’ll also need cooking spray or parchment paper to line your baking dish.
How long does it take to make Fruity Pebbles treats?
These treats are incredibly quick to make, requiring only about 15 minutes of active preparation time. However, you’ll need to allow approximately 60 minutes for the treats to cool completely and set to the perfect chewy texture before cutting and serving.
What equipment do I need to make these bars?
Essential equipment includes a large saucepan, wooden spoon or heat-resistant spatula, 8×8 or 9×9 inch baking dish, measuring cups and spoons, parchment paper or cooking spray, and a sharp knife for cutting. Having all tools ready before starting ensures a smooth cooking process.
How should I store Fruity Pebbles bars?
Store the treats in an airtight container at room temperature for 3-5 days, or refrigerate for up to one week. For long-term storage, wrap properly and freeze for 3-4 months. If treats become stale, microwave for 8 seconds to restore their chewy texture.
Can I customize or add variations to the basic recipe?
Yes! You can drizzle melted chocolate or white chocolate on top, fold in extra mini marshmallows for a gooier texture, or dust with powdered sugar. For themed events, use cookie cutters to create fun shapes from the cooled treats.
What’s the best way to cut the treats without crushing them?
Use a sharp knife and cut the completely cooled treats at room temperature for the cleanest edges. Consider measuring intervals for uniform pieces. Greasing your knife slightly can help prevent sticking while cutting through the chewy texture.
Can I make these treats ahead of time?
Absolutely! These treats are perfect for make-ahead preparation. Prepare them in a greased pan, allow to cool completely before covering to prevent condensation, and store in a sealed container for up to 3 days or refrigerate for up to one week.
What should I do if my marshmallows get hard or the treats fall apart?
Use low heat when melting marshmallows to prevent hardening, ensure your marshmallows are fresh for proper texture, and maintain the correct cereal-to-marshmallow ratio. Always grease your tools to prevent sticking and store treats properly to maintain their chewy consistency.


