There’s something magical about the way toasted hazelnuts transform simple cookie dough into an extraordinary treat. These hazelnut cookies deliver a perfect balance of buttery richness and nutty sophistication that’ll have everyone asking for the recipe. We’ve discovered that the secret lies in properly toasting the hazelnuts until they’re golden and fragrant – it intensifies their flavor and creates that irresistible aroma that fills your kitchen.
What makes these cookies truly special is their versatility. Whether you’re hosting a dinner party or need a quick afternoon pick-me-up with your coffee, they strike the perfect chord between elegant and comforting. The texture is wonderfully satisfying – crispy edges that give way to a tender center studded with crunchy hazelnut pieces.
We promise this recipe will become your go-to when you want to impress without spending hours in the kitchen. Each bite delivers that distinctive hazelnut flavor that pairs beautifully with everything from espresso to dessert wine.
Ingredients
These carefully selected ingredients create our perfect hazelnut cookies with their signature nutty flavor and tender texture. We recommend measuring everything before starting to ensure the best results.
For the Cookies
- 1 cup whole hazelnuts, toasted and roughly chopped
- 2 cups all-purpose flour
- 1/2 teaspoon baking soda
- 1/2 teaspoon salt
- 3/4 cup unsalted butter, softened at room temperature
- 3/4 cup packed light brown sugar
- 1/2 cup granulated sugar
- 1 large egg, room temperature
- 2 teaspoons vanilla extract
- 2-3 tablespoons whole milk
For the Glaze (Optional)
- 1 cup powdered sugar, sifted
- 3-4 tablespoons whole milk
- 1/2 teaspoon vanilla extract
- Pinch of salt
- 2 tablespoons finely chopped toasted hazelnuts for garnish
Equipment Needed
Creating perfect hazelnut cookies requires exact tools that ensure consistent results and make the baking process efficient. We recommend gathering all equipment before starting to streamline your cookie making experience.
Baking sheets form the foundation of successful cookie baking. We suggest using at least two baking sheets lined with parchment paper to accommodate multiple batches and maintain proper spacing between cookies.
Electric mixer becomes essential for achieving the proper texture in your cookie dough. A stand mixer or electric hand mixer allows us to cream butter and sugar effectively, creating the light and fluffy base that makes these cookies exceptional.
Paddle attachment works specifically with stand mixers to blend ingredients without overworking the dough. This attachment ensures our hazelnut cookie dough maintains the perfect consistency for optimal texture.
Food processor or blender proves invaluable when making hazelnut butter from scratch or grinding hazelnuts to your preferred consistency. These tools give us complete control over the texture of hazelnuts in our cookies.
Cookie scoop guarantees uniform cookie sizes and consistent baking results. We recommend using a cookie scoop to portion dough evenly, ensuring all cookies bake at the same rate and achieve identical golden brown perfection.
| Equipment | Primary Function | Recommended Type |
|---|---|---|
| Baking Sheets | Cookie baking surface | At least 2, parchment lined |
| Electric Mixer | Creaming butter and sugar | Stand mixer or hand mixer |
| Paddle Attachment | Mixing dough | Stand mixer compatible |
| Food Processor | Grinding hazelnuts | Standard capacity |
| Cookie Scoop | Portioning dough | Medium size |
Having these tools ready transforms the hazelnut cookie making process from challenging to enjoyable, allowing us to focus on creating these delectable treats with confidence and precision.
Instructions
Now we’ll walk through the step-by-step process to create these delectable hazelnut cookies. Each stage builds upon the previous one to ensure our cookies achieve the perfect balance of flavor and texture.
Prep the Hazelnuts
We begin by toasting whole hazelnuts to enhance their rich flavor profile. Spread the hazelnuts on a rimmed baking sheet and toast them in a preheated 350°F oven for 8-10 minutes until fragrant and lightly golden. Allow the toasted hazelnuts to cool completely before transferring them to our food processor. Process the cooled hazelnuts until they form a fine powder with some slightly coarser pieces for texture. This hazelnut powder will distribute evenly throughout our cookie dough and provide that distinctive nutty flavor we’re after.
Make the Cookie Dough
We start our dough by creaming the softened butter with both brown and granulated sugars using our electric mixer on medium speed for 3-4 minutes until the mixture becomes light and fluffy. Beat in the egg and vanilla extract until fully incorporated. In a separate bowl we whisk together the all-purpose flour, baking soda, and salt. Gradually add the flour mixture to our creamed butter mixture, alternating with the whole milk and mixing on low speed until just combined. Fold in our prepared hazelnut powder until evenly distributed throughout the dough.
Shape the Cookies
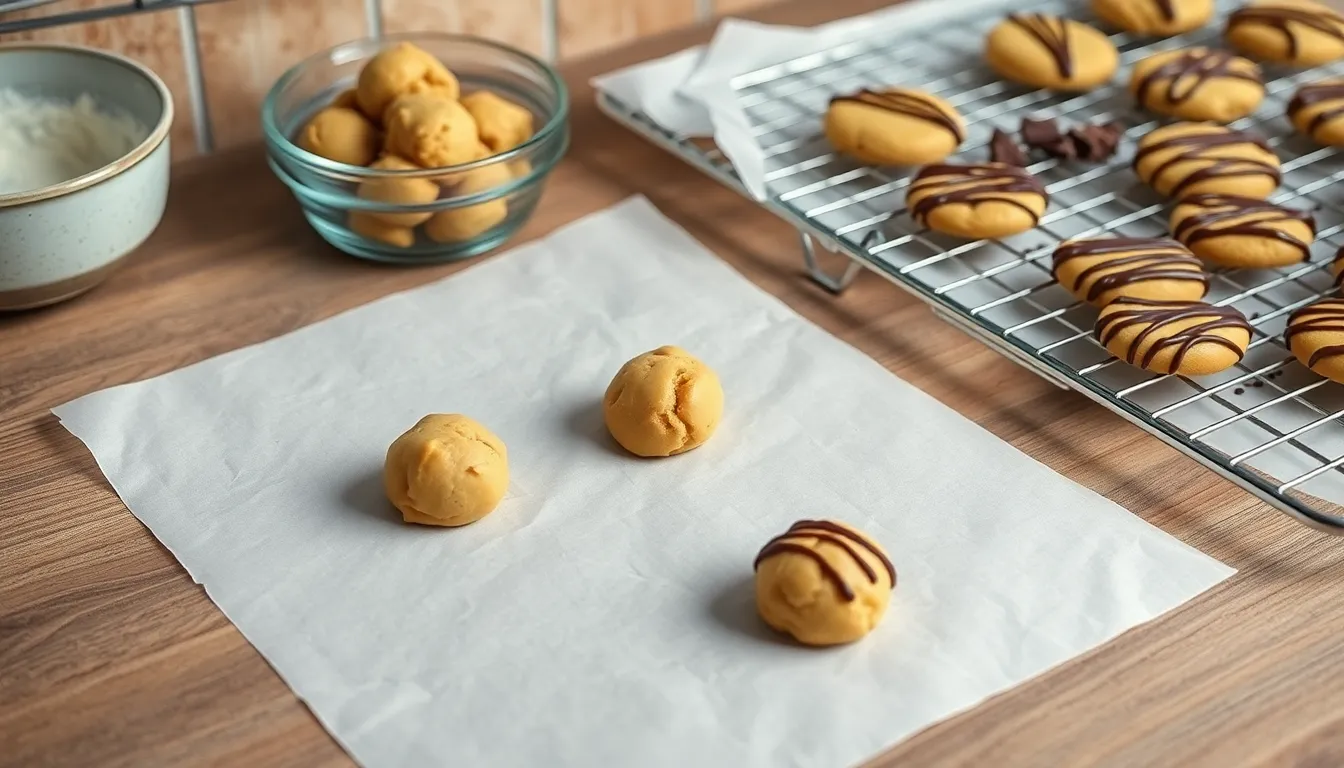
Using our cookie scoop or a tablespoon we portion the dough into uniform balls about 1½ inches in diameter. Place each dough ball on our parchment-lined baking sheets, spacing them 2 inches apart to allow for spreading during baking. For an elegant presentation we can gently press a whole toasted hazelnut into the center of each cookie before baking. This creates both visual appeal and an extra burst of hazelnut flavor in every bite.
Bake the Cookies
We preheat our oven to 350°F and bake the cookies for 10-12 minutes until the edges appear firm and lightly golden while the centers still look slightly soft. The cookies will continue cooking from residual heat once removed from the oven, so we avoid overbaking to maintain their tender texture. Allow the cookies to rest on the baking sheet for 5 minutes before transferring them to a wire cooling rack.
Prepare the Glaze
While our cookies cool we prepare the optional glaze by whisking together powdered sugar with small amounts of milk and vanilla extract until smooth. The consistency should be thick enough to coat the back of a spoon but thin enough to drizzle easily. For enhanced hazelnut flavor we can add a few drops of hazelnut extract or incorporate a tablespoon of cocoa powder for a chocolate hazelnut variation.
Finish and Cool
Once our cookies have cooled completely we drizzle the glaze over them using a spoon or piping bag for precise application. Sprinkle the glazed cookies with our reserved chopped toasted hazelnuts for added crunch and visual appeal. Allow the glaze to set for 15-20 minutes before serving or storing. Our finished hazelnut cookies will stay fresh in an airtight container for up to one week, maintaining their perfect texture and rich flavor.
Storage Instructions
Now that we’ve created these delicious hazelnut cookies, proper storage ensures they maintain their rich flavor and delightful texture for as long as possible. We’ll guide you through the best methods to keep your cookies fresh whether you plan to enjoy them within days or preserve them for future occasions.
Room Temperature Storage
We recommend storing your hazelnut cookies in an airtight container at room temperature for optimal freshness. Our cookies will maintain their quality for up to 2 to 3 weeks when stored properly in a cool, dry place away from direct sunlight and heat sources.
| Storage Method | Duration | Conditions |
|---|---|---|
| Room Temperature | 2-3 weeks | Airtight container, cool dry place |
| Refrigerator | 2-3 weeks | Airtight container |
| Freezer (baked cookies) | 1 month | Parchment-lined, then zip-top bag |
| Freezer (cookie dough) | 2 months | Airtight container |
Refrigerator Storage
For extended freshness, we can store our hazelnut cookies in the refrigerator for up to 2 to 3 weeks. The cookies will become slightly firmer during refrigeration, which some people prefer for the enhanced crunch factor. Make sure to use an airtight container to prevent the cookies from absorbing other flavors in the refrigerator.
Freezing Options
We have two excellent freezing options that work particularly well for our hazelnut cookies. For baked cookies, allow them to cool completely before placing them on a parchment-lined baking sheet and freezing until solid. Transfer the frozen cookies to a zip-top bag for storage up to 1 month.
Cookie dough freezes beautifully for up to 2 months using our preferred scoop-and-freeze method. We scoop the dough into balls, freeze them on a baking sheet until solid, then transfer to an airtight container. The frozen dough can be thawed overnight in the refrigerator or for a couple of hours on the countertop before baking.
Essential Storage Tips
We always ensure our cookies are completely cooled before storing to prevent condensation that could make them soggy. This cooling step preserves the crispy edges and tender centers we worked so hard to achieve. Label containers with the date to track freshness and rotate older cookies to the front for first use.
Make-Ahead Tips
We understand the appeal of having fresh hazelnut cookies ready when you need them. Our make-ahead strategies transform your baking schedule from rushed to relaxed.
Prepare Dough in Advance
Cookie dough preparation offers the most flexibility for busy bakers. After mixing our hazelnut cookie dough completely, we can scoop it into individual portions and refrigerate for up to five days. This method works perfectly when you want fresh cookies throughout the week.
For longer storage, we freeze the scooped dough balls for 3 to 6 months. When ready to bake, we transfer frozen dough to the refrigerator overnight, then bring to room temperature before baking. This approach ensures optimal texture in our finished cookies.
Shape and Chill Method
Recipes requiring rolled or cut shapes benefit from our wrap and chill technique. We shape the dough as directed, wrap tightly in plastic wrap, then refrigerate or freeze without baking. Chilled dough needs slight softening before final shaping or rolling.
Baked Cookie Storage Timeline
| Storage Method | Duration | Best Quality Period |
|---|---|---|
| Room Temperature (airtight) | Up to 1 week | Within 1 week |
| Refrigerated | Up to 2 weeks | Within 1 week |
| Frozen (baked cookies) | 3-6 months | First 3 months |
Freezing Baked Cookies
We layer parchment paper between baked cookies before freezing to prevent sticking. This method preserves both texture and appearance for 3 to 6 months. Thawing occurs naturally at room temperature without quality loss.
Decorative Finishing Strategy
Cookies featuring chocolate drizzles or chopped hazelnut toppings require special timing. We apply these decorative elements after cookies cool completely, then chill until set before storing. This sequence prevents smudging and maintains visual appeal during storage.
Serving Suggestions
Our hazelnut cookies shine brightest when paired thoughtfully with complementary beverages and presentation styles. We recommend serving these nutty treats alongside freshly brewed coffee or robust espresso to enhance their rich flavor profile. The warm bitterness of coffee creates a perfect balance with the sweet nuttiness of our cookies.
Tea lovers will find these cookies pair beautifully with black tea or Earl Grey for an afternoon treat. We suggest offering a glass of cold milk as a classic accompaniment that softens the cookies’ texture and provides a creamy contrast to their crunch.
For special occasions we love elevating our hazelnut cookies with a light chocolate drizzle. Simply melt dark or milk chocolate and drizzle it across the cooled cookies for an elegant finish. This presentation transforms simple cookies into sophisticated desserts worthy of dinner parties.
Creating cookie sandwiches adds another dimension to our serving options. We fill two cookies with melted chocolate or hazelnut spread to create delightful Baci di Dama inspired treats. These filled versions work wonderfully for gift giving and holiday celebrations.
Our hazelnut cookies make excellent additions to dessert platters alongside fresh fruit and cheese. The nutty flavor complements soft cheeses like brie or camembert beautifully. We arrange them on wooden boards with seasonal fruits for rustic charm.
For cozy evenings we serve these cookies with warm beverages and soft blankets. This combination creates the perfect comfort food experience during colder months. The cookies’ rich texture and warming spices make them ideal for relaxing moments.
Gift presentations require special attention to packaging. We arrange our cookies in decorative tins or boxes lined with parchment paper for holidays and special occasions. Small batches work particularly well for teacher gifts or hostess presents.
Wine enthusiasts will appreciate pairing these cookies with dessert wines like Port or Moscato. The sweet wine enhances the hazelnut flavors while providing a sophisticated ending to dinner parties. We serve them on small plates with wine glasses for elegant presentations.
Recipe Variations
We love exploring different ways to showcase hazelnuts in cookie form. Each variation brings its own unique texture and flavor profile while maintaining the beloved nutty essence.
Chocolate Hazelnut Cookies
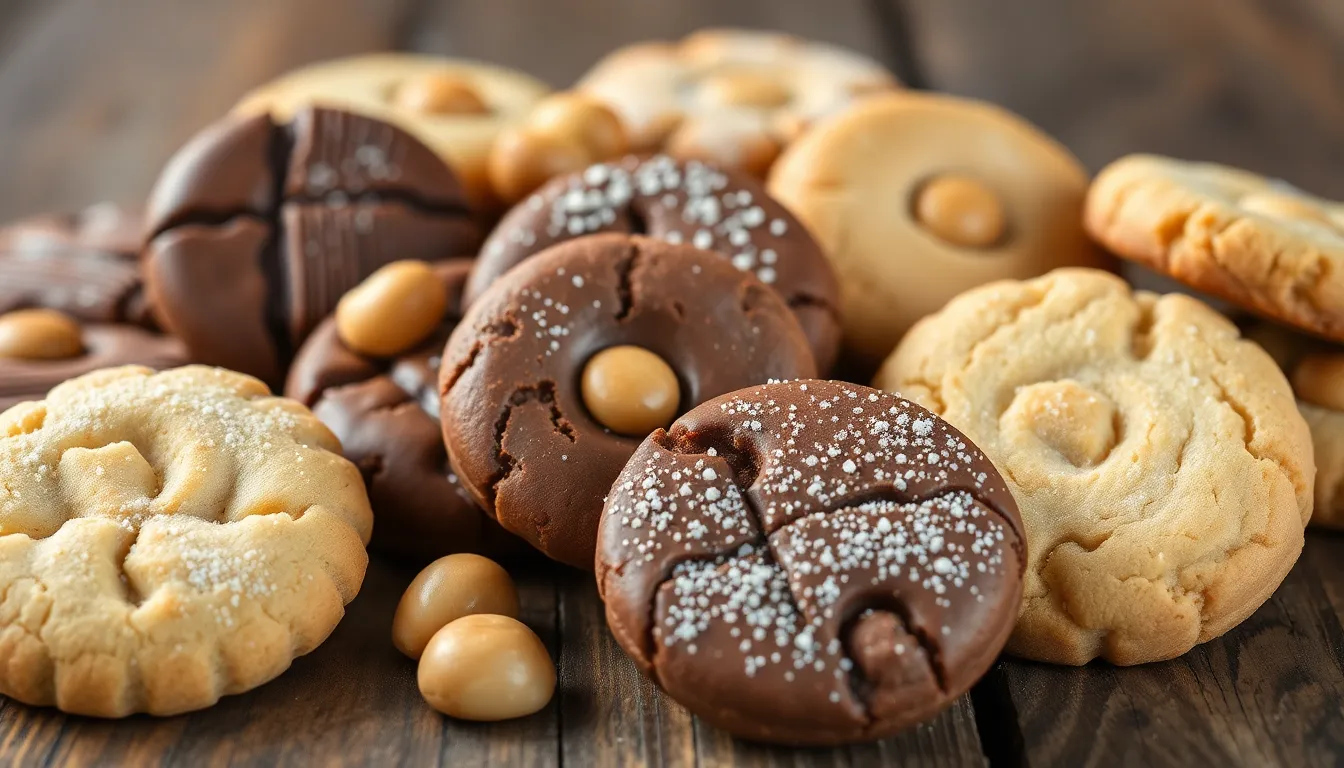
Our chocolate hazelnut cookies take inspiration from the classic Italian Baci di Dama, where small hazelnut cookies are paired and filled with rich chocolate. We create the base using ground hazelnuts, powdered sugar, flour, cold butter, vanilla extract, and sometimes a hint of lemon zest for brightness. After baking these delicate rounds, we sandwich them together with melted semi-sweet or bittersweet chocolate for an indulgent treat.
For a simpler approach, we incorporate chocolate chips directly into our hazelnut butter cookie dough. This method delivers bursts of chocolate throughout each bite while maintaining the cookies’ structural integrity. The combination creates a perfect balance of sweet chocolate and rich hazelnuts that appeals to both kids and adults.
Hazelnut Shortbread Cookies
We transform our basic hazelnut recipe into elegant shortbread by emphasizing the buttery, crumbly texture that makes these cookies so special. Our shortbread variation combines ground hazelnuts, butter, sugar, egg yolk, vanilla, and flour to create a delicate, melt-in-your-mouth experience.
The key to perfect hazelnut shortbread lies in our shaping technique. We roll the dough carefully before cutting into traditional rounds or press it into decorative molds for special occasions. This method produces cookies with crisp edges and tender centers that practically dissolve on the tongue, showcasing the hazelnuts’ natural oils and flavor.
Gluten-Free Hazelnut Cookies
Our gluten-free version relies entirely on hazelnuts as the main structural component, eliminating flour completely from the recipe. We use just three essential ingredients: roasted hazelnuts, sugar, and egg white to create these naturally gluten-free treats.
The process involves grinding roasted hazelnuts into coarse crumbs, then mixing them with sugar and whipped egg white until well combined. We spoon the mixture onto baking sheets and bake until golden brown. These cookies develop a chewy, dense texture with an intensely concentrated hazelnut flavor that satisfies even the most discerning palates. The natural oils from the hazelnuts provide enough binding power to hold the cookies together without any additional flour or gluten-containing ingredients.
Troubleshooting Tips
Even experienced bakers encounter challenges when making hazelnut cookies. We’ve identified the most common issues and provided practical answers to ensure your cookies turn out perfectly every time.
Preventing Dry or Tough Cookies
Measuring flour incorrectly often creates the biggest problem with cookie texture. We recommend fluffing your flour before spooning it into the measuring cup to avoid packing too much flour into your dough. Overmixing the dough after adding flour develops too much gluten and results in tough cookies. Mix ingredients just until they combine for the best texture.
Your oven temperature plays a crucial role in cookie success. We always use an oven thermometer to verify our oven’s accuracy since temperature discrepancies directly affect cookie texture and can turn tender cookies into dry disappointments.
Fixing Flat or Over-Spread Cookies
Chilling your cookie dough prevents excessive spreading during baking. We chill our hazelnut cookie dough for at least 30 minutes to allow the butter to firm up and the ingredients to meld together properly. This simple step creates cookies that hold their shape beautifully.
Insufficient flour causes cookies to spread too much and become flat and crispy. If your first batch spreads excessively we suggest adding more flour to the remaining dough before baking the next batch.
Achieving Even Browning
Brown butter adds incredible depth to hazelnut cookies but requires proper technique. We cook the butter until it loses excess moisture and develops a nutty aroma. Always allow the browned butter to cool completely before adding it to your dough to prevent unwanted spreading.
Creating Perfect Cookie Centers
Overnight chilling works wonders for achieving that coveted gooey center texture. We often prepare our hazelnut cookie dough the night before baking and adjust the baking time slightly if needed to achieve the perfect balance between set edges and tender centers.
| Common Issue | Primary Cause | Solution |
|---|---|---|
| Dry/Tough Cookies | Overmeasured flour or overmixing | Fluff flour before measuring; mix until just combined |
| Flat Cookies | Warm dough or insufficient flour | Chill dough 30+ minutes; add flour if needed |
| Uneven Browning | Incorrect oven temperature | Use oven thermometer for accuracy |
| Hard Centers | Overbaking | Chill dough overnight; reduce baking time |
Remember that oven temperature variance remains the most critical factor affecting your hazelnut cookies. We cannot stress enough the importance of using an oven thermometer to ensure accurate temperatures throughout the baking process.
Conclusion
We’ve covered everything you need to create exceptional hazelnut cookies that’ll impress family and friends alike. From proper toasting techniques to storage answers these recipes offer endless possibilities for your baking adventures.
Whether you’re making classic hazelnut cookies or exploring chocolate variations the key lies in using quality ingredients and following our proven techniques. The troubleshooting tips we’ve shared will help you avoid common pitfalls and achieve bakery-quality results every time.
Now it’s time to gather your ingredients and start baking. We’re confident you’ll love the rich nutty flavors and perfect textures these cookies deliver. Happy baking!
Frequently Asked Questions
How do I store hazelnut cookies to keep them fresh?
Store hazelnut cookies in an airtight container at room temperature for 2-3 weeks. For longer storage, refrigerate for the same duration or freeze baked cookies for up to 1 month. Always cool cookies completely before storing and label containers with dates for best quality tracking.
Can I make hazelnut cookie dough ahead of time?
Yes, you can prepare hazelnut cookie dough in advance. The dough can be refrigerated for up to one week or frozen for up to 2 months. Chilling the dough overnight actually improves texture and prevents spreading during baking.
What equipment do I need to make perfect hazelnut cookies?
Essential equipment includes at least two baking sheets with parchment paper, an electric mixer with paddle attachment for creaming, a food processor for grinding hazelnuts, and a cookie scoop for uniform sizing. These tools ensure consistent results and make the baking process smoother.
How do I prevent my hazelnut cookies from spreading too much?
To prevent over-spreading, chill your cookie dough for at least 30 minutes before baking. Also, make sure your butter isn’t too warm when mixing, use an oven thermometer to verify accurate temperature, and don’t overcream the butter and sugar mixture.
What beverages pair well with hazelnut cookies?
Hazelnut cookies pair excellently with coffee, espresso, tea, and milk. For special occasions, try them with dessert wines. The nutty flavor complements both hot and cold beverages, making them versatile for various serving situations.
Can I make gluten-free hazelnut cookies?
Yes, you can make gluten-free hazelnut cookies using only roasted hazelnuts, sugar, and egg whites. This simple version creates chewy, dense cookies with concentrated hazelnut flavor. The texture differs from traditional cookies but maintains the beloved nutty essence.
How do I know when hazelnut cookies are properly baked?
Properly baked hazelnut cookies should have crispy edges with a tender center. They’re done when the edges are lightly golden brown. Avoid overbaking to prevent dry, tough cookies. Use an oven thermometer to ensure accurate baking temperature.
What are some creative variations for hazelnut cookies?
Try chocolate hazelnut cookies inspired by Italian Baci di Dama, add chocolate chips to the basic dough, make buttery hazelnut shortbread, or create cookie sandwiches with chocolate filling. Each variation offers unique textures while maintaining the signature hazelnut flavor.

