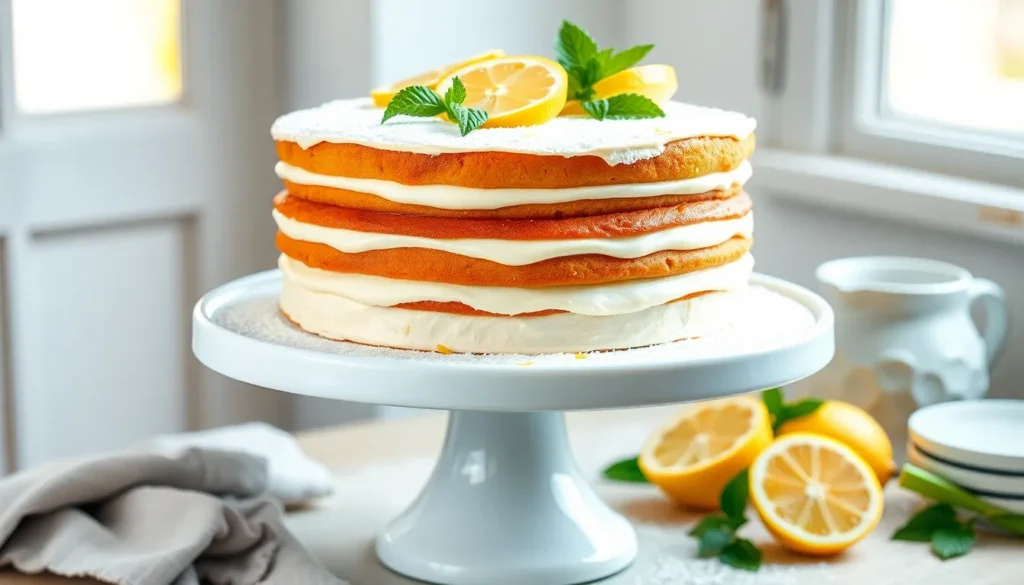
We’ve discovered the perfect dessert that brings together Italy’s most beloved flavors in one show-stopping cake. This limoncello mascarpone cake combines the bright citrusy kick of limoncello liqueur with the rich creaminess of mascarpone cheese, creating a dessert that’s both elegant and utterly irresistible.
What makes this cake truly special is how the mascarpone transforms the texture into something incredibly moist and luxurious, while the limoncello adds that distinctive Italian flair that’ll transport your taste buds straight to the Amalfi Coast. We’ve perfected this recipe to balance the sweet and tart flavors beautifully.
Whether you’re hosting a dinner party or simply craving something extraordinary, this cake delivers restaurant-quality results right from your own kitchen. The combination of tender cake layers and silky mascarpone frosting creates a dessert that’s guaranteed to impress even the most discerning palates.
Ingredients
We’ve organized this limoncello mascarpone cake recipe into four distinct components to ensure perfect results. Each element plays a crucial role in creating the cake’s signature Italian-inspired flavor profile.

Skip the juicing and zesting with our Pure Lemon Extract, made with lemon oil from the highest quality California lemons.

Pure Extract is perfect for baking, flavoring drinks and more!

BAKING ESSENTIAL: Superior extract for baking alternative among baking essentials for your kitchen, taking your baking experience to a whole new level.
For the Cake
- 2 cups all-purpose flour
- 1 1/2 cups granulated sugar
- 1/2 cup unsalted butter, softened
- 3 large eggs, room temperature
- 1 cup whole milk
- 1/4 cup limoncello liqueur
- 2 teaspoons baking powder
- 1/2 teaspoon salt
- 2 tablespoons fresh lemon zest
- 1 tablespoon vanilla extract
For the Limoncello Syrup
- 1/2 cup water
- 1/3 cup granulated sugar
- 1/4 cup fresh lemon juice
- 1/4 cup limoncello liqueur
- 1 tablespoon lemon zest
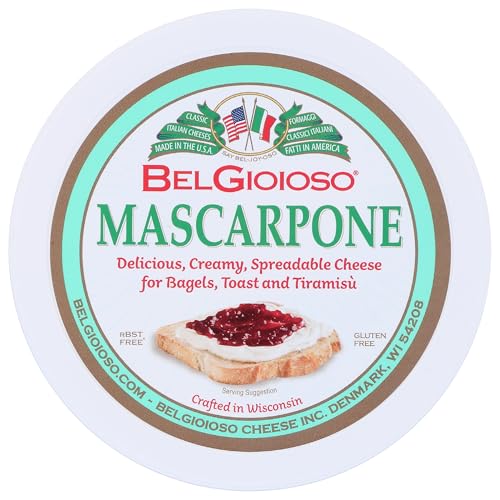
For the Mascarpone Frosting
- 16 oz mascarpone cheese, room temperature
- 1 cup heavy whipping cream, cold
- 3/4 cup powdered sugar
- 3 tablespoons limoncello liqueur
- 1 teaspoon vanilla extract
- 1 tablespoon fresh lemon zest
For Garnish
- Fresh lemon slices, thinly cut
- Additional lemon zest
- Fresh mint leaves
- Candied lemon peel (optional)
- Powdered sugar for dusting
Equipment Needed

We need exact tools to create this exceptional limoncello mascarpone cake with professional results. Our kitchen setup requires both basic baking essentials and a few specialized items to achieve the perfect texture and presentation.
Mixing bowls form the foundation of our preparation process. We recommend having a set of 2-3 bowls in different sizes to separate dry ingredients from wet ingredients and prepare our various components efficiently.
A whisk or hand mixer becomes essential for creating our smooth batter and achieving the perfect mascarpone frosting consistency. We can upgrade to a stand mixer with a whisk attachment for added convenience when working with multiple components.
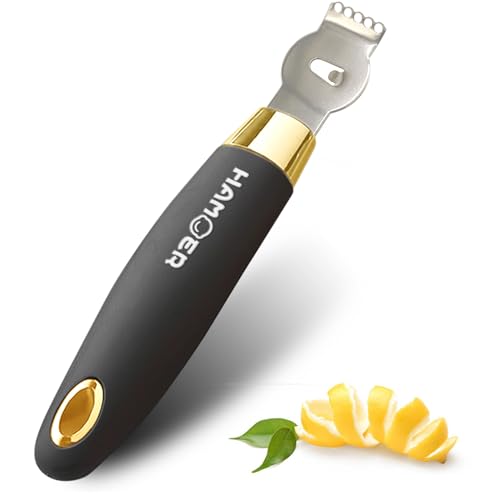
A zester allows us to extract fresh lemon zest that infuses both our cake batter and frosting with bright citrus oils. This tool ensures we capture the aromatic oils from the lemon peel without the bitter white pith.
Cake pan selection offers flexibility based on our desired presentation. We can choose from a 9-inch (23 cm) springform pan for easy removal, a 9×9-inch (23×23 cm) baking pan for square portions, a loaf pan for sliced servings, or a bundt pan for an elegant ring shape.
Parchment paper prevents sticking and ensures our cake releases cleanly from the pan. We line our chosen pan completely for foolproof removal after baking.
Optional equipment enhances our preparation and presentation capabilities. A saucepan helps us prepare homemade lemon curd if we choose to add this luxurious layer. An offset spatula creates smooth, professional-looking frosting application, while a rubber spatula assists with gentle folding and efficient batter transfer.
| Equipment Category | Essential Items | Optional Upgrades |
|---|---|---|
| Mixing Tools | 2-3 mixing bowls, whisk or hand mixer | Stand mixer with whisk attachment |
| Preparation | Zester, parchment paper | Rubber spatula |
| Baking | Cake pan (various sizes available) | Multiple pan sizes |
| Finishing | None required | Offset spatula, saucepan for lemon curd |
Gluten-free

Brought to you by Whole Foods Market

Milk Source: Pasteurized Cow's Milk
Instructions

Now that we have our ingredients prepared and equipment ready, let’s begin creating this stunning limoncello mascarpone cake. We’ll work through each component systematically to ensure perfect results.
2-In-1 Function - This zester‘s 5 ultra-sharp holes easily remove the outer layer of the skin of citrus fruits, creating fine lemon, orange or lime zest to add texture and flavor to food. A channel knife makes it easy to create strips or twisted strips of citrus zest for garnishes for cocktails or to add beauty and interest to food.

2 in 1 Citrus Zester Tool for Kitchen: Perfect for creating citrus zest and garnishes. Five ultra sharp zester holes are easy to zest citrus. Specially designed channel knife is easy to peel citrus fruits

2-in-1 tool easily creates citrus zest and garnishes. Made for effortless zesting and quick strips
Prep the Cake Pans
First, preheat your oven to 325°F (165°C) and position the rack in the center. Generously grease two 8-inch or 9-inch round cake pans with butter, ensuring every surface is coated. Dust the greased pans with flour, tapping out any excess to prevent sticking. Line the bottom of each pan with parchment paper for foolproof removal after baking.
Make the Cake Batter
Begin by sifting together the all-purpose flour, baking powder, baking soda, and salt in a medium bowl. In a large mixing bowl, beat the eggs and granulated sugar using an electric mixer until the mixture becomes light and fluffy, approximately 3-4 minutes. Add the Greek yogurt and vegetable oil to the egg mixture, beating until well combined.
Create the liquid mixture by combining the whole milk and limoncello in a measuring cup. Add the dry ingredients to the egg mixture in three additions, alternating with the milk-limoncello mixture in two additions. Start and end with the flour mixture, mixing just until combined after each addition to avoid overmixing.
Bake the Cake Layers
Divide the batter evenly between the prepared pans, using a kitchen scale for accuracy if available. Gently tap the pans on the counter to release any air bubbles. Bake for 25-30 minutes, or until a toothpick inserted in the center comes out clean or with just a few moist crumbs. Allow the cakes to cool in their pans for 10 minutes before turning them out onto wire racks to cool completely.
Prepare the Limoncello Syrup
Combine equal parts sugar and water in a small saucepan over medium heat, stirring until the sugar completely dissolves. Remove from heat and stir in the limoncello, allowing the syrup to cool completely before using. This aromatic syrup will add moisture and intensify the limoncello flavor throughout the cake.
Make the Mascarpone Frosting
Beat the mascarpone cheese in a large bowl until smooth and creamy, ensuring no lumps remain. Gradually add the powdered sugar, beating until well incorporated. Pour in the heavy whipping cream and vanilla extract, then beat on medium-high speed until stiff peaks form. Be careful not to overbeat, as mascarpone can become grainy if whipped too long.
Assembly

We transform our carefully prepared components into an elegant limoncello mascarpone cake through methodical layering and artistic decoration. This final stage brings together all our hard work into one spectacular dessert.

NO MORE LOST BEATERS: The snap-on storage case that comes with the Hamilton Beach hand mixer neatly holds the 2 beaters and whisk in one easy-to-find place, reducing the chance that the attachments are lost or misplaced.

SELF-CONTROL SPEED – Features 5 adjustable speeds, ranging from 1 (Lowest) to 5 (Highest), allowing you to choose the ideal mixing speed for perfectly customizable texture and consistency in any recipe. Perfect for whipping cream, making butter, beating egg whites and batter, or preparing mashed potatoes and other dishes.

This hand mixer has the right speed for the task at hand, from mixing in nuts and chocolate chips at speed one, to whipping perfect meringues at speed five
Layer the Cake
We begin by placing one cake layer upside down on our serving plate to prevent crumbs from loosening during the frosting process. This professional technique ensures clean and smooth results throughout assembly.
We spread half of our mascarpone whipped cream generously over the first cake layer, making sure to cover the surface completely to the edges. Next, we add half of our prepared lemon curd on top of the mascarpone frosting, creating a luxurious flavor combination.
We carefully position the second cake layer on top of our frosted base, pressing gently to secure it in place. A dollop of frosting placed in the center of our cake plate beforehand helps stabilize the entire structure during assembly.
Apply the Frosting
We beat our mascarpone cheese until completely smooth, then incorporate vanilla extract and powdered sugar for sweetness and flavor balance. Gradually adding heavy cream while mixing allows us to achieve stiff peaks and the perfect consistency.
We generously spread the remaining mascarpone frosting over the top cake layer, ensuring complete coverage from edge to edge. Our frosting application should be smooth and even, creating an attractive canvas for our final decorative touches.
| Frosting Component | Purpose | Technique |
|---|---|---|
| Mascarpone cheese | Base texture | Beat until smooth |
| Powdered sugar | Sweetness | Mix gradually |
| Heavy cream | Volume and peaks | Add slowly while beating |
| Vanilla extract | Flavor enhancement | Incorporate early |
Final Decorating
We drop dollops of our remaining lemon curd into the swirls of mascarpone frosting across the cake’s surface. Using the back of a spoon, we gently swirl the curd into the frosting to create beautiful marbled patterns that showcase both components.
We line our serving plate with aluminum foil along the edges to catch any drips and crumbs, making cleanup significantly easier after our decorating process. This professional trick keeps our presentation area neat and organized.
We can enhance our cake’s visual appeal by adding fresh lemon slices, extra lemon zest, or mint leaves as garnish. A light dusting of powdered sugar provides the perfect finishing touch for our restaurant quality limoncello mascarpone cake.
Make-Ahead Instructions

We understand that timing can be crucial when planning special occasions. This elegant limoncello mascarpone cake offers excellent make-ahead flexibility that allows us to spread the work across multiple days while achieving optimal results.
Preparing Cake Layers in Advance
Our cake layers can be baked up to 2 days before serving when stored properly at room temperature. After the layers cool completely, we wrap each one tightly in plastic wrap to prevent moisture loss and maintain freshness. For longer storage, we can freeze the wrapped layers for up to 3 months. Simply thaw the frozen layers at room temperature for 2 hours before assembly.
Make-Ahead Frosting and Fillings
We can prepare both the mascarpone frosting and lemon curd components up to 3 days in advance. Each component requires separate storage in airtight containers in the refrigerator to maintain proper texture and prevent flavor transfer. The mascarpone frosting may soften slightly when made too far ahead, so we recommend giving it a gentle whisk before use if needed.
Full Cake Assembly Timeline
Our assembled cake actually benefits from overnight chilling, making it perfect for advance preparation. We can complete the entire assembly process up to 1 day before serving, which allows the flavors to meld beautifully and creates the ideal texture for clean slicing. Store the fully assembled cake covered in the refrigerator during this time.
Optimal Storage Guidelines
| Component | Storage Method | Duration |
|---|---|---|
| Cake layers (room temp) | Plastic wrap | 2 days |
| Cake layers (frozen) | Plastic wrap | 3 months |
| Mascarpone frosting | Airtight container, refrigerated | 3 days |
| Lemon curd | Airtight container, refrigerated | 3 days |
| Assembled cake | Covered, refrigerated | 2 days |
Final Serving Preparation
We recommend allowing the assembled cake to chill for at least 2 hours before serving to ensure the mascarpone frosting sets properly and the flavors reach their full potential. This chilling period also makes slicing significantly easier and creates cleaner presentation on each plate.

Extra high rim - Our springform pan is ideal for particularly high cakes or the Italian panettone. With a diameter of 18 cm and a height of 120 mm, it offers enough space for your baking creations

[NONSTICK BAKING SURFACE] The smooth coating on this tiramisu cake pan allows desserts to release cleanly without sticking to the surface. The rectangle cake mold supports even shaping while the nonstick cake mold helps reduce residue, making the baking pan easier to clean with a simple wipe after use.

HEAVY-DUTY CARBON STEEL FOR EVEN HEAT DISTRIBUTION : Crafted from premium carbon steel, this lemon shaped baking pan ensures rapid and uniform heat distribution to every cavity. No more burnt edges or undercooked centers—just evenly baked results, whether you‘re making lemon mini cakes or lemon brownie bites
Storage Tips

Proper storage techniques ensure your limoncello mascarpone cake maintains its exceptional flavor and texture for days after preparation. We recommend different storage methods depending on whether your cake includes mascarpone frosting.

YOUR PACKAGE INCLUDES: A 2 oz glass bottle of premium, water-soluble ORGANIC lemon extract, crafted with quality ingredients right here in the USA.

Our Key Lime Extract has Unique citrus flavor

Bakto Flavors is a family-owned company dedicated to bringing together scientific expertise with high quality flavors
Room Temperature Storage
Unfrosted limoncello mascarpone cake layers store beautifully at room temperature in an airtight container for 3 to 5 days. The storage duration depends on your exact recipe and local humidity levels. But, we always refrigerate frosted cakes due to the dairy content in mascarpone cheese.
Refrigerated Storage
Store your completed cake with mascarpone frosting in the refrigerator using an airtight container. This method preserves freshness for 4 to 5 days while preventing spoilage. We suggest allowing the refrigerated cake to reach room temperature before serving to restore optimal flavor and texture.
Freezing Guidelines
Unfrosted cake layers freeze exceptionally well when wrapped in plastic wrap and placed in freezer-safe containers or bags. These components maintain quality for 1 to 2 months in the freezer. Thaw frozen layers overnight in the refrigerator before use. We strongly advise against freezing cakes with mascarpone frosting since the texture becomes compromised during the freezing process.
Make Ahead Strategies
Cake layers can be baked several days in advance and stored at room temperature or frozen until needed. We recommend preparing mascarpone frosting several hours ahead and storing it in an airtight container in the refrigerator before assembly.
Additional Storage Considerations
| Storage Method | Duration | Best For |
|---|---|---|
| Room Temperature | 3-5 days | Unfrosted layers only |
| Refrigeration | 4-5 days | Frosted cakes with mascarpone |
| Freezing | 1-2 months | Unfrosted layers and components |
For clean slicing, we recommend chilling the assembled cake for at least one hour before serving. This technique firms the frosting and prevents messy cuts. Always use room temperature ingredients during assembly for the smoothest results and most professional appearance.
Serving Suggestions

We recommend serving our limoncello mascarpone cake as the perfect finale to Italian dinners or special celebrations. The cake pairs beautifully with a steaming cup of espresso that balances the dessert’s creamy sweetness with bold coffee notes. Hot herbal tea also creates a lovely contrast and helps cleanse the palate after each rich bite.
Fresh berry accompaniments elevate this dessert to restaurant quality presentation. We love adding a handful of fresh raspberries or blueberries alongside each slice to provide bursts of tartness that complement the lemony flavors. A drizzle of raspberry coulis sauce creates an elegant touch while adding visual appeal with its vibrant red color against the pale cake layers.
Whipped cream makes an excellent addition for guests who enjoy extra richness. We suggest lightly sweetened cream that won’t compete with the mascarpone frosting’s delicate flavor profile. A small dollop placed beside each slice allows diners to customize their dessert experience.
The lemon curd component offers decorative possibilities beyond our basic assembly instructions. We create artistic swirls by placing small dollops of lemon curd on the mascarpone frosting and using a toothpick to draw patterns across the surface. This technique adds visual interest while ensuring every bite contains the perfect balance of creamy and tart elements.
| Serving Timeline | Storage Method | Duration |
|---|---|---|
| Freshly assembled | Room temperature | 2-3 hours |
| After chilling | Refrigerated | 3-5 days |
| Defrosted cake | Refrigerated | Up to 3 days |
Temperature considerations play a crucial role in serving this dessert successfully. We always chill the assembled cake for at least one hour before serving to ensure clean slices and optimal texture. The mascarpone frosting holds its shape better when properly chilled and the flavors meld together beautifully during this resting period.
Mild, clean flavor

Authentic Italian-Style Mascarpone: Smooth, rich, and velvety texture suitable for both sweet and savory dishes

Exclusively selected and passionately sourced from farmers and producers around the world
Conclusion
We’ve shared everything you need to create this stunning limoncello mascarpone cake that’ll transport your taste buds straight to the Italian coast. With proper preparation and our detailed guidance you’ll achieve bakery-quality results every time.
This elegant dessert truly shines when you take your time with each component and allow the flavors to develop. The overnight chilling isn’t just a suggestion – it’s what transforms good cake into an unforgettable experience.
Whether you’re planning ahead for a special celebration or treating yourself to something extraordinary this recipe delivers on both flavor and presentation. Your guests will be asking for the recipe long after the last slice disappears.

✅ The tool set comes with 1 lemon grater and 1 citrus channel knife, and uses a beautiful hard PVC packaging box that makes the perfect gift for your favorite person.

2-In-1 Function - This zester‘s 5 ultra-sharp holes easily remove the outer layer of the skin of citrus fruits, creating fine lemon, orange or lime zest to add texture and flavor to food. A channel knife makes it easy to create strips or twisted strips of citrus zest for garnishes for cocktails or to add beauty and interest to food.

OFFICIAL MASTERCHEF PRODUCT - This professional quality zester is an official product of MasterChef the TV Series.
Frequently Asked Questions

MAKE CREAMY FROTH IN SECONDS: High speed rotation of food safe stainless-steel whisk and BPA free shaft, this handheld milk frother is perfect for creating rich, creamy froth within 15-20s for your coffee drink. Now, you can effortlessly create professional-grade froth in the comfort of your own home with Bonsenkitchen coffee frother!

Mix ingredients for a variety of recipes from slowly stirring in chunky ingredients, like nuts or chocolate chips, at speed one to whipping egg whites or heavy cream at speed five

SELF-CONTROL SPEED – Features 5 adjustable speeds, ranging from 1 (Lowest) to 5 (Highest), allowing you to choose the ideal mixing speed for perfectly customizable texture and consistency in any recipe. Perfect for whipping cream, making butter, beating egg whites and batter, or preparing mashed potatoes and other dishes.
What makes limoncello mascarpone cake special?
This Italian-inspired dessert combines the vibrant citrus flavors of limoncello liqueur with the creamy richness of mascarpone cheese. The result is a moist, luxurious cake with perfectly balanced sweet and tart flavors that evoke the essence of Italy’s Amalfi Coast, making it ideal for special occasions and dinner parties.
What are the main components of this cake recipe?
The recipe consists of four distinct parts: the cake base (made with flour, sugar, butter, eggs, milk, and limoncello), limoncello syrup for added moisture and flavor, mascarpone frosting (combining mascarpone cheese, cream, and powdered sugar), and garnishes including fresh lemon slices, zest, and mint leaves.
What equipment do I need to make this cake?
Essential equipment includes mixing bowls, a whisk or hand mixer, a zester, cake pans, and parchment paper for easy removal. Optional but helpful tools include a stand mixer for easier preparation, an offset spatula for smooth frosting application, and a saucepan if making homemade lemon curd.
Can I make this cake ahead of time?
Yes! Cake layers can be baked 2 days in advance and stored at room temperature, or frozen for up to 3 months. The mascarpone frosting and lemon curd can be prepared up to 3 days ahead and refrigerated. The fully assembled cake actually benefits from overnight chilling to allow flavors to meld.
How should I store the finished cake?
Unfrosted cake layers can be stored at room temperature in an airtight container for 3-5 days. Once frosted, the cake should be refrigerated and consumed within 4-5 days. Avoid freezing assembled cakes with mascarpone frosting as it compromises the texture, but unfrosted layers freeze well for 1-2 months.
What are the best serving suggestions for this cake?
This cake pairs beautifully with espresso or herbal tea and makes an excellent finale to Italian dinners. For extra indulgence, serve with fresh berries, raspberry coulis, or whipped cream. Chill the assembled cake for at least one hour before serving to ensure optimal texture and clean slicing.
How do I achieve the best texture and presentation?
The key is proper chilling – refrigerate the assembled cake for at least 2 hours before serving. This helps the flavors meld and makes slicing much easier. When assembling, place the first layer upside down to prevent crumbs, and apply frosting smoothly for professional-looking results.