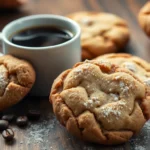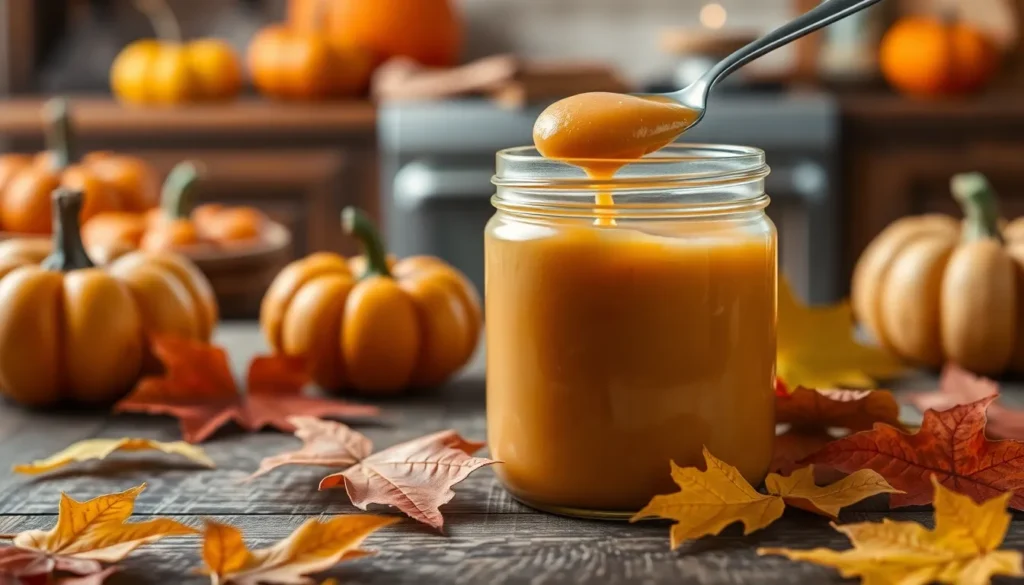
When autumn arrives and maple trees begin their colorful transformation, we can’t help but crave those rich, caramelized flavors that define the season. Maple butter captures this essence perfectly – it’s a silky, spreadable confection that concentrates pure maple syrup into an irresistibly smooth treat.
Don’t let the name fool you – this isn’t actually butter at all. Traditional maple butter contains no dairy and gets its creamy texture from carefully cooking and cooling maple syrup until it transforms into a luxurious spread. We’ve perfected this time-honored technique that Vermont sugarhouses have used for generations.
Whether you’re slathering it on warm biscuits, dolloping it onto pancakes, or eating it straight from the spoon (we won’t judge), this maple butter will become your new obsession. It’s surprisingly simple to make at home with just one ingredient and a little patience.
Ingredients
We need only one essential ingredient to create this delicious maple butter at home. The simplicity of this recipe makes it accessible to anyone wanting to experience the rich taste of Vermont-style maple butter.
Required Ingredient:
- 1 cup pure maple syrup (Grade A Dark Robust or Grade A Amber Rich preferred)
Optional Enhancement:
- Pinch of sea salt (enhances the maple flavor)
Equipment Needed:
- Heavy-bottomed saucepan
- Candy thermometer
- Electric mixer or whisk
- Clean glass jars for storage
We recommend using high-quality pure maple syrup for the best results. Avoid pancake syrup or artificial maple flavoring as these will not produce the same creamy texture or authentic flavor. The grade of maple syrup affects the final taste, with darker grades providing more robust maple notes while lighter grades offer delicate sweetness.
Our choice of pure maple syrup determines the quality of the final product. Vermont maple syrup works exceptionally well due to its traditional processing methods, though any pure maple syrup from reputable producers will yield excellent results.


Equipment Needed

Creating perfect maple butter at home requires exact equipment to achieve the smooth, creamy texture that makes this treat so irresistible. We recommend investing in quality tools that can handle the precise temperature control and mixing requirements essential for success.
Heavy-Bottomed Saucepan forms the foundation of our maple butter making process. Stainless steel construction provides even heat distribution and prevents hot spots that could burn the delicate maple syrup. We prefer a 2-3 quart capacity to allow adequate space for the syrup to bubble and expand during cooking.
Candy Thermometer ensures precise temperature monitoring throughout the cooking process. Digital models offer the most accurate readings and quick response times. We recommend thermometers that clip to the pan side and provide clear temperature displays for consistent results.
Electric Mixer or Whisk transforms the cooled maple syrup into creamy butter through vigorous beating. Stand mixers with paddle attachments work exceptionally well for larger batches, while handheld electric mixers suffice for smaller quantities. Manual whisking requires important arm strength and time commitment.
Clean Glass Jars provide proper storage for our finished maple butter. Mason jars with tight-fitting lids preserve freshness and prevent crystallization. We suggest 4-ounce or 8-ounce sizes for convenient portion control and gift giving.
Cooling Systems play a crucial role in achieving the proper consistency. Ultra-fast cooling systems integrated into specialized maple cream machines help achieve the right texture for commercial production. Home cooks can simulate this process using ice baths or refrigeration methods.
| Equipment Category | Purpose | Recommended Size |
|---|---|---|
| Saucepan | Even heating | 2-3 quart capacity |
| Thermometer | Temperature control | Digital candy type |
| Mixer | Texture development | Stand or handheld |
| Storage jars | Preservation | 4-8 ounce glass |
Specialized Maple Cream Machines offer professional-grade results for serious maple butter enthusiasts. CDL and Roth Sugar Bush manufacture 8L and 16L machines featuring stainless steel pumps for durability. These machines incorporate cooling coils and drenching systems that rapidly cool maple cream to the desired temperature for butter production.
Motors and Power Systems in commercial equipment typically range from 3/4 HP motors for smaller operations to 2 HP motors for larger capacity machines. Home cooks can achieve similar results using standard kitchen equipment with proper technique and patience.


Instructions

Follow these three essential steps to transform pure maple syrup into silky smooth maple butter. We’ll guide you through each phase to ensure perfect results every time.
Prep the Maple Syrup
Start by measuring exactly 1 cup of pure Grade A maple syrup into your heavy-bottomed saucepan. We recommend using Dark Robust or Amber Rich varieties for their intense maple flavor that creates the most satisfying final product. Ensure your candy thermometer is clean and ready to use by testing it in boiling water first. Set up your electric mixer or whisk nearby along with a clean mixing bowl for the whipping stage. Keep your storage jars within reach but avoid opening them until the maple butter is completely ready.
Cook the Maple Syrup
Place the saucepan over medium-high heat and attach your candy thermometer to the side without touching the bottom of the pan. Heat the maple syrup steadily while watching the temperature climb toward our target range of 230°F to 232°F (110°C to 111°C). This cooking process typically takes 8 to 12 minutes depending on your stove and pan size. Watch carefully as the syrup approaches temperature because it can foam and bubble vigorously near the end. Remove the pan from heat immediately once the thermometer reads 230°F to prevent overcooking.
Cool and Whip
Allow the hot syrup to cool at room temperature for approximately 10 minutes before transferring it to your refrigerator. Chill the syrup for exactly 30 minutes to reach the optimal temperature for whipping. Pour the cooled syrup into your mixing bowl and begin whipping with an electric mixer on medium speed. Continue beating for 3 to 5 minutes until the mixture transforms from liquid to a thick creamy consistency that resembles butter. The maple butter will lighten in color and increase in volume as air incorporates throughout the whipping process. Transfer immediately to clean glass jars and seal tightly for storage.


Directions for Storage

Proper storage of our freshly made maple butter ensures we maximize its shelf life while maintaining that perfect creamy texture and rich flavor. We need to follow exact guidelines based on whether our maple butter remains unopened or has been opened for use.
Unopened Storage
We can store unopened maple butter in a cool, dry pantry for up to one year when kept away from heat and direct light. Room temperature storage at 68–77°F extends this timeframe to two years if our containers remain properly sealed. We must avoid exposing our maple butter to heat sources or direct sunlight to prevent discoloration and maintain quality.
Refrigerated Storage After Opening
Once we open our maple butter, refrigeration becomes essential for preserving freshness and preventing spoilage. We can expect our refrigerated maple butter to last 2–3 months when stored properly. Some separation of syrup naturally occurs during storage, which we can easily remedy by stirring the product before use. We should always use clean utensils when scooping out portions to avoid contamination.
Freezer Storage for Long-Term Preservation
Freezer storage provides our best option for long-term preservation of maple butter. We can freeze maple butter for 6 months to 1 year or longer while maintaining its taste and texture. This method works particularly well when we make large batches and want to preserve them for extended periods.
Storage Guidelines by Duration
| Storage Condition | Expected Shelf Life (Opened) | Expected Shelf Life (Unopened) |
|---|---|---|
| Room Temperature | 1 month (best quality) | 2 years (sealed) |
| Refrigerator | 2 weeks–3 months | — |
| Freezer | 6 months–1 year or more | Indefinitely |
Essential Storage Tips
We must ensure containers remain tightly sealed regardless of our chosen storage method. Since maple butter contains no preservatives and remains completely natural, proper storage becomes crucial for food safety. We should always check for signs of spoilage including changes in texture, aroma, or visible mold before consuming stored maple butter. Room temperature storage after opening should only be considered for consumption within one month for optimal quality.
Serving Suggestions

We love sharing creative ways to enjoy homemade maple butter beyond the traditional breakfast spread. This versatile delicacy transforms ordinary dishes into extraordinary culinary experiences with its rich sweetness and creamy texture.
Sweet Applications
Breakfast treats become irresistible when we spread maple butter on warm toast, fluffy pancakes, or golden waffles for the perfect morning indulgence. We recommend pairing maple butter with fresh berries to create a delicious topping that elevates French toast and pancakes to restaurant-quality dishes.
Baked goods reach new flavor heights when we incorporate maple butter into cookies, cakes, and muffins, adding depth and richness to every bite. Our favorite dessert applications include using maple butter in no-bake treats, layered cakes, or as a luxurious ice cream topping that guests always remember.
Snack time gets a sweet upgrade when we stir maple butter into warm oatmeal or creamy yogurt, creating satisfying treats that fuel our day. We also love experimenting with chocolate recipes, where maple butter adds a unique flavor profile that transforms ordinary desserts into gourmet creations.
Savory Pairings
Roasted vegetables gain incredible depth when we drizzle maple butter over carrots, Brussels sprouts, or sweet potatoes, creating that perfect sweet and savory contrast that makes vegetables irresistible. This technique transforms simple side dishes into memorable accompaniments that complement any main course.
Meat dishes become restaurant-worthy when we use maple butter in marinades or as a glaze for chicken, infusing proteins with rich maple flavors that caramelize beautifully during cooking. We find this application particularly effective for grilled or roasted meats where the natural sugars create an appealing golden finish.
Charcuterie boards gain sophistication when we include maple butter as a spread for artisanal crackers or crusty bread, offering guests a sweet complement that balances rich meats and sharp cheeses perfectly. This unexpected addition always sparks conversation and introduces people to new flavor combinations they never considered before.


Make-Ahead Tips

Planning ahead transforms maple butter preparation into a stress-free cooking experience. We recommend making maple butter several days before special occasions or gift-giving events since the process requires dedicated attention and cooling time.
Timing Your Preparation
Starting our maple butter preparation 2-3 days before needed gives us flexibility with temperature control and cooling stages. The syrup heating process takes approximately 15-20 minutes while the cooling phase requires 2-3 hours before we can begin whipping. We suggest making large batches during weekend cooking sessions when we have uninterrupted time to monitor temperatures carefully.
Batch Preparation Strategy
Making multiple jars simultaneously maximizes our cooking efficiency. We can process 3-4 cups of maple syrup in the same timeframe as a single cup while using identical equipment and techniques. This approach works especially well for holiday gift preparation or stocking our pantry for extended periods.
Storage Timeline Planning
| Storage Method | Duration | Best For |
|---|---|---|
| Refrigerated | Up to 1 month | Regular household use |
| Frozen | Up to 1 year | Long-term storage and gifts |
| Room temperature (sealed) | 2-3 weeks | Short-term convenience |
Freezer Preparation Tips
We divide large batches into smaller portions using clean glass jars before freezing. Individual 4-ounce portions thaw quickly and prevent waste from repeatedly freezing and thawing larger containers. Leaving 1/2 inch headspace in jars prevents cracking during the freezing expansion process.
Gift Preparation Advantage
Making maple butter ahead allows flavors to meld and develop richer complexity. We find that maple butter tastes even better after resting for 24-48 hours in refrigerated storage. This timing works perfectly for packaging gifts with attractive labels and decorative jar treatments.
Quality Control Benefits
Advance preparation gives us time to test consistency and adjust texture if needed. We can remix any separated batches or add small amounts of fresh maple syrup to achieve our desired spreadability before serving or gifting.
Troubleshooting Common Issues

Even experienced cooks encounter challenges when making maple butter at home. We’ve compiled answers to the most common problems that arise during the maple butter making process.
Maple Butter Not Thickening
When our maple butter refuses to reach the proper consistency, insufficient heating typically causes the problem. We need to reheat the maple syrup to a higher temperature, approximately 3 to 4 degrees more than our previous attempt. This additional heat helps break down the necessary crystals for proper thickening.
Invert sugar levels play a crucial role in achieving smooth texture. We can add ¼ to 1 teaspoon of invertase per gallon of syrup to improve consistency. After adding the invertase, we allow the mixture to sit for several hours before heating it again to inactivate the enzyme.
Maple Butter Too Thick or Crystallized
Overheating creates the opposite problem, resulting in maple butter that becomes too thick or develops unwanted crystals. We can remedy this by adding a few tablespoons of water to the mixture and reheating it to a lower temperature. Reducing the heat by 3 to 4 degrees from our previous attempt usually corrects the issue.
Adjusting our finishing temperature prevents future crystallization problems. We recommend lowering the finishing temperature by 2 to 5°F to achieve better texture consistency.
Water Content Management
Maintaining proper water content between 15% and 18% proves crucial for achieving the right maple butter consistency. We adjust our finishing temperature accordingly to maintain this optimal range.
| Water Content Range | Recommended Action |
|---|---|
| Below 15% | Reduce finishing temperature |
| 15% – 18% | Maintain current temperature |
| Above 18% | Increase finishing temperature |
Advanced Answers
Adding inverted syrup to our heated sugar solution helps control crystallization and improves overall texture. We use a ratio of 5 parts sugar solution to 1 part inverted syrup for optimal results. This technique works particularly well when we’re dealing with stubborn batches that won’t cooperate with standard methods.
These troubleshooting techniques ensure we can salvage batches that don’t turn out perfectly on the first attempt. Most maple butter issues stem from temperature control problems, making careful monitoring of our heating and cooling processes essential for consistent results.
Conclusion
We’ve shown you that creating homemade maple butter is surprisingly simple yet incredibly rewarding. With just pure maple syrup and a bit of patience you can create this versatile treat that elevates everything from morning toast to gourmet dinner preparations.
The beauty of maple butter lies in its adaptability – make it ahead for special occasions store it properly for months of enjoyment or experiment with different maple syrup grades to discover your perfect flavor profile.
Whether you’re spreading it on warm pancakes incorporating it into baked goods or adding sophistication to your next charcuterie board maple butter brings the authentic taste of autumn to your kitchen year-round. Start with quality ingredients follow our detailed instructions and you’ll master this traditional Vermont delicacy in no time.
Frequently Asked Questions
What is maple butter and does it contain dairy?
Despite its name, maple butter contains no dairy products. It’s a creamy, spreadable treat made from pure maple syrup that achieves its smooth, butter-like texture through a traditional cooking and cooling process. The name comes from its spreadable consistency, not its ingredients.
What ingredients do I need to make maple butter?
You only need one essential ingredient: 1 cup of pure maple syrup, preferably Grade A Dark Robust or Grade A Amber Rich. An optional pinch of sea salt can enhance the maple flavor. It’s crucial to use high-quality pure maple syrup, not pancake syrup or artificial alternatives.
What equipment is required for making maple butter at home?
You’ll need a heavy-bottomed saucepan for even heat distribution, a digital candy thermometer for precise temperature control, an electric mixer or whisk for whipping, and clean glass jars for storage. These tools are essential for achieving the desired smooth, creamy texture.
What temperature should I heat the maple syrup to?
Heat the maple syrup to precisely 230°F to 232°F. This specific temperature range is crucial for achieving the proper consistency. Using a candy thermometer ensures accurate temperature monitoring, which is essential for successful maple butter creation.
How long does homemade maple butter last?
Unopened maple butter can be stored in a cool, dry pantry for up to one year. Once opened, refrigerate it for 2–3 months. For long-term storage, freeze maple butter for 6 months to a year. Always use clean utensils and check for spoilage signs.
What are some creative ways to use maple butter?
Beyond spreading on toast, pancakes, or waffles, maple butter enhances baked goods like cookies and cakes. For savory applications, it pairs beautifully with roasted vegetables and meat dishes. It also makes an elegant addition to charcuterie boards as a sophisticated spread.
Can I make maple butter in advance?
Yes, maple butter can be made several days ahead for special occasions or gifts. Making larger batches maximizes efficiency, and advance preparation allows for proper flavor development and quality control. This ensures the desired consistency and texture before serving.
What should I do if my maple butter doesn’t thicken properly?
If maple butter doesn’t thicken, check your heating temperature and ensure proper cooling before whipping. If it becomes too thick or crystallized, you can add a small amount of invertase or gently reheat and re-whip to improve consistency.