When we’re craving something sweet but don’t want to commit to a full-sized muffin, mini chocolate chip muffins become our perfect solution. These bite-sized treats pack all the flavor of their larger counterparts into adorable, portion-controlled packages that make everyone smile.
We love how these miniature muffins transform any ordinary morning into something special. They’re incredibly versatile – perfect for breakfast on-the-go, afternoon snacks, or even elegant party treats. The mini size means they bake faster than regular muffins, making them ideal when we need a quick homemade treat.
What makes these mini muffins truly irresistible is their tender, fluffy texture studded with melty chocolate chips in every single bite. We’ve perfected this recipe to ensure each muffin is golden brown on the outside and perfectly moist on the inside. Plus, they freeze beautifully, so we can always have a sweet treat ready when cravings strike.
Ingredients
We’ve carefully selected each ingredient to create the perfect balance of flavor and texture in our mini chocolate chip muffins. These simple pantry staples combine to deliver bakery-quality results every time.
Dry Ingredients
- 2 cups all-purpose flour
- 2 teaspoons baking powder
- 1/2 teaspoon salt
- 1/2 cup granulated sugar
- 1/4 cup brown sugar, packed
Wet Ingredients
- 1/3 cup vegetable oil or melted butter
- 1 large egg, room temperature
- 1 cup whole milk
- 1 teaspoon vanilla extract
Add-ins
- 3/4 cup mini chocolate chips
- 1 tablespoon all-purpose flour (for coating chocolate chips)
Equipment Needed
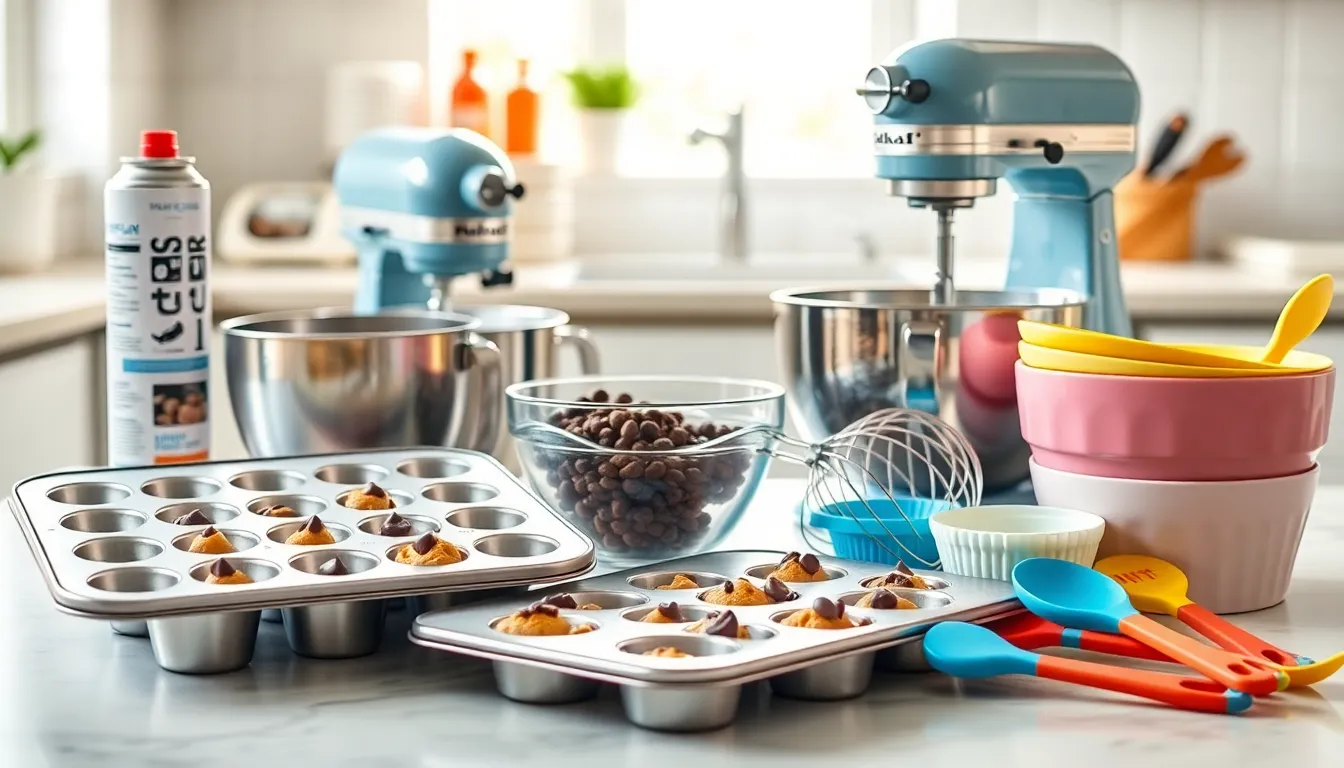
Creating perfect mini chocolate chip muffins requires the right tools to ensure consistent results and easy preparation. We recommend gathering these essential pieces of equipment before starting your baking adventure.
Essential Baking Equipment
A mini muffin pan serves as the foundation for these delightful treats. We suggest using a light silver 24-cavity muffin pan for optimal heat distribution and even browning. Standard-sized muffin pans work as an alternative when mini pans aren’t available.
Non-stick cooking spray or mini paper liners prevent sticking and make removal effortless. Paper liners also add a professional presentation touch for serving guests or storing your muffins.
Mixing and Measuring Tools
An electric mixer streamlines the ingredient combining process and creates the perfect batter consistency. Hand mixers work well for smaller batches while stand mixers handle larger quantities with ease.
Mixing bowls in various sizes keep ingredients organized during preparation. We use large bowls for wet ingredients and smaller ones for dry ingredients to maintain proper mixing ratios.
A whisk ensures dry ingredients blend evenly without overmixing. This tool helps incorporate air into flour mixtures while preventing dense, tough muffins.
Silicone spatulas excel at folding chocolate chips into batter without deflating the mixture. These flexible tools also scrape bowls clean and handle delicate batters with care.
Measuring cups and spoons guarantee accurate ingredient proportions every time. Precise measurements create consistent texture and flavor in each batch.
Optional but Helpful Tools
A piping bag simplifies batter distribution into mini muffin cups. This tool reduces mess and ensures even filling across all cavities for uniform baking results.
Having these tools ready before mixing creates a smooth baking process and helps achieve bakery-quality mini chocolate chip muffins every time.
Instructions
With our ingredients ready and equipment prepared, we’ll walk through the simple process of creating these delectable mini treats. Follow these straightforward steps to achieve perfectly golden, fluffy mini chocolate chip muffins every time.
Prep
We begin by preheating our oven to 375°F for consistent baking results. While the oven heats, we prepare our mini muffin tin by generously spraying each cavity with nonstick cooking spray to ensure easy removal. This preparation step prevents sticking and creates beautifully shaped muffins that release effortlessly from the pan.
Mix the Batter
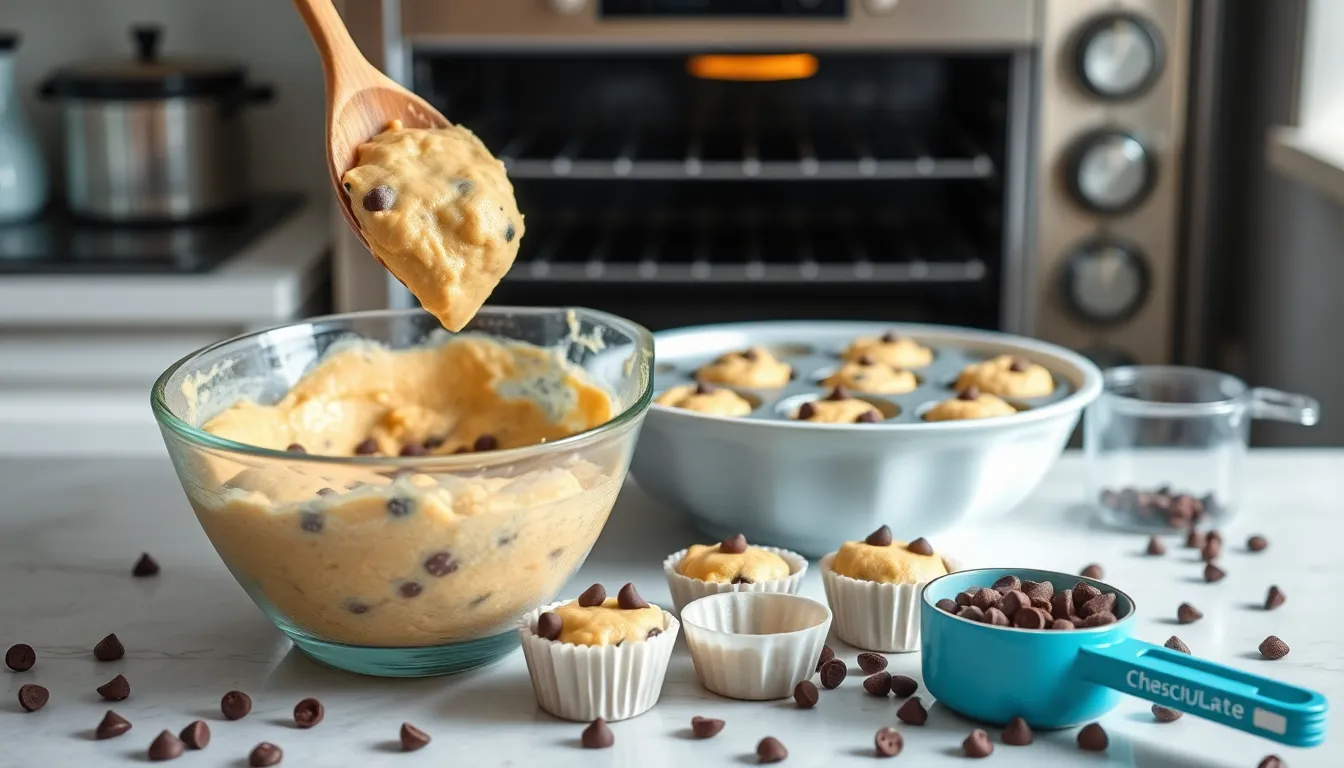
In a large mixing bowl, we whisk together 1 1/2 cups flour, 3/4 cup sugar, 1/2 teaspoon salt, and 2 teaspoons baking powder until evenly combined. Our wet ingredients come together in a separate bowl where we blend 1/3 cup oil, 1 egg, 1 teaspoon vanilla extract, and 1/2 cup milk until smooth. We pour the wet mixture into our dry ingredients and gently stir until just combined, being careful not to overmix which can result in tough muffins. Finally, we fold in 1/2 cup chocolate chips, ensuring they distribute evenly throughout the batter.
Fill the Muffin Cups
Using a small spoon or cookie scoop, we fill each mini muffin cavity about 3/4 full with batter. This measurement prevents overflow while allowing enough room for the muffins to rise properly. We work efficiently to maintain consistent portion sizes across all cavities for even baking results.
Bake
Our mini muffins bake for 12-15 minutes at 375°F until they achieve a beautiful golden brown color on top. We check for doneness by gently pressing the center of a muffin, which should spring back when fully baked. Once finished, we allow the muffins to cool in the pan for 2-3 minutes before transferring them to a wire rack to prevent overcooking from residual heat.
Directions for Perfect Mini Muffins
Getting the temperature and timing right makes all the difference when we’re baking these delicate treats. We’ll walk you through the essential techniques that ensure consistent results every time.
Temperature and Timing Tips
We recommend preheating your oven to 375°F for the most reliable results. This temperature delivers moist, evenly baked muffins with tender crumbs throughout. Some bakers prefer 400°F for a quicker bake that creates slightly crispier edges, but we find 375°F gives us better control over the final texture.
Our mini muffins typically need 10-15 minutes in the oven, depending on your exact oven’s calibration. Most standard ovens will produce perfect results at the 12-minute mark. We always start checking at 10 minutes to prevent overbaking, which can turn our tender muffins into dry disappointments.
When using regular-sized muffin tins instead of mini pans, we reduce the batter amount per cup and extend the baking time accordingly. The larger cavities require additional time to cook through completely while maintaining that perfect golden exterior.
| Oven Temperature | Baking Time | Best Results |
|---|---|---|
| 375°F | 10-15 minutes | Moist, tender texture |
| 400°F | 8-12 minutes | Slightly crispier edges |
Testing for Doneness
We look for lightly golden brown edges as our first visual indicator that the muffins are ready. The tops should spring back gently when touched, and the muffins should just start pulling away from the sides of the pan.
Our most reliable test involves inserting a toothpick or cake tester into the center of one muffin. We want it to come out clean or with just a few moist crumbs clinging to it. Wet batter on the toothpick means we need a few more minutes in the oven.
After removing them from the oven, we let the muffins cool in the pan for 2-3 minutes before transferring them to a wire rack. This brief cooling period prevents the delicate muffins from breaking apart while allowing them to finish setting up properly.
Storage and Make-Ahead Instructions
Once our mini chocolate chip muffins have cooled completely we want to store them properly to maintain their fresh bakery taste and tender texture. Proper storage techniques help preserve the muffins’ quality whether we plan to enjoy them within a few days or save them for later.
Storing Fresh Muffins
Room Temperature Storage: We recommend storing our freshly baked mini chocolate chip muffins in an airtight container at room temperature for optimal freshness. This method keeps the muffins at peak quality for 2 to 4 days while maintaining their soft texture and flavor.
Refrigerated Storage: For extended freshness we can store the muffins in the refrigerator using an airtight container. Refrigeration extends their shelf life to 5 to 7 days making this ideal when we bake larger batches or want to meal prep for the week.
Moisture Control Tip: We suggest placing a paper towel on top of the muffins inside the airtight container to absorb excess moisture and prevent sogginess.
Freezing Instructions
Long-Term Storage: Our mini chocolate chip muffins freeze beautifully for up to 2 to 3 months without losing their delicious taste or texture. We place the completely cooled muffins in freezer bags removing as much air as possible to prevent freezer burn.
Thawing Process: When we’re ready to enjoy our frozen muffins we can thaw them at room temperature for natural defrosting. Alternatively we warm them in the microwave using 15-second intervals until they’re heated throughout.
Reheating for Best Results: Once thawed we recommend briefly reheating the muffins in the microwave until warmed through to restore their fresh-baked texture and enhance the chocolate chip flavor.
| Storage Method | Duration | Container Type | Additional Notes |
|---|---|---|---|
| Room Temperature | 2-4 days | Airtight container | Add paper towel for moisture control |
| Refrigerated | 5-7 days | Airtight container | Best for larger batches |
| Frozen | 2-3 months | Freezer bags | Remove air to prevent freezer burn |
Serving Suggestions
Our mini chocolate chip muffins shine brightest when served warm from the oven with their chocolate chips still slightly melted and their tender crumb at peak texture. We love pairing them with a steaming cup of coffee or tea for the perfect morning breakfast combination that delivers comfort in every bite.
Breakfast options transform these delightful treats into morning fuel by serving them alongside fresh fruit or a dollop of Greek yogurt. We often arrange them on a platter with berries and nuts for a balanced start to the day that satisfies both sweet cravings and nutritional needs.
Snack time presentations work beautifully when we place the muffins in colorful cupcake liners or arrange them on tiered serving stands for afternoon gatherings. Room temperature serving allows the full flavor profile to emerge while maintaining that perfect soft texture we’ve worked to achieve.
Dessert transformations elevate these mini treats by warming them briefly in the microwave for 10 to 15 seconds before serving with vanilla ice cream or whipped cream. We drizzle honey or maple syrup over the top for an indulgent finish that turns a simple muffin into an elegant dessert course.
Party and event serving becomes effortless with these bite sized portions that guests can enjoy without utensils or plates. We arrange them on decorative platters or in small paper bags for grab and go convenience at potlucks, school events, or office gatherings where individual servings create less mess and more enjoyment.
Special occasion presentations benefit from dusting the muffins with powdered sugar or serving them in small ramekins with fresh mint garnish. We find that these thoughtful touches transform our simple recipe into something special enough for brunch parties or holiday celebrations while maintaining the approachable charm that makes them universally loved.
Recipe Variations
Our basic mini chocolate chip muffins serve as the perfect foundation for countless delicious variations. Transform these beloved treats into exciting new flavors with simple ingredient swaps and additions.
Double Chocolate Mini Muffins
We create these intensely chocolatey muffins by adding 1/4 cup of cocoa powder to our dry ingredients. The cocoa powder delivers a rich chocolate base that pairs beautifully with the mini chocolate chips throughout each bite.
Dark chocolate chips elevate the chocolate experience even further than regular semi-sweet chips. We recommend using mini dark chocolate chips to maintain the perfect chip-to-batter ratio in these smaller muffins.
A chocolate glaze drizzled over the cooled muffins transforms them into bakery-worthy treats. Simply whisk together powdered sugar and cocoa powder with a splash of milk until smooth, then drizzle over each muffin for an elegant finishing touch.
Blueberry Chocolate Chip Mini Muffins
Fresh or frozen blueberries make an exceptional addition to our chocolate chip muffins. We fold 1/2 cup of blueberries into the batter just before adding the chocolate chips to ensure even distribution.
The natural sweetness of blueberries complements the rich chocolate chips perfectly. Fresh blueberries provide bursts of juicy flavor, while frozen blueberries work equally well when added directly to the batter without thawing.
Gently toss the blueberries in a light coating of flour before folding them into the batter. This technique prevents the berries from sinking to the bottom during baking and helps maintain the muffins’ tender texture throughout.
Troubleshooting Tips
Even experienced bakers encounter challenges when making mini chocolate chip muffins. We’ve compiled answers to the most common issues that can affect your baking results.
Preventing Soggy Muffins
Steam trapped during cooling creates soggy muffins that lack the desired texture. We recommend removing muffins from pans within 5 minutes of baking and transferring them immediately to a wire rack. This allows proper air circulation and prevents moisture buildup that leads to undesirable sogginess.
Fixing Heavy Dense Muffins
Several factors contribute to heavy muffins that fail to achieve the light fluffy texture we expect. Underbaking often creates dense results, so we suggest increasing bake time by 1-2 minutes if muffins seem too heavy. Using old batter that has sat too long also produces poor results. Fresh batter ensures optimal rise and texture every time.
Batter that has been thawed and refrozen before baking creates particularly heavy muffins. We always recommend using batter immediately after mixing or storing it properly in the freezer without multiple freeze-thaw cycles.
Addressing Tough Texture Issues
Overly tough muffins typically result from excessive oven heat. We reduce oven temperature by 25°F when muffins develop a chewy unpleasant texture. This gentler heat allows proper cooking without creating tough gluten structures.
Managing Crust Problems
Cracked crusts indicate several potential issues with your baking process. High oven temperatures cause rapid surface cooking that creates unsightly cracks. We lower the temperature and extend baking time slightly for smooth golden tops.
Overbaking also produces cracked surfaces that detract from appearance. Checking muffins at the minimum baking time prevents this common problem. Batter that has undergone freeze-thaw cycles before baking frequently develops cracks during cooking.
Solving Sticking Issues
| Sticking Cause | Prevention Method |
|---|---|
| Improper greasing | Apply even coating to all surfaces |
| Excess grease buildup | Remove surplus grease with paper towel |
| Dirty muffin tins | Clean thoroughly between uses |
| Wet tin surfaces | Ensure complete drying before greasing |
Muffins that stick to tins create frustration and damaged results. We ensure even greasing coverage in every cavity while removing any excess that pools in corners. Clean dry tins prevent sticking better than those with residue or moisture.
Preventing Chocolate Chip Migration
Chocolate chips naturally sink through batter due to their weight compared to the surrounding mixture. While some sinking occurs naturally, we can minimize this issue by creating slightly thicker batter. Adding an extra tablespoon of flour helps support chocolate chips throughout the muffin structure, though this may slightly alter the final texture.
Coating chocolate chips lightly with flour before folding them into batter also helps prevent excessive sinking during baking.
Essential Mixing Guidelines
Overmixing creates dense rubbery muffins that lack the tender crumb we desire. We mix wet and dry ingredients just until combined, accepting some lumps in the batter rather than overworking the mixture. Gentle folding motions preserve the light texture that makes mini muffins so appealing.
Proper oven temperature control prevents most baking issues before they develop. We verify oven accuracy with an independent thermometer since temperature variations cause uneven results and multiple texture problems.
Conclusion
These delightful mini chocolate chip muffins have earned their place as one of our favorite go-to treats. They’re proof that good things really do come in small packages – delivering all the flavor and satisfaction of traditional muffins in perfectly portioned bites.
We love how these versatile treats fit seamlessly into any part of your day. Whether you’re hosting a brunch gathering or simply want a quick afternoon pick-me-up they never disappoint.
The beauty lies in their simplicity and reliability. With the right techniques and a few quality ingredients you’ll consistently create bakery-worthy results that’ll have everyone asking for the recipe. Happy baking!
Frequently Asked Questions
What temperature should I bake mini chocolate chip muffins at?
Bake mini chocolate chip muffins at 375°F for moist, evenly baked results. Some bakers prefer 400°F for a quicker bake with crispier edges. The typical baking time is 10-15 minutes, but start checking at 10 minutes to avoid overbaking.
How long do mini chocolate chip muffins stay fresh?
Store mini chocolate chip muffins in an airtight container at room temperature for 2-4 days or refrigerate for 5-7 days. For long-term storage, freeze them for 2-3 months in freezer bags. Use a paper towel in the container to control moisture.
What equipment do I need to make mini chocolate chip muffins?
You’ll need a 24-cavity mini muffin pan (preferably light silver), non-stick cooking spray or mini paper liners, mixing bowls, whisk, electric mixer, and silicone spatula. Optional tools include piping bags for easier batter distribution and better portion control.
How do I prevent my mini muffins from sticking to the pan?
Use non-stick cooking spray or mini paper liners to prevent sticking. Make sure to grease the pan thoroughly, including the tops. Remove muffins from the pan promptly after cooling for 2-3 minutes to prevent them from sticking as they cool completely.
Can I make variations of mini chocolate chip muffins?
Yes! Try double chocolate mini muffins by adding cocoa powder, or blueberry chocolate chip versions by folding in fresh berries. Coat chocolate chips and berries with flour before adding to ensure even distribution and prevent sinking to the bottom.
How do I know when my mini muffins are done baking?
Look for lightly golden edges and tops that spring back when lightly touched. Insert a toothpick into the center – it should come out with just a few moist crumbs, not wet batter. The muffins should pull slightly away from the pan edges.
What’s the best way to serve mini chocolate chip muffins?
Serve them warm from the oven with coffee or tea for breakfast. Pair with fresh fruit or Greek yogurt for balance. For parties, use colorful cupcake liners or tiered stands. They also make elegant desserts when warmed and served with ice cream or whipped cream.
How do I avoid overmixing my muffin batter?
Mix wet and dry ingredients just until combined – the batter should look slightly lumpy. Overmixing develops gluten, resulting in tough, dense muffins. Use a gentle folding motion with a spatula and stop mixing as soon as you no longer see dry flour.


