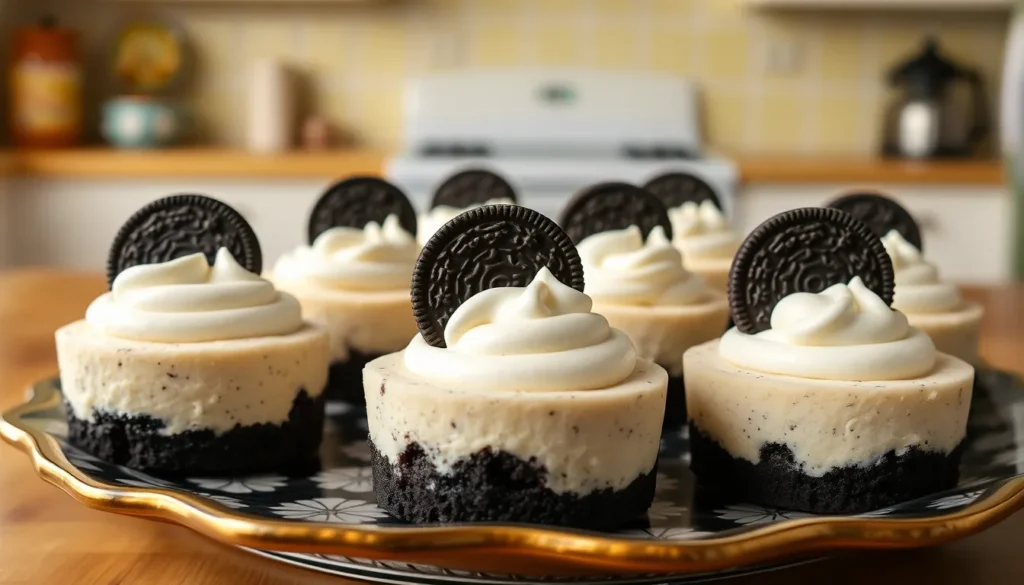
These mini Oreo cheesecakes combine two of our favorite desserts into one irresistible bite-sized treat that’ll disappear from your dessert table faster than you can say “seconds please!” We’ve transformed the classic New York-style cheesecake into adorable individual portions featuring crushed Oreo cookies in both the crust and filling.
What makes these mini cheesecakes absolutely perfect is their foolproof nature – they’re nearly impossible to mess up and require no water bath like traditional cheesecakes. Each little cake delivers that signature tangy cream cheese flavor balanced with chocolatey Oreo goodness that both kids and adults can’t resist.
We love serving these at parties because they’re naturally portion-controlled and incredibly easy to grab and go. Plus they can be made ahead of time and actually taste better after chilling overnight. Whether you’re hosting a birthday party or just craving something sweet these mini Oreo cheesecakes will become your new go-to dessert.
Ingredients
Creating these delightful mini Oreo cheesecakes requires just a handful of simple ingredients that you likely already have in your kitchen. We’ve organized everything you need into three easy categories to streamline your baking process.
For the Oreo Crust
- 24 Oreo cookies (including cream filling)
- 3 tablespoons unsalted butter, melted
- Pinch of salt
For the Cheesecake Filling
- 16 ounces cream cheese, softened to room temperature
- 1/2 cup granulated sugar
- 2 large eggs, room temperature
- 1/4 cup sour cream
- 1 teaspoon vanilla extract
- 2 tablespoons all-purpose flour
- 6 Oreo cookies, roughly chopped
For the Topping
- 1 cup heavy whipping cream
- 2 tablespoons powdered sugar
- 1/2 teaspoon vanilla extract
- 12 mini Oreo cookies, halved
- Optional: chocolate shavings or cocoa powder for dusting


Equipment Needed
 1")
Creating perfect mini Oreo cheesecakes requires the right tools to achieve that professional bakery quality we all crave. We’ve organized our equipment list to help you gather everything before starting this delightful baking adventure.
Essential Baking Equipment
A standard 12-cup muffin tin serves as our primary baking vessel for these individual treats. Paper cupcake liners make removal effortless and prevent sticking, though you can lightly grease the tin if preferred. We recommend using a mini cheesecake pan with removable bottoms for an even more professional presentation, but the muffin tin works perfectly for home bakers.
Mixing and Preparation Tools
Our food processor becomes invaluable for crushing Oreo cookies into uniform crumbs for the crust. If you don’t own a food processor, a sturdy ziplock bag and rolling pin will accomplish the same task with a bit more effort. A hand mixer or stand mixer ensures our cream cheese filling achieves that smooth, lump-free consistency that defines exceptional cheesecake.
Additional Kitchen Essentials
Multiple mixing bowls in various sizes help us organize ingredients and prevent cross-contamination during preparation. A rubber spatula allows for gentle folding of cookie pieces into our filling without overmixing. Measuring cups and spoons ensure accuracy in our ingredient ratios, which directly impacts the final texture and flavor.
| Equipment Type | Primary Option | Alternative Option | Purpose |
|---|---|---|---|
| Baking Pan | 12-cup muffin tin | Mini cheesecake pan | Individual portion molding |
| Cookie Crushing | Food processor | Rolling pin + ziplock bag | Uniform crust texture |
| Mixing | Hand mixer | Stand mixer | Smooth filling consistency |
| Measuring | Standard measuring tools | Kitchen scale | Ingredient accuracy |
Optional but Helpful Tools
An offset spatula makes leveling our cheesecake filling in each cup much easier and creates that perfectly smooth top surface. Wire cooling racks allow proper air circulation during the cooling process, preventing condensation buildup that could affect texture.


Instructions
 2")
We’ll guide you through each step to create these irresistible mini Oreo cheesecakes that are perfect for any occasion. Follow our detailed process to achieve bakery-quality results every time.
Prep the Muffin Tin
Lightly coat a 12-count mini cheesecake pan or regular muffin tin with nonstick cooking spray. Line the muffin tin with cupcake liners for easier removal if you prefer this method. Place the prepared pan in the refrigerator to chill while we work on the crust components.
Make the Oreo Crust
Crush 24 Oreo cookies into fine crumbs using a food processor or blender for the most consistent texture. Place the cookies in a sealed plastic bag and crush them with a rolling pin if you don’t have a food processor available. Add 4 tablespoons of melted butter to the crushed Oreos and mix thoroughly until the mixture holds together when pressed. Sprinkle in a pinch of salt to enhance the chocolate flavor of the crust.
Prepare the Cheesecake Filling
Beat 12 ounces of full-fat cream cheese with an electric mixer until completely smooth and free of lumps. Gradually add 1/2 cup granulated sugar and continue beating until well incorporated. Add 1 large egg and beat until just combined without overmixing. Mix in 1/4 cup sour cream and 1 teaspoon vanilla extract until the filling is silky smooth. Fold in 1 tablespoon of all-purpose flour to help stabilize the cheesecakes during baking.
Assemble the Mini Cheesecakes
Distribute about 1 tablespoon of the Oreo crust mixture into each prepared muffin cup. Press the crust firmly into the bottom using the back of a spoon or small measuring cup to create an even layer. Spoon the cheesecake filling over each crust, filling each cup about 3/4 full to allow room for slight expansion. Gently tap the pan on the counter to remove any air bubbles from the filling.
Bake the Cheesecakes
Preheat your oven to 325°F for consistent baking results. Bake the mini cheesecakes for 14-16 minutes until the centers are just set but still slightly jiggly. Avoid overbaking as the cheesecakes will continue to set as they cool. Remove from the oven when the tops look firm but not browned.
Cool and Chill
Allow the cheesecakes to cool completely on the counter for 30 minutes at room temperature. Transfer the cooled cheesecakes to the refrigerator and chill for at least 3 hours before serving. The texture improves significantly with overnight chilling, making them even more delicious the next day.


Topping and Garnish Ideas
 3")
We’ve discovered that the perfect topping can transform our mini Oreo cheesecakes from delicious to absolutely irresistible. After experimenting with countless combinations, we’ve identified several standout options that complement the rich cheesecake filling beautifully.
Classic Whipped Cream Toppings
Our favorite go-to topping remains a dollop of freshly whipped cream. The light and airy texture creates a perfect contrast against the dense, creamy cheesecake filling. We recommend whipping heavy cream with a touch of powdered sugar and vanilla extract until soft peaks form.
For those seeking something more adventurous, we absolutely love strawberry whipped cream cheese frosting. This unique combination brings together the sweetness of fresh strawberries with cream cheese, adding a delightful fruity twist that pairs surprisingly well with the chocolate Oreo base.
Decadent Chocolate Options
Nothing beats the indulgence of chocolate ganache drizzled over our mini cheesecakes. We prepare this by heating heavy cream and pouring it over chopped chocolate, creating a smooth, glossy finish that provides intense chocolate flavor. The ganache sets beautifully and adds an elegant restaurant-quality appearance.
Eye-Catching Garnish Ideas
Our presentation gets an instant upgrade when we place a mini Oreo cookie on top of each cheesecake. This classic garnish immediately identifies the dessert’s flavor theme and creates visual consistency across the serving platter.
We also love sprinkling crushed Oreo cookie crumbs around the base or directly on top of whipped cream. These crumbs add extra texture and enhance the overall Oreo experience with every bite.
Gourmet Flavor Combinations
For a more sophisticated flavor profile, we drizzle caramel sauce and sprinkle flaky sea salt over our cheesecakes. This sweet and salty contrast elevates the dessert from simple to extraordinary, creating complex flavors that keep guests coming back for more.
Peanut butter enthusiasts will appreciate our peanut butter swirl technique. We either swirl peanut butter directly into the cheesecake batter before baking or drizzle it as a finishing touch, adding a rich nutty dimension that complements the chocolate cookies perfectly.
Creative Variations
We encourage experimenting with different Oreo cookie flavors like mint or peanut butter varieties to create unique cheesecake variations. Each flavor brings its own character while maintaining the familiar Oreo appeal that makes these mini desserts so popular.
| Topping Type | Preparation Time | Best Pairing |
|---|---|---|
| Whipped Cream | 5 minutes | Classic presentation |
| Chocolate Ganache | 10 minutes | Elegant occasions |
| Strawberry Cream Cheese Frosting | 15 minutes | Summer gatherings |
| Caramel and Sea Salt | 8 minutes | Gourmet events |


Storage Instructions
 4")
Refrigeration
We recommend storing our mini Oreo cheesecakes in an airtight container in the refrigerator to maintain their creamy texture and fresh flavor. The storage duration varies based on your exact needs and preparation timeline.
| Storage Duration | Timeframe |
|---|---|
| Short-term storage | 3 days |
| Standard storage | 3-4 days |
| Extended storage | 5-6 days |
Keep the cheesecakes chilled until you’re ready to serve them to guests. Room temperature exposure should be minimal to preserve the filling’s consistency and prevent any food safety concerns.
Freezing
Place our finished mini cheesecakes on a baking sheet lined with parchment paper and freeze them until they become firm to the touch. This initial freezing step prevents the cheesecakes from sticking together during long-term storage.
Transfer the frozen cheesecakes to a freezer-safe container or resealable plastic bag once they’re completely solid. Label the container with the date to track storage time effectively.
| Freezing Duration | Timeframe |
|---|---|
| Optimal quality | 1-2 months |
| Maximum storage | Up to 3 months |
Thaw frozen cheesecakes in the refrigerator overnight before serving to maintain their optimal texture and flavor profile. We never recommend thawing at room temperature as this can compromise the cheesecake’s structure.
Serving Notes
Add whipped cream and mini Oreos just before serving to preserve their freshness and visual appeal. These toppings can become soggy or lose their crunch if applied too far in advance.
Ensure all ingredients reach room temperature before preparation to achieve the best results and smoothest filling texture. This temperature consideration becomes especially important when working with cream cheese and eggs.
Tips for Perfect Mini Oreo Cheesecakes
 5")
Mastering these bite-sized treats requires attention to exact details that ensure consistent results every time. We’ve compiled essential techniques from our extensive testing to help you achieve bakery-quality mini cheesecakes.
Temperature Control for Smooth Texture
Room temperature ingredients create the foundation for silky cheesecake filling. We recommend removing cream cheese from the refrigerator 2-3 hours before baking to achieve proper softness. Cold cream cheese develops lumps that resist mixing, resulting in an uneven texture throughout your finished cheesecakes.
Proper oven temperature prevents cracking and ensures even cooking. Bake your mini cheesecakes at 325°F to 350°F depending on your pan size and desired doneness. Lower temperatures work best for standard muffin pans, while mini cheesecake pans can handle slightly higher heat due to their shallower depth.
Mixing Techniques That Matter
Gentle mixing prevents air incorporation that leads to cracks during baking. We beat the cream cheese mixture until smooth, then stop immediately to avoid overworking the batter. Excessive mixing creates too much air, causing the cheesecakes to rise dramatically and then collapse.
Folding crushed Oreos into the filling requires a light touch to maintain cookie texture. Use a spatula to gently incorporate both large and small cookie pieces, preserving the signature Oreo crunch in every bite.
Crust Preparation Secrets
Crushing approximately 18 Oreos provides the perfect amount for both crust and filling components. We process half the cookies into fine crumbs for the base, leaving the remainder in larger pieces for mixing into the cheesecake batter.
Moistening the crust mixture with melted butter creates cohesion without making it soggy. The butter should bind the crumbs together when pressed, forming a stable foundation that won’t crumble during serving.
Baking and Doneness Indicators
| Pan Type | Baking Time | Temperature | Doneness Test |
|---|---|---|---|
| Standard Muffin Pan | 15-18 minutes | 325°F | Edges set, centers slightly wobbly |
| Mini Cheesecake Pan | 12-15 minutes | 350°F | Just set throughout |
| Silicone Molds | 14-17 minutes | 325°F | Light golden edges |
Visual cues help determine perfect doneness better than timer alone. We look for edges that appear set and firm while centers remain slightly wobbly when gently shaken. The cheesecakes will continue cooking from residual heat after removal from the oven.
Assembly Strategy
Placing whole Oreo cookies at the bottom of each liner creates an instant crust foundation. This technique eliminates guesswork while ensuring consistent portions across all cheesecakes. The cookie base also adds structural support during serving.
Filling each cup three-quarters full prevents overflow during baking while allowing room for slight expansion. We use a large spoon or small ladle to distribute filling evenly, tapping the pan gently to release air bubbles.
Cooling for Best Results
Gradual cooling prevents sudden temperature changes that cause cracks. We allow the cheesecakes to cool at room temperature for 30 minutes before refrigerating, following the same principle used for full-sized cheesecakes.
Overnight chilling develops the best flavor and texture, though 3 hours provides adequate setting time. The extended refrigeration allows flavors to meld while firming the texture to ideal consistency for clean removal from liners.


Variations and Flavor Twists
 6")
Our mini Oreo cheesecakes offer endless possibilities for customization and flavor experimentation. We’ve discovered that the basic recipe serves as a perfect foundation for creative variations that can transform these treats into entirely new dessert experiences.
Crust Variations
The traditional Oreo crust can be modified in several ways to create unique textures and flavors. We recommend trying a two-ingredient approach using crushed Oreos mixed with melted butter for a more cohesive base. Alternatively, placing a whole Oreo cookie at the bottom of each cupcake liner creates an elegant presentation while maintaining the classic flavor profile.
Different Oreo varieties open up exciting possibilities for flavor combinations. Golden Oreos create a vanilla-forward base that pairs beautifully with berry toppings. Mint Oreos add a refreshing twist that complements chocolate ganache perfectly. We’ve found that Double Stuf Oreos provide extra cookie flavor intensity in both the crust and filling.
Filling Enhancements
The cheesecake filling benefits from strategic additions that elevate both texture and taste. We incorporate sour cream or Greek yogurt to achieve a lighter, more tangy profile while maintaining the signature creaminess. Powdered sugar instead of granulated sugar creates an exceptionally smooth texture that melts on the tongue.
For chocolate lovers, we fold in additional chopped Oreos directly into the filling mixture. This cookies and cream approach distributes flavor throughout each bite rather than concentrating it only in the crust. We’ve experimented with adding cocoa powder to the filling itself, which intensifies the chocolate notes without overwhelming the cream cheese base.
Gourmet Flavor Combinations
| Variation | Key Ingredients | Flavor Profile | Preparation Time |
|---|---|---|---|
| Cookies and Cream | Crushed Oreos in filling | Classic, familiar | 20 minutes |
| Chocolate Ganache | Dark chocolate, heavy cream | Rich, decadent | 25 minutes |
| Caramel Sea Salt | Caramel sauce, flaky salt | Sweet and salty | 15 minutes |
| Peanut Butter Swirl | Peanut butter, powdered sugar | Nutty, creamy | 20 minutes |
We create sophisticated flavor profiles by layering complementary tastes. Our chocolate ganache version features a dark chocolate layer on top that enhances the Oreo’s natural cocoa notes. The ganache sets beautifully when chilled and provides a glossy finish that looks professionally crafted.
Caramel and sea salt combinations have become increasingly popular in our kitchen experiments. We drizzle homemade or high-quality store-bought caramel sauce over the cheesecake layer before adding our final toppings. A light sprinkle of flaky sea salt creates a gourmet contrast that balances the sweetness perfectly.
Creative Topping Applications
Beyond traditional whipped cream, we’ve developed several signature topping combinations that transform the basic recipe. Peanut butter lovers appreciate our swirled technique where we marble softened peanut butter directly into the filling before baking. This creates beautiful patterns and distributes nutty flavor throughout.
Fresh fruit additions work exceptionally well with the Oreo base. We layer thin strawberry slices between the crust and filling for a fresh contrast. Raspberry coulis drizzled over the finished cheesecakes adds both visual appeal and bright acidity that cuts through the rich cream cheese.
Temperature contrasts create memorable eating experiences. We serve our mini cheesecakes chilled but add warm elements like heated caramel or chocolate sauce just before serving. This temperature play enhances flavor perception and creates a restaurant-quality dessert experience at home.
Seasonal Adaptations
Holiday seasons inspire us to create themed variations that celebrate exact flavors and colors. During autumn, we incorporate pumpkin spice into the filling and top with cinnamon whipped cream. Winter holidays call for peppermint Oreo crusts paired with white chocolate ganache and crushed candy canes.
Spring variations feature lighter flavors like lemon zest mixed into the filling with fresh berry toppings. Summer adaptations might include key lime juice in the cheesecake mixture or tropical fruit garnishes that provide refreshing contrast to the rich Oreo base.
These seasonal modifications keep our mini Oreo cheesecakes relevant throughout the year while maintaining the beloved core recipe that makes them consistently successful.


Serving Suggestions
 7")
Our mini Oreo cheesecakes shine brightest when presented with thoughtful touches that enhance both their visual appeal and flavor experience. We recommend topping each individual cheesecake with a generous dollop of freshly whipped cream and crowning it with a mini Oreo cookie for the perfect finishing touch. This classic presentation not only creates stunning contrast but also amplifies the beloved Oreo flavor profile.
Perfect Portion Control for Every Occasion
These bite-sized treats excel at gatherings where portion control becomes essential. We love how guests can easily grab their own individual dessert without the hassle of cutting or serving from a larger cheesecake. Each mini cheesecake delivers the perfect amount of indulgence while maintaining elegant presentation standards.
Creative Flavor Variations
Transform your mini cheesecakes by experimenting with different Oreo varieties in your crust and garnish selections. Red Velvet Oreos create a romantic twist perfect for special occasions while Golden Oreos offer a classic vanilla flavor that appeals to traditional tastes. We find these variations add excitement to dessert tables and give guests delightful flavor surprises.
Make-Ahead Convenience
Planning ahead becomes effortless with these individually portioned desserts. We store our finished mini cheesecakes in airtight containers where they maintain peak freshness for up to 4 days in the refrigerator. For longer storage answers we freeze them for up to 2 months without compromising their creamy texture or rich flavor.
| Storage Method | Duration | Container Type |
|---|---|---|
| Refrigerated | 4 days | Airtight container |
| Frozen | 2 months | Freezer-safe container |
Crowd-Pleasing Presentation Ideas
Feeding large groups becomes simple when we arrange these mini cheesecakes on tiered serving stands or decorative platters. We suggest removing the paper liners just before serving to showcase the beautiful layers and professional appearance. Adding fresh berries or chocolate shavings around the base of each cheesecake creates restaurant-quality presentation that impresses every guest.


Conclusion
These mini Oreo cheesecakes represent the perfect balance of convenience and indulgence. We’ve shown you how simple it is to create professional-looking desserts that’ll impress your guests without the stress of traditional cheesecake preparation.
The beauty of this recipe lies in its versatility. Whether you’re hosting a birthday party or satisfying a late-night sweet tooth we’ve given you all the tools to customize these treats to your heart’s content. From seasonal variations to gourmet toppings the possibilities are endless.
With proper storage techniques and make-ahead tips you can always have these delightful mini cheesecakes ready for any occasion. They’re proof that sometimes the best desserts come in small packages delivering maximum flavor with minimal effort.
Frequently Asked Questions
How long do mini Oreo cheesecakes need to chill?
Mini Oreo cheesecakes should chill in the refrigerator for at least 3 hours after baking and cooling. However, overnight chilling is highly recommended as it significantly improves the texture and flavor. The extended chilling time allows the filling to fully set and develop the perfect creamy consistency that makes these mini desserts irresistible.
Can I make mini Oreo cheesecakes ahead of time?
Yes, mini Oreo cheesecakes are perfect make-ahead desserts. They can be stored in the refrigerator for 3-6 days in an airtight container. For longer storage, freeze them for up to 3 months. They often taste even better after chilling overnight, making them ideal for party planning and busy schedules.
What equipment do I need to make mini Oreo cheesecakes?
You’ll need a standard 12-cup muffin tin, paper cupcake liners, a food processor for crushing Oreos, and a hand or stand mixer for the filling. Optional equipment includes a mini cheesecake pan with removable bottoms for professional presentation, measuring tools for accuracy, and an offset spatula for smooth filling distribution.
How do I prevent my mini cheesecakes from cracking?
Use room temperature ingredients and avoid overmixing the batter to prevent incorporating too much air. Bake at the correct temperature (325°F) and don’t overbake – they should be just set with a slight jiggle in the center. Allow gradual cooling at room temperature before refrigerating to prevent temperature shock.
What are the best toppings for mini Oreo cheesecakes?
Popular toppings include freshly whipped cream with mini Oreo cookies, chocolate ganache, strawberry whipped cream cheese frosting, and caramel sauce with sea salt. You can also use crushed Oreo crumbs, fresh berries, or peanut butter swirls. Add toppings just before serving to maintain freshness and visual appeal.
Can I use different Oreo flavors for variations?
Absolutely! Try Golden Oreos for a vanilla twist, Mint Oreos for a refreshing flavor, or Red Velvet Oreos for a colorful variation. Different Oreo flavors can be used in both the crust and filling to create unique flavor combinations that will surprise and delight your guests.
How should I store leftover mini Oreo cheesecakes?
Store mini Oreo cheesecakes in an airtight container in the refrigerator for 3-6 days. For freezing, wrap individually or store in freezer-safe containers for up to 3 months. Thaw frozen cheesecakes in the refrigerator overnight before serving. Always keep them refrigerated to maintain their creamy texture and food safety.
Do mini Oreo cheesecakes require a water bath?
No, mini Oreo cheesecakes don’t require a water bath, making them much easier to prepare than traditional cheesecakes. The individual portions and shorter baking time help prevent cracking naturally. This simplified method makes them nearly foolproof while still delivering the classic creamy cheesecake texture everyone loves.