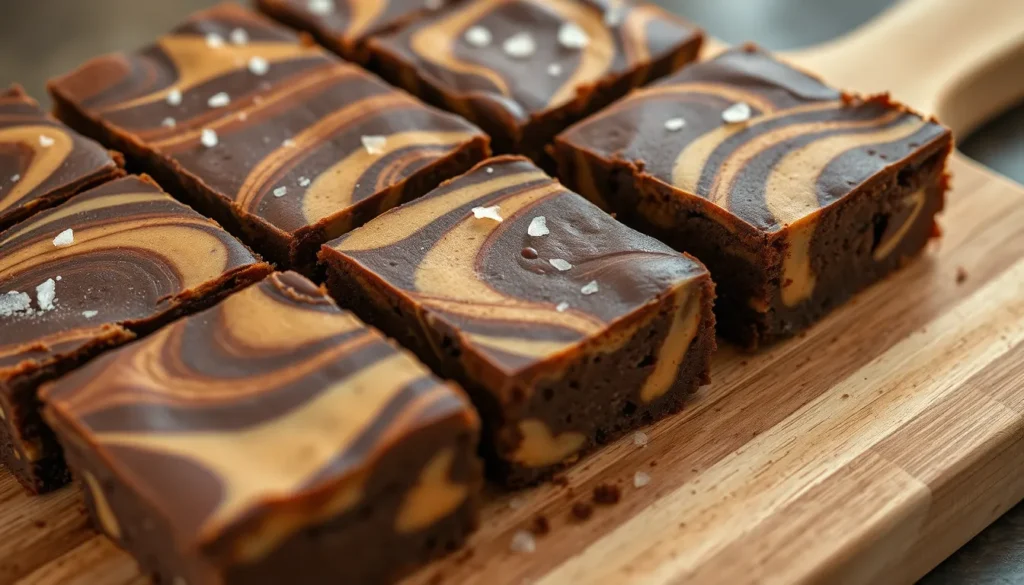
We’re about to share the ultimate dessert that’ll make every chocolate and peanut butter lover weak in the knees. These peanut butter brownies combine the best of both worlds – rich, fudgy chocolate brownies swirled with creamy peanut butter that creates the most irresistible marble effect.
What makes these brownies absolutely magical is how the salty-sweet peanut butter perfectly balances the deep chocolate flavor. Every bite delivers that perfect contrast of textures – from the dense, chewy brownie base to the smooth peanut butter ribbons that melt on your tongue.
We’ve perfected this recipe through countless kitchen experiments to bring you brownies that are incredibly simple to make yet taste like they came from a high-end bakery. Whether you’re hosting a party or just craving something decadent, these peanut butter chocolate brownies will become your new go-to dessert that never fails to impress.
Ingredients
We’ve carefully selected each ingredient to create the perfect balance of rich chocolate and creamy peanut butter flavors. These simple pantry staples combine to deliver bakery-quality results every time.
For the Brownie Base
- 1/2 cup unsalted butter
- 4 oz dark chocolate (70% cocoa), chopped
- 3/4 cup granulated sugar
- 2 large eggs, room temperature
- 1 teaspoon vanilla extract
- 1/2 cup all-purpose flour
- 1/4 cup unsweetened cocoa powder
- 1/2 teaspoon salt
- 1/4 teaspoon baking powder
For the Peanut Butter Swirl
- 1/2 cup creamy peanut butter
- 1/4 cup powdered sugar
- 1 large egg yolk
- 2 tablespoons unsalted butter, melted
- 1/4 teaspoon vanilla extract
- Pinch of salt
Equipment Needed

Creating perfect peanut butter brownies requires the right tools to ensure even baking and effortless preparation. We recommend gathering these essential pieces of equipment before starting your baking process.
Baking Pan serves as the foundation for our brownies. An 8×8-inch or 9×9-inch square pan works best for achieving the ideal thickness and even heat distribution. Metal pans conduct heat more efficiently than glass options, resulting in better browning and texture.
Saucepan becomes crucial for melting our chocolate and butter mixture smoothly. Choose a heavy-bottomed pan to prevent scorching during the melting process. Medium heat control ensures our chocolate melts without seizing or burning.
Whisk and Spatula handle different mixing stages throughout our recipe. The whisk incorporates air into our batter for the perfect texture, while a rubber spatula gently folds ingredients without overmixing. Both tools prevent tough brownies that result from aggressive mixing.
Knife or Skewer creates the signature marbled appearance we love in peanut butter brownies. A butter knife works perfectly for creating swirl patterns, while a wooden skewer offers more precise control for intricate designs. These tools help us achieve that beautiful contrast between chocolate and peanut butter layers.
Measuring Cups and Spoons ensure accuracy in our ingredient ratios. Precise measurements make the difference between perfect brownies and disappointing results. We recommend using both dry and liquid measuring tools for the most accurate results.
Mixing Bowls provide adequate space for combining ingredients without spillage. Medium to large bowls accommodate our batter volume while allowing room for proper mixing technique.
Instructions

Follow these step-by-step instructions to create perfectly fudgy peanut butter brownies with beautiful marbled swirls. We’ll guide you through each stage to ensure bakery-quality results every time.
Prep the Pan and Oven
Preheat your oven to 350°F (175°C) and position the rack in the center. Prepare your baking pan by greasing an 8×8-inch or 9×9-inch pan thoroughly with cooking spray or butter. Line the pan with parchment paper, leaving some overhang for easy removal. This preparation ensures our brownies won’t stick and maintains clean edges.
Make the Brownie Batter
Melt the butter and dark chocolate in a heavy-bottomed saucepan over medium heat, stirring constantly until smooth. Remove from heat and whisk in both granulated sugars until well combined. Beat in the eggs one at a time, followed by vanilla extract, mixing thoroughly after each addition.
Sift together flour, cocoa powder, and salt in a separate bowl to eliminate any lumps. Fold the dry ingredients into the chocolate mixture using a spatula, being careful not to overmix. The batter should be thick and glossy with no flour streaks visible.
Prepare the Peanut Butter Mixture
Combine creamy peanut butter with powdered sugar in a medium bowl, whisking until smooth. Beat in the egg yolk, melted butter, and vanilla extract until the mixture becomes creamy and pipeable. Add a pinch of salt to enhance the peanut butter flavor. The mixture should be slightly thick but easy to swirl.
Assemble and Swirl
Pour the brownie batter into your prepared pan, spreading it evenly with a spatula. Drop spoonfuls of peanut butter mixture across the surface of the brownie batter, spacing them evenly. Use a knife or skewer to create swirl patterns by drawing it through both batters in figure-eight motions. Avoid over-swirling to maintain distinct ribbons of peanut butter.
Bake the Brownies
Bake for 40-45 minutes for an 8×8-inch pan or 29-32 minutes for a 9×9-inch pan. Check for doneness by inserting a skewer into the center; it should come out with moist crumbs attached, not wet batter. The edges should appear set while the center remains slightly soft. Allow cooling completely in the pan before cutting to achieve clean slices.
| Pan Size | Baking Time | Temperature |
|---|---|---|
| 8×8-inch | 40-45 minutes | 350°F (175°C) |
| 9×9-inch | 29-32 minutes | 350°F (175°C) |
Directions for Cooling and Cutting

After removing our peanut butter brownies from the oven, we must resist the temptation to cut them immediately. The cooling process is crucial for achieving clean, professional-looking squares that maintain their structure.
We place the hot baking pan directly onto a wire rack and allow the brownies to cool for at least 30 minutes to one hour. This cooling period lets the interior set and solidify properly, preventing our brownies from crumbling when we slice them. The brownies should reach room temperature before we attempt any cutting.
| Cooling Timeline | Purpose |
|---|---|
| 30-60 minutes | Interior sets and solidifies |
| Room temperature | Prevents crumbling during cutting |
| Optional chilling | Creates even cleaner cut edges |
Once our brownies have cooled completely, we use the parchment paper overhang to lift the entire brownie slab from the pan onto a clean cutting board. This technique eliminates the risk of damaging our brownies while transferring them.
We select a sharp, straight-edged knife such as a chef’s knife for the cleanest cuts possible. Serrated or plastic knives can tear the delicate brownie texture and create jagged edges. For exceptionally clean slices, we can briefly chill the cooled brownies in the refrigerator before cutting.
We cut our brownies into squares just before serving to maintain maximum freshness. Leaving cut brownies exposed causes them to dry out more quickly than keeping the slab intact. Each slice reveals the beautiful marbled pattern we created during the swirling process.
Our finished brownies stay fresh when stored in an airtight container at room temperature for up to four days. For longer storage, we can refrigerate them for up to one week while maintaining their fudgy texture and rich flavor.
Storage Instructions

Proper storage ensures our peanut butter brownies maintain their fudgy texture and delicious flavor for days after baking. We recommend several storage methods based on how long you plan to keep them fresh.
Room Temperature Storage
We store our brownies in an airtight container at room temperature for optimal texture and flavor retention. This method keeps them fresh for up to 3 to 4 days and preserves their signature fudgy consistency. The container prevents moisture loss while maintaining the perfect balance between the chocolate base and peanut butter swirl.
Refrigerated Storage
For extended freshness we place the brownies in an airtight container and refrigerate them for up to 5 days. Refrigeration helps retain moisture better than room temperature storage and prevents the peanut butter layer from becoming too soft in warm conditions. We always allow refrigerated brownies to come to room temperature for about 15 minutes before serving for the best texture.
Freezer Storage
We wrap individual brownies in plastic wrap or aluminum foil before placing them in an airtight container or freezer bag for long term storage. Frozen brownies maintain their quality for up to 3 months when properly wrapped. To serve we thaw them at room temperature for 45 minutes to one hour or place them in the refrigerator overnight for gradual thawing.
| Storage Method | Duration | Container Type | Notes |
|---|---|---|---|
| Room Temperature | 3-4 days | Airtight container | Best for maintaining texture |
| Refrigerated | Up to 5 days | Airtight container | Better moisture retention |
| Frozen | Up to 3 months | Wrapped + airtight container | Thaw 45-60 minutes |
Storage Tips
We always ensure our brownies cool completely before storing them as this helps them hold together better when cut. Cooling prevents condensation from forming inside storage containers which could make the brownies soggy. We use airtight containers exclusively to prevent moisture and other flavors from affecting our brownies.
For variety we can substitute the peanut butter with other processed nut butters like almond butter or sunflower seed butter while following the same storage guidelines. These alternatives maintain similar storage requirements and shelf life expectations.
Tips for Perfect Peanut Butter Brownies

Creating bakery-quality peanut butter brownies requires attention to key techniques that make the difference between good and exceptional results. We’ve tested these methods extensively to ensure your brownies turn out perfectly every time.
Essential Preparation Techniques
Room temperature eggs mix smoothly into the batter and create a more uniform texture. We recommend taking eggs out of the refrigerator 30 minutes before baking to bring them to the ideal temperature. This simple step prevents lumpy batter and ensures even distribution throughout the mixture.
Sifting dry ingredients together aerates the flour and cocoa powder while breaking up any lumps that could create dense spots in your brownies. We always sift these ingredients into a separate bowl before folding them into the wet mixture. This technique creates lighter, more tender brownies with consistent texture.
Non-stick pan preparation ensures easy removal without breaking your beautiful brownies. We spray our baking pan thoroughly with non-stick cooking spray before lining with parchment paper for double protection.
Mixing Methods for Optimal Texture
Gentle mixing with a spatula prevents tough, chewy brownies that result from overdeveloped gluten. We fold the dry ingredients into the wet mixture using smooth, deliberate motions until just combined. Stop mixing as soon as you no longer see streaks of flour.
The batter should look slightly lumpy rather than perfectly smooth when properly mixed. Overmixing creates dense, cake-like brownies instead of the fudgy texture we’re aiming for.
Peanut Butter Swirl Techniques
| Technique | Method | Result |
|---|---|---|
| Dollop Swirl | Drop peanut butter in dollops and swirl with knife | Classic marbled appearance |
| Chunk Addition | Add peanut butter chunks to batter | Chunky texture variation |
| Layered Approach | Freeze peanut butter layer for stuffing | Distinct peanut butter center |
Dropping peanut butter mixture in dollops across the brownie batter creates the most visually appealing swirl pattern. We use a knife or toothpick to create figure-eight motions through the batter, pulling the peanut butter into beautiful marble designs.
For those who prefer chunks of peanut butter throughout, we add small spoonfuls of the mixture directly to the batter without swirling. This creates pockets of concentrated peanut butter flavor in every bite.
Finishing Touches and Cooling
Additional chocolate chips sprinkled on top before baking create extra chocolate bursts, while a melted chocolate glaze drizzled after cooling adds professional bakery appeal. We often add these final touches based on personal preference and occasion.
Complete cooling prevents crumbling when cutting and allows the interior to set properly. We let our brownies cool on a wire rack for at least one hour before attempting to slice them. Chilling the cooled brownies in the refrigerator for 30 minutes before cutting creates the cleanest, most professional-looking squares.
Sharp knife cuts dipped in warm water between slices produce the cleanest edges without dragging the peanut butter swirl. We wipe the blade clean after each cut to maintain neat presentation.
Variations and Substitutions

Our peanut butter brownies recipe serves as a versatile foundation that welcomes countless creative adaptations. We love experimenting with different approaches to suit various tastes and dietary needs.
Popular Variations
Classic Peanut Butter Brownies represent the traditional approach where we incorporate peanut butter directly into the brownie batter. This method creates exceptionally fudgy brownies with rich peanut butter flavor distributed throughout each bite.
Double Peanut Butter Swirl Brownies take indulgence to the next level by adding chunks of peanut butter throughout the batter while maintaining our signature swirl on top. We achieve this marbled effect by incorporating both techniques for maximum peanut butter impact.
Peanut Butter Stuffed Brownies feature a hidden layer of pure peanut butter baked directly inside the brownie. We create this by pouring half the brownie batter into the pan, adding a thick layer of peanut butter, then topping with remaining batter for an indulgent surprise center.
Brownie Mix Variation offers a simplified approach where we use store-bought brownie mix as our base and drizzle peanut butter over the unbaked surface. This method delivers excellent results with minimal preparation time.
Smart Substitutions
Peanut Butter Alternatives work beautifully for those managing peanut allergies. We successfully substitute almond butter or cashew butter using identical measurements while maintaining the same creamy texture and nutty flavor profile.
Sugar Substitutions allow us to customize sweetness levels and flavor complexity. Honey or maple syrup can replace portions of granulated sugar, though we recommend reducing liquid ingredients slightly to maintain proper batter consistency.
Gluten-Free Options make our brownies accessible to those with gluten sensitivities. We substitute all-purpose flour with equal amounts of gluten-free flour blends, ensuring the same fudgy texture and rich taste.
| Substitution Type | Original Ingredient | Alternative Options | Measurement Ratio |
|---|---|---|---|
| Nut Butter | Peanut Butter | Almond/Cashew Butter | 1:1 |
| Sweetener | Granulated Sugar | Honey/Maple Syrup | 3/4 cup per 1 cup sugar |
| Flour | All-Purpose Flour | Gluten-Free Blend | 1:1 |
These variations and substitutions empower us to create personalized versions while maintaining the fundamental appeal of our original recipe. Each adaptation preserves the essential balance between chocolate richness and creamy nut butter that makes these brownies irresistible.
Conclusion
These peanut butter brownies deliver everything we’ve promised – rich chocolate flavor perfectly balanced with creamy peanut butter swirls. We’ve shared our tested techniques and variations to help you create bakery-quality results every time.
Whether you’re making them for a special occasion or treating yourself to something indulgent these brownies won’t disappoint. The combination of fudgy texture and that beautiful marbled appearance makes them as impressive to look at as they are to eat.
Now it’s time to gather your ingredients and start baking. We’re confident you’ll love how these turn out and we’d love to hear about your own creative variations!
Frequently Asked Questions
What makes these peanut butter brownies different from regular brownies?
These brownies combine rich, fudgy chocolate brownies with a creamy peanut butter swirl, creating a beautiful marble effect. The perfect balance of salty-sweet flavors and contrasting textures makes each bite more indulgent than traditional brownies, delivering bakery-quality results from simple pantry ingredients.
What ingredients do I need for peanut butter brownies?
For the brownie base: unsalted butter, dark chocolate, granulated sugar, eggs, vanilla extract, all-purpose flour, cocoa powder, salt, and baking powder. For the peanut butter swirl: creamy peanut butter, powdered sugar, egg yolk, melted butter, vanilla extract, and a pinch of salt.
What equipment is essential for making perfect peanut butter brownies?
You’ll need an 8×8-inch or 9×9-inch metal baking pan, a heavy-bottomed saucepan for melting chocolate, whisks and spatulas for mixing, measuring cups and spoons, medium to large mixing bowls, and a knife or skewer for creating the marbled swirl pattern.
How long should I bake peanut butter brownies?
Bake at 350°F (175°C) for 25-30 minutes for an 8×8-inch pan or 20-25 minutes for a 9×9-inch pan. The brownies are done when a toothpick inserted in the center comes out with a few moist crumbs attached, not completely clean.
How do I achieve the perfect marble swirl pattern?
After pouring the brownie batter into the pan, add spoonfuls of the peanut butter mixture on top. Use a knife or skewer to gently swirl the mixtures together in a figure-eight motion, being careful not to overmix to maintain distinct marble patterns.
How should I cool and cut the brownies for best results?
Cool brownies on a wire rack for at least 30 minutes to 1 hour before cutting. This allows the interior to set properly. Use a sharp knife and cut just before serving for the cleanest edges and best presentation of the marble pattern.
How long can I store peanut butter brownies?
Store in an airtight container at room temperature for 3-4 days, refrigerate for up to 5 days, or freeze for up to 3 months when properly wrapped. Always cool completely before storing to prevent sogginess and maintain the fudgy texture.
Can I make substitutions for dietary restrictions?
Yes! You can substitute almond butter or sunflower seed butter for peanut butter, use alternative sweeteners, or make them gluten-free with appropriate flour substitutions. These adaptations maintain the essential balance between chocolate richness and creamy nut butter flavors.


