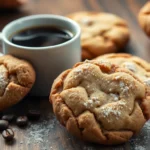
When we’re craving something sweet that combines two of our favorite flavors, these peanut butter chocolate chip bars deliver exactly what we need. There’s something magical about the way creamy peanut butter pairs with rich chocolate chips – it’s a combination that never gets old and always satisfies our dessert cravings.
We love how these bars come together quickly without any complicated techniques or special equipment. They’re perfect for those moments when we want homemade treats but don’t have hours to spend in the kitchen. The chewy texture and balanced sweetness make them irresistible to both kids and adults.
Ingredients
We’ve carefully selected simple pantry ingredients that create the perfect balance of nutty richness and chocolate indulgence. Our ingredient list ensures you can whip up these irresistible bars without any specialty shopping trips.
For the Peanut Butter Base
- 1 cup creamy peanut butter (not natural or oil-separated)
- 1/2 cup unsalted butter, melted
- 1 cup packed light brown sugar
- 2 large eggs, room temperature
- 1 teaspoon vanilla extract
- 1 1/3 cups all-purpose flour
- 1/2 teaspoon baking powder
- 1/2 teaspoon salt
For the Chocolate Chip Topping
- 1 1/2 cups semi-sweet chocolate chips
- 1/4 cup mini chocolate chips (optional, for extra chocolate bursts)
- 2 tablespoons creamy peanut butter, melted
- 1/4 teaspoon sea salt flakes for sprinkling


Equipment Needed
 1")
Creating these irresistible peanut butter chocolate chip bars requires just a few basic kitchen tools that most home bakers already have on hand. We recommend gathering all your equipment before starting to ensure a smooth baking process.
The 9×13-inch baking pan serves as our foundation for these bars. This standard size works perfectly for achieving the ideal thickness and ensures even baking throughout. We suggest greasing the pan or lining it with foil or parchment paper for easy removal once the bars have cooled.
Mixing bowls play a crucial role in our preparation process. You’ll need at least one large bowl for combining all the wet and dry ingredients effectively. A medium bowl can also be helpful for organizing ingredients before mixing.
Measuring cups and spoons ensure accuracy in our recipe execution. Precise measurements make the difference between perfectly balanced bars and ones that might turn out too dry or overly sweet. We always recommend using dry measuring cups for flour and liquid measuring cups for wet ingredients.
A whisk or electric mixer helps us blend the wet ingredients smoothly. While hand whisking works perfectly fine, an electric mixer can save time and ensure our butter and peanut butter mixture reaches the ideal consistency.
Spatula or wooden spoon becomes essential when folding in the chocolate chips and combining the final mixture. These tools prevent overmixing while ensuring all ingredients are evenly distributed throughout the dough.
Your oven should be preheated to 350-375°F (177-190°C) depending on your exact recipe variation. Proper preheating ensures consistent baking results and helps achieve those perfectly golden edges we’re looking for.
Optional equipment like foil or parchment paper makes cleanup easier and helps with clean removal of the bars from the pan. These simple additions can transform your baking experience from messy to effortless.


Instructions
 2")
Follow these straightforward steps to create perfectly chewy peanut butter chocolate chip bars. We’ll guide you through each stage to ensure your bars turn out with the ideal texture and flavor balance.
Prep the Pan and Oven
Preheat your oven to 350°F (175°C) for optimal baking results. Line your 9×13-inch baking pan with parchment paper or foil, leaving some overhang on the sides for easy removal. This preparation step prevents sticking and makes cleanup effortless.
Make the Peanut Butter Base
Melt the unsalted butter in a microwave-safe bowl or small saucepan over low heat. Combine the melted butter with creamy peanut butter in a large mixing bowl, stirring until smooth and well blended. Add the brown sugar, eggs, and vanilla extract to the mixture, beating until the combination becomes creamy and uniform. Gradually incorporate the all-purpose flour, baking powder, and salt, mixing just until the dry ingredients are fully absorbed into the wet mixture.
Add the Chocolate Chips
Fold the semi-sweet chocolate chips evenly throughout the peanut butter base using a spatula or wooden spoon. Distribute the chips thoroughly to ensure every bite contains the perfect balance of peanut butter and chocolate. Avoid overmixing at this stage to maintain the desired texture.
Bake the Bars
Spread the mixture evenly into your prepared baking pan, using a spatula to smooth the surface. Bake for 25-30 minutes, watching for the bars to become lightly golden brown around the edges while the center appears set but still slightly soft. The bars should spring back lightly when touched in the center.
Cool and Cut
Allow the bars to cool completely in the pan for at least 2 hours before cutting. Use the parchment paper overhang to lift the entire batch from the pan, then cut into squares using a sharp knife. Clean the knife between cuts for the neatest presentation.


Storage Instructions
 3")
We recommend several storage options to keep your peanut butter chocolate chip bars fresh and delicious. The storage method you choose depends on how quickly you plan to enjoy these treats.
Room Temperature Storage
We find that storing the bars at room temperature works perfectly for short-term enjoyment. Place the completely cooled bars in an airtight container where they will maintain their chewy texture and rich flavor.
| Storage Method | Duration | Container Type |
|---|---|---|
| Room Temperature | 2-5 days | Airtight container |
| Refrigerator | 5-7 days | Airtight container |
| Freezer | 2-6 months | Freezer-safe bag or container |
Refrigerator Storage
We suggest refrigerator storage when you want to extend freshness beyond a few days. The cool environment preserves the bars’ quality while maintaining their signature peanut butter and chocolate chip combination. Store them in an airtight container for optimal results.
Freezer Storage
We love freezing these bars for longer storage periods. Wrap each bar individually in plastic wrap or aluminum foil before placing them in a freezer-safe bag or container. This method preserves both texture and flavor remarkably well.
Make-Ahead Tips
We often prepare the cookie dough in advance for convenience. Mix the dough according to our recipe instructions but skip the baking step. Wrap the prepared dough tightly in plastic wrap and refrigerate for 2-3 days or freeze for up to 2 months.
Reheating Instructions
We recommend warming individual bars in the microwave for 15-25 seconds when you want that fresh-from-the-oven experience. This brief heating restores the gooey texture and enhances the melted chocolate chips throughout each bar.


Serving Suggestions
 4")
We love presenting these peanut butter chocolate chip bars in ways that highlight their rich, chewy texture and irresistible flavor combination. Our favorite approach involves cutting the cooled bars into perfect squares, creating uniform portions that showcase the golden-brown edges and chocolate chip studded interior.
Portion Control and Presentation
Bite-size squares work wonderfully for parties and gatherings, allowing guests to enjoy multiple pieces without overwhelming sweetness. Larger rectangular pieces suit individual servings perfectly, especially when we want to create a more substantial dessert experience. We always ensure our bars reach room temperature before serving, as this allows the peanut butter flavor to shine through completely.
Temperature and Texture Enhancement
Room temperature serving brings out the optimal chewy texture we’ve worked to achieve during baking. Slightly warmed bars create an even more indulgent experience, with the chocolate chips becoming pleasantly soft and the peanut butter base taking on a more pronounced nutty richness. We recommend warming individual portions in the microwave for 10-15 seconds to achieve this effect.
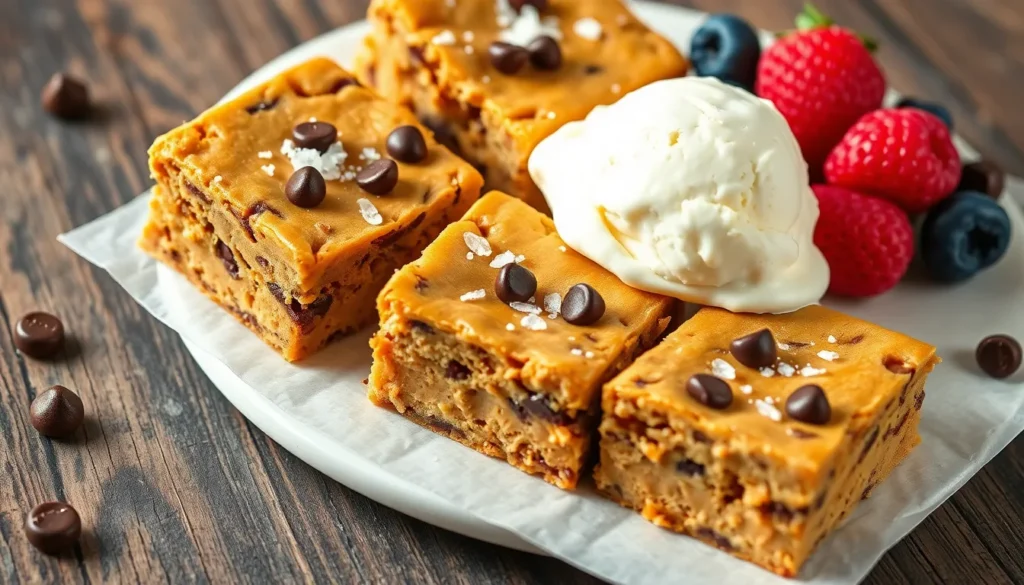
Complementary Pairings
Vanilla ice cream transforms these bars into an elevated dessert, with the cold creaminess perfectly balancing the warm, dense texture of the bars. Fresh berries add a bright, acidic contrast that cuts through the rich peanut butter and chocolate combination. Cold milk remains a classic pairing that enhances the nostalgic comfort food appeal.
Visual and Flavor Enhancements
Powdered sugar dusting creates an elegant presentation while adding a subtle sweetness that complements the existing flavors. Flaky sea salt sprinkled on top provides a sophisticated contrast that intensifies both the peanut butter and chocolate notes. We often drizzle melted chocolate or additional peanut butter over cooled bars for extra visual appeal and flavor depth.
Storage and Serving Timeline
| Storage Method | Duration | Serving Temperature |
|---|---|---|
| Room Temperature | 2 days | Optimal at room temp |
| Refrigerated | 5 days | Best slightly warmed |
| Frozen | 2-6 months | Thaw to room temp |
These bars maintain their quality when stored properly in airtight containers, ensuring we can enjoy them over several days while preserving their signature chewy texture and balanced sweetness.


Recipe Variations
 5")
We can easily customize our peanut butter chocolate chip bars to accommodate dietary needs and personal preferences. These versatile variations maintain the beloved texture and flavor while offering exciting new twists.
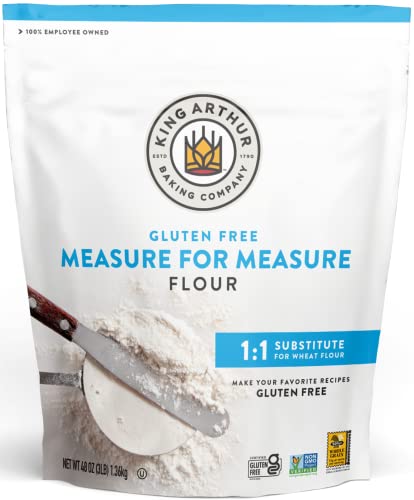
Gluten-Free Option
Our gluten-free version delivers the same irresistible taste without compromising on texture. We substitute all-purpose flour with a high-quality gluten-free flour blend at a 1:1 ratio. The key to success lies in selecting a blend that contains xanthan gum for proper binding. We must verify that our chocolate chips are certified gluten-free as some brands may contain traces of wheat. This modification creates bars that are just as chewy and satisfying as the original recipe.
Extra Chunky Bars
We transform our basic bars into a textural masterpiece by incorporating additional mix-ins. Beyond the standard chocolate chips, we fold in chopped peanuts or walnuts for extra crunch. Using 3 cups of semi-sweet chocolate chips instead of the standard amount creates pockets of melted chocolate throughout each bite. We can also add mini chocolate chips alongside regular-sized ones for varied chocolate distribution. These enhanced bars provide a more substantial eating experience with every forkful.
White Chocolate Version
Our white chocolate variation offers a lighter and creamier alternative to traditional bars. We replace all semi-sweet chocolate chips with an equal amount of white chocolate chips. This substitution creates a more delicate sweetness that perfectly balances the rich peanut butter base. The white chocolate melts beautifully during baking and creates stunning visual contrast against the golden brown bars. We recommend using high-quality white chocolate chips for the best flavor and melting properties.


Troubleshooting Tips
 6")
Even experienced bakers encounter challenges when making peanut butter chocolate chip bars. We’ve compiled answers to the most common issues that can affect your bars’ texture and appearance.
Texture Problems
Gooey or Mushy Bars (No-Bake Versions)
We often see this issue when the butter has been melted instead of properly softened. The base requires softened butter combined with graham cracker crumbs, powdered sugar, and peanut butter to achieve the right consistency. Check that your ratio of dry to wet ingredients matches the recipe specifications.
Chilling time plays a crucial role in achieving the proper texture. We recommend refrigerating your bars overnight or for several hours to allow them to firm up completely. Room temperature storage overnight can cause the butter to soften excessively, resulting in a mushy texture. Return overly soft bars to the refrigerator for additional firming time.
Dry or Hard Bars (Baked Versions)
Over-baking creates the most common cause of dry, crumbly bars. We suggest removing your bars from the oven when the center appears just set, as residual heat continues the cooking process during cooling.
Measuring ingredients by weight ensures accuracy and prevents the dry texture that results from too much flour. Scooping flour directly from the bag typically adds excess flour to your recipe. We recommend using the spoon-and-level method for volume measurements, though weight remains the most precise approach.
Overmixing your batter can create tough, dense bars. Mix ingredients just until combined to maintain the desired tender texture.
Frosting and Chocolate Layer Issues
Cracked Chocolate Layer
We prevent chocolate layer cracking by ensuring the peanut butter base has chilled until completely firm before adding the chocolate topping. Allow the chocolate layer to set thoroughly before cutting your bars. Let the finished bars warm slightly at room temperature before slicing to minimize cracking.
Storage and Ingredient Considerations
Sugar Substitutions
Reducing or substituting sugar affects both structure and moisture content in your bars. Large sugar reductions can result in denser or drier textures, as sugar contributes essential moisture and structure to the final product.
Proper Storage Methods
Store your finished bars in an airtight container at room temperature or in the refrigerator, depending on your recipe type and desired texture consistency.
Pan Preparation
Line your baking pan with parchment paper to ensure easy removal and promote even baking or chilling throughout the bars.


Conclusion
These peanut butter chocolate chip bars deliver everything we love about homemade treats – they’re simple to make yet incredibly satisfying. We’ve covered all the essentials to help you create bars with that perfect chewy texture and irresistible flavor combination.
Whether you’re baking for a family gathering or just treating yourself we’re confident these bars will become a go-to recipe in your collection. The versatility of ingredients and storage options makes them practical for any occasion.
Now it’s time to preheat that oven and experience the magic of melted chocolate chips and creamy peanut butter coming together in every delicious bite. Happy baking!
Frequently Asked Questions
How long do peanut butter chocolate chip bars last?
When stored properly in an airtight container, these bars stay fresh at room temperature for 2-5 days. For longer storage, refrigerate for 5-7 days or freeze for 2-6 months. Wrap individual bars in plastic wrap or foil before freezing for best results.
What equipment do I need to make these bars?
You’ll need basic kitchen equipment: a 9×13-inch baking pan, mixing bowls, measuring cups and spoons, a whisk or electric mixer, and a spatula. Parchment paper or foil is recommended for easy cleanup and removal from the pan.
Can I make these bars gluten-free?
Yes! Simply substitute the all-purpose flour with a gluten-free flour blend in equal amounts. This substitution maintains the bars’ signature chewy texture while accommodating gluten-free dietary needs.
What temperature should I bake the bars at?
Preheat your oven to 350°F (175°C) for optimal results. Bake the bars for 25-30 minutes until they’re golden brown. Proper preheating ensures even baking and consistent texture throughout.
How should I serve peanut butter chocolate chip bars?
Serve at room temperature for the best texture and flavor. Cut into uniform squares for presentation. For an extra indulgent experience, warm slightly in the microwave. Pair with vanilla ice cream, fresh berries, or cold milk for enhanced enjoyment.
Can I add extra mix-ins to the recipe?
Absolutely! For an extra chunky version, add chopped peanuts, walnuts, or additional chocolate chips. You can also substitute white chocolate chips for a lighter sweetness that complements the peanut butter base perfectly.
Why are my bars too gooey or too dry?
Gooey bars often result from improperly melted butter or insufficient chilling time. Dry bars typically indicate over-baking. Follow precise measurements, proper mixing techniques, and bake only until golden brown to achieve the perfect chewy texture.
Can I make the dough ahead of time?
Yes! You can prepare the dough in advance and store it in the refrigerator. This make-ahead tip is perfect for busy schedules. Just remember to bring it to room temperature before baking for even cooking.