Craving something sweet but don’t want to bake an entire cake? We’ve got the perfect solution that’ll satisfy your dessert desires in just minutes. Our Oreo mug cake transforms everyone’s favorite chocolate sandwich cookie into a warm, gooey single-serving treat that’s ready faster than you can say “midnight snack.”
This ingenious microwave creation captures all the chocolatey goodness of traditional Oreos in a fluffy, cake-like texture that’s absolutely irresistible. We love how this recipe uses simple pantry staples alongside crushed Oreos to create something truly magical. The best part? You probably have everything you need sitting in your kitchen right now.
Whether you’re treating yourself after a long day or impressing guests with a quick dessert, this Oreo mug cake delivers bakery-quality satisfaction without the fuss. It’s the ultimate comfort food that proves the best things really do come in small packages.
Ingredients
We’ve carefully selected each ingredient to ensure your Oreo mug cake delivers maximum chocolate flavor with minimal effort. Our recipe requires just seven simple ingredients that you likely already have in your pantry.
For the Cake Base:
- 4 tablespoons all-purpose flour
- 3 tablespoons granulated sugar
- 2 tablespoons unsweetened cocoa powder
- 1/4 teaspoon baking powder
- Pinch of salt
- 3 tablespoons milk
- 2 tablespoons vegetable oil or melted butter
For the Oreo Mix-ins:
- 3-4 Oreo cookies, crushed into chunks
- 1 tablespoon additional crushed Oreos for topping
Optional Enhancements:
- 1 tablespoon mini chocolate chips
- Whipped cream for serving
- Vanilla ice cream for serving
We recommend using room temperature milk for better mixing and crushing your Oreos into varied sizes to create different textures throughout the cake. The larger chunks provide delightful bursts of cookie flavor while smaller pieces distribute evenly for consistent taste in every bite.
Fresh baking powder ensures proper rise in the microwave environment. We suggest checking your baking powder’s expiration date since older powder may result in a denser cake texture.
Equipment Needed

Creating our delicious Oreo mug cake requires minimal equipment that most kitchens already have on hand. We designed this recipe to be accessible and convenient for anyone wanting a quick dessert fix.
Essential Equipment:
- Microwave-safe mug: We recommend using a standard ceramic or glass mug that holds at least 12 ounces to prevent overflow during cooking
- Microwave: Any standard household microwave will work perfectly for this recipe
- Fork or spoon: Essential for mixing ingredients and crushing Oreo cookies directly in the mug
- Measuring spoons: Needed for accurate measurements of flour, sugar, and other dry ingredients
- Liquid measuring cup: Helps ensure precise milk measurements for the perfect cake texture
Optional but Helpful:
- Small whisk: Makes mixing smoother if you prefer not to use a fork
- Small mixing bowl: Some bakers prefer combining dry ingredients separately before adding to the mug
- Kitchen scale: Provides the most accurate measurements for consistent results
The beauty of this recipe lies in its simplicity. We can prepare everything directly in our serving mug, which means fewer dishes to wash and less cleanup time. Our microwave does all the heavy lifting, transforming simple ingredients into a warm, gooey dessert in under two minutes.
Most home cooks already own these basic tools, making this recipe incredibly accessible for spontaneous dessert cravings. We love how this minimal equipment list means we can whip up our Oreo mug cake whenever the mood strikes, whether at home, in a dorm room, or even at the office with a microwave.
Instructions

With all our ingredients ready and equipment at hand, we can create this indulgent Oreo mug cake in just minutes. Follow these simple steps to transform basic pantry staples into a warm, gooey dessert that rivals any bakery treat.
Prep the Mug
We need to start with a microwave-safe mug that holds at least 10 oz to prevent overflow during cooking. The larger capacity ensures our cake has room to rise properly without creating a mess in the microwave. Lightly grease the mug with butter or cooking spray to make removal easier if desired.
Mix Dry Ingredients
We combine our flour, cocoa powder, baking powder, and salt in a separate bowl for the best results. Sifting these dry ingredients together creates a smooth, lump-free mixture that ensures even distribution throughout our cake. This step prevents pockets of unmixed flour or cocoa powder that could affect the final texture.
Add Wet Ingredients
We pour the milk, oil, and vanilla extract directly into our prepared mug. Using a fork, we mix these wet ingredients thoroughly until they form a smooth liquid base. The room temperature milk blends more easily and helps create a consistent batter texture.
Incorporate Oreo Cookies
We add 4 Oreos to the mug with our wet ingredients and crush them using a fork until they form a paste-like mixture. This crushing technique distributes the Oreo flavor evenly throughout the cake rather than leaving large chunks. The crushed cookies blend seamlessly with the milk to create our signature Oreo base.
Microwave the Cake
We add the sugar to our mug and mix well before incorporating the dry ingredients. Stirring until just combined prevents overmixing, which can make our cake tough. We place the mug in the microwave and cook on high for 60-90 seconds, watching carefully as cooking time varies depending on microwave power. The cake is done when it springs back lightly when touched and pulls slightly away from the mug sides.
Directions for Serving

We recommend serving your Oreo mug cake immediately while it’s still warm for the best taste and texture experience. The cake should spring back when lightly touched and have a slightly gooey center that makes each bite irresistible.
Immediate Serving Steps:
Remove the mug carefully from the microwave using oven mitts since it will be hot. Allow the cake to cool for 30-60 seconds before diving in with a spoon. This brief cooling period prevents burns while maintaining that perfect warm temperature we all crave.
Enhanced Topping Options:
Transform your basic mug cake into a gourmet dessert by adding our favorite toppings. Drizzle melted chocolate over the surface for extra richness. A dollop of whipped cream creates a delightful contrast against the warm cake. Vanilla ice cream melts beautifully into the warm dessert creating a hot and cold sensation. Sprinkle additional crushed Oreos on top for enhanced texture and visual appeal.
Serving Variations by Size:
Our testing shows different serving approaches work best based on cake size. Small cakes made with 2 Oreos pair perfectly with a single scoop of ice cream. Standard cakes using 4 Oreos benefit from multiple toppings layered together. Large cakes with 6 Oreos can easily serve two people when topped generously with whipped cream and chocolate drizzle.
| Cake Size | Oreo Count | Best Serving Method | Recommended Toppings |
|---|---|---|---|
| Small | 2 Oreos | Single serving with fork | Ice cream scoop |
| Standard | 4 Oreos | Individual indulgence | Multiple toppings |
| Large | 6 Oreos | Shared portion | Generous garnishes |
Presentation Tips:
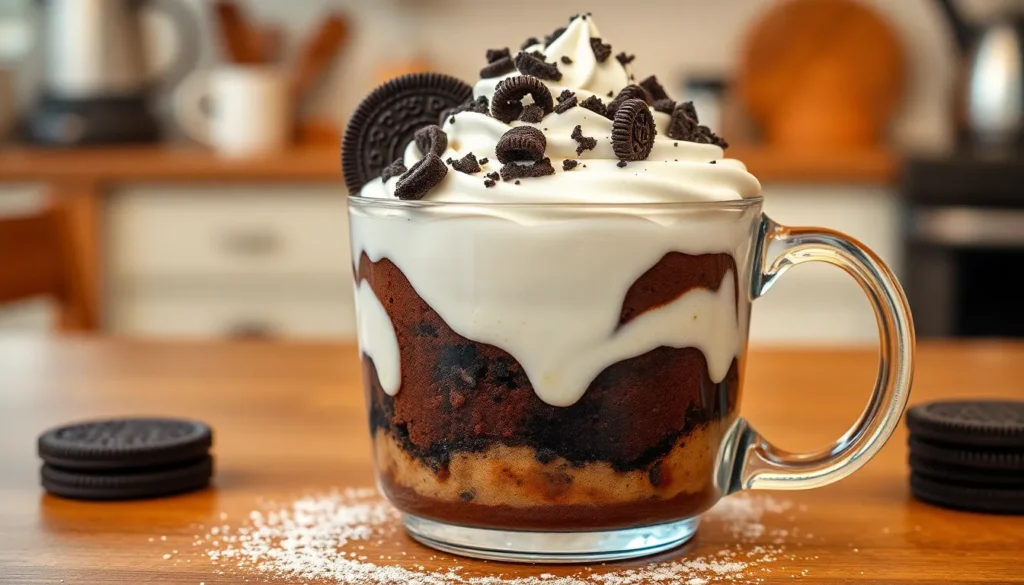
We suggest using a clear glass mug when possible to showcase the beautiful layers of chocolate and cookie pieces. Dust the rim with cocoa powder for an elegant finishing touch. Fresh mint leaves add a pop of color and complement the chocolate flavors perfectly.
Tips for Perfect Results

Mastering the art of Oreo mug cake requires attention to a few key details that can make or break your dessert experience. We’ve gathered essential techniques to ensure your single-serving treat turns out perfectly every time.
Choosing the Right Mug
We recommend selecting a microwave-safe mug with a minimum capacity of 8 to 12 ounces to prevent overflow during cooking. The batter will rise significantly as it heats, so adequate space is crucial for achieving the proper texture. Always inspect your mug for cracks or damage before use, as these can affect both safety and cooking results. Clean mugs free of residue ensure the best flavor and prevent any unwanted reactions during the microwaving process.
Microwave Power Settings
Our testing shows that most successful recipes work best in microwaves rated between 700 and 1100 watts. For microwaves below 1100 watts, we suggest increasing the cooking time by 5 to 15 seconds to achieve proper doneness. Conversely, if your microwave exceeds 1100 watts, reduce the cooking time by 5 to 15 seconds to prevent overcooking. Standard cooking time ranges from 1 minute to 90 seconds on high power, but these adjustments ensure consistent results regardless of your appliance’s specifications.
| Microwave Wattage | Cooking Time Adjustment |
|---|---|
| Below 1100 watts | Add 5-15 seconds |
| 1100 watts | Standard time (60-90 seconds) |
| Above 1100 watts | Reduce 5-15 seconds |
Texture and Doneness
We achieve the smoothest batter consistency by thoroughly crushing Oreo cookies before adding milk and mixing with other ingredients. The cake reaches perfect doneness when it appears solid and springs back slightly to gentle touch. Never serve immediately after microwaving, as allowing the cake to cool for a few minutes dramatically improves the final texture. Overcooking leads to dry or rubbery results, so we always err on the side of slightly underdone rather than overdone. The surface should appear set without any wet or liquid areas visible on top.
Variations and Add-Ins

Our Oreo mug cake recipe serves as the perfect foundation for countless delicious variations. We can easily customize this base recipe with different add-ins and flavor combinations to create new dessert experiences.
Double Chocolate Oreo Mug Cake
We transform our classic recipe into an ultra-rich chocolate experience by incorporating additional chocolate elements. Adding 1-2 teaspoons of cocoa powder to the batter creates deeper chocolate notes that perfectly complement the Oreo cookies. Chocolate chips scattered throughout the mixture provide bursts of melted chocolate in every bite.
Double Stuf Oreos work exceptionally well for this variation since their extra cream filling enhances the overall richness. We can also substitute chocolate-flavored Oreos for the regular variety to intensify the chocolate profile even further. The result delivers a decadent dessert that satisfies even the most serious chocolate cravings.
Cookies and Cream Frosting
Topping our mug cake with homemade cookies and cream frosting elevates this simple dessert to bakery-quality status. We create this frosting by mixing crushed Oreos into freshly whipped cream until we achieve a smooth yet textured consistency. The combination provides both visual appeal and an extra layer of Oreo flavor.
Cream cheese frosting offers another excellent option for those preferring a tangier profile. We blend softened cream cheese with powdered sugar and a splash of milk until smooth, then fold in crushed Oreos for that signature cookies and cream taste. Sprinkling additional crushed Oreos on top creates an attractive garnish while adding delightful texture contrast.
Mix-In Options
Peanut butter transforms our Oreo mug cake into a completely different flavor experience. We swirl 1-2 tablespoons of creamy peanut butter into the batter before microwaving for a rich, nutty taste that pairs beautifully with chocolate cookies. This combination mirrors popular candy bar flavors that many people love.
Mint extract opens up refreshing possibilities for our mug cake variations. Just a few drops of mint extract mixed into the batter creates a cookies and mint dessert reminiscent of popular ice cream flavors. We can enhance this variation further by using mint-flavored Oreos when available.
White chocolate chips provide sweetness balance against the darker Oreo cookies. These chips melt beautifully during microwaving and create pockets of creamy sweetness throughout the cake. We can also experiment with other cookie types like Chips Ahoy or Golden Oreos to create unique flavor combinations that surprise and delight.
| Variation Type | Key Ingredients | Flavor Profile |
|---|---|---|
| Double Chocolate | Cocoa powder, chocolate chips, Double Stuf Oreos | Rich, intense chocolate |
| Cookies & Cream Frosting | Whipped cream or cream cheese, crushed Oreos | Sweet, tangy, textured |
| Peanut Butter Mix-In | Creamy peanut butter | Nutty, candy bar inspired |
| Mint Variation | Mint extract, mint Oreos | Fresh, cool, ice cream like |
| White Chocolate | White chocolate chips | Sweet, creamy contrast |
Storage and Reheating

We strongly recommend enjoying your Oreo mug cake immediately after preparation for the best taste and texture experience. These single-serving desserts are designed to be consumed fresh from the microwave when they’re at their peak warmth and moisture.
Storing leftover mug cake presents important challenges that affect the overall quality. The cake becomes hard and chewy over time due to moisture loss and the nature of the microwave cooking process. We’ve found that the delicate texture that makes these cakes so appealing deteriorates rapidly once cooled completely.
Storage Considerations
If you absolutely must store your mug cake we suggest covering it tightly with plastic wrap and refrigerating for no more than 24 hours. Room temperature storage is not recommended as it can lead to spoilage and further texture degradation.
The microwave cooking method creates a different structure compared to traditional oven-baked cakes. This unique texture doesn’t hold up well to storage which is why we emphasize immediate consumption.
Reheating Guidelines
Should you need to reheat a stored mug cake we recommend microwaving it for 10 to 15 seconds at 50% power. This gentle approach helps prevent the cake from becoming rubbery or overcooked during the reheating process.
Monitor the cake closely during reheating as overcooking can result in an unpleasantly dry texture. We suggest checking every 5 seconds to achieve the desired warmth without compromising quality.
Keep in mind that reheated mug cakes will never match the texture and moisture of freshly made ones. The reheating process can affect both the cake’s structure and the distribution of the Oreo pieces throughout.
Best Practices
Rather than storing and reheating we recommend making fresh mug cakes as needed. The entire process takes only 3 to 4 minutes from start to finish making it more practical to prepare a new cake than to deal with storage concerns.
For meal planning purposes consider preparing your dry ingredients in advance and storing them in small containers. This preparation method allows you to quickly assemble and cook fresh mug cakes whenever cravings strike.
Make-Ahead Instructions

We understand that having dessert components ready can make those sudden sweet cravings even easier to satisfy. While Oreo mug cake tastes best when prepared fresh, we can take several steps to streamline the process for faster assembly.
Dry Ingredient Preparation
We recommend measuring and combining all dry ingredients ahead of time. Mix the flour, sugar, cocoa powder, baking powder, and salt in a small container or directly in your serving mug. Store this mixture covered at room temperature for up to one week. This advance preparation reduces our active cooking time to just 2 minutes when cravings strike.
Oreo Cookie Crushing
Crushing Oreos in advance saves valuable time during assembly. We suggest placing 4 to 6 Oreo cookies in a sealed plastic bag and crushing them with a rolling pin or the back of a spoon. Store the crushed cookies in an airtight container at room temperature for up to 3 days. Fresh crushing produces the best texture, but this method works well for convenience.
Wet Ingredient Assembly
Milk and oil can be measured and combined in advance, though we recommend doing this no more than 2 hours before preparation. Store the wet ingredient mixture covered in the refrigerator. Allow it to return to room temperature before mixing with dry ingredients for optimal texture results.
Complete Mix Assembly
For maximum convenience, we can combine all ingredients except milk in our serving mug up to 4 hours before cooking. Cover the mug tightly with plastic wrap and store at room temperature. Add the milk just before microwaving to prevent the mixture from becoming too dense or affecting the final texture.
Storage Limitations
We advise against preparing the complete batter more than 4 hours in advance. Extended storage causes the baking powder to lose effectiveness and creates a dense, heavy texture. Fresh assembly produces the fluffiest results that make this dessert so appealing.
Conclusion
We’ve shown you how this incredible Oreo mug cake transforms your sweet cravings into reality in just minutes. With simple ingredients and minimal cleanup you can enjoy bakery-quality dessert anytime the mood strikes.
The beauty of this recipe lies in its versatility and convenience. Whether you’re customizing with different flavors or preparing ingredients ahead of time you’ll always have a delicious treat within reach.
Next time you’re craving something sweet don’t reach for store-bought snacks. Grab your favorite mug and whip up this satisfying dessert that’s perfectly portioned for one. Your taste buds will thank you for this warm gooey indulgence that’s ready faster than you can say “Oreo.”
Frequently Asked Questions
What ingredients do I need for an Oreo mug cake?
You’ll need 7 simple pantry ingredients: all-purpose flour, granulated sugar, cocoa powder, baking powder, salt, milk, and vegetable oil or melted butter. Don’t forget crushed Oreo cookies for mixing in and topping. Optional enhancements include mini chocolate chips, whipped cream, and vanilla ice cream for serving.
What equipment is required to make an Oreo mug cake?
The essential equipment includes a microwave-safe mug (8-12 oz capacity), microwave, fork or spoon for mixing, measuring spoons, and liquid measuring cup. Optional items like a small whisk, mixing bowl, and kitchen scale can help but aren’t necessary. You can prepare everything directly in the serving mug.
How long does it take to cook an Oreo mug cake in the microwave?
Cook the mug cake for 60-90 seconds in the microwave. The exact time depends on your microwave’s wattage. Start with 60 seconds and add more time if needed. The cake is done when it appears solid and springs back slightly to the touch.
Can I store leftover Oreo mug cake?
It’s best to enjoy the mug cake immediately for optimal taste and texture. If you must store it, cover tightly with plastic wrap and refrigerate for no more than 24 hours. Reheat at 50% microwave power for 10-15 seconds. Fresh preparation is always recommended.
What are some popular variations for Oreo mug cake?
Popular variations include Double Chocolate Oreo Mug Cake with extra cocoa powder and chocolate chips, adding peanut butter for a nutty twist, mint extract for refreshing flavor, or white chocolate chips for sweetness. You can also top with cookies and cream frosting made from whipped cream and crushed Oreos.
Can I prepare ingredients ahead of time?
Yes! Measure and combine dry ingredients up to a week in advance and store at room temperature. Crush Oreos ahead and store in an airtight container for up to 3 days. Pre-measure wet ingredients and refrigerate for no more than 2 hours before use.
What size mug should I use for the best results?
Use a microwave-safe mug with 8-12 ounce capacity to prevent overflow and ensure proper texture. The mug should be wide enough to allow the cake to rise properly. A clear glass mug works great for showcasing the dessert layers and presentation.
How do I know when my Oreo mug cake is perfectly done?
The cake is ready when it appears solid on top and springs back slightly when gently touched. It should look set rather than wet or batter-like. Avoid overcooking as this will result in a dry or rubbery texture instead of the desired fluffy consistency.


